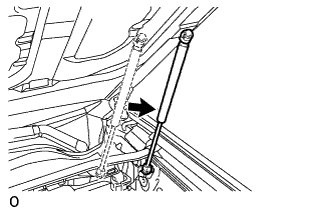
 |
Install a new hood support assembly.
- NOTICE:
- Install a new hood support assembly while supporting the hood by hand.
HOOD > REASSEMBLY |
| Item | Temperature |
| Hood Bulge | 20 to 30°C (68 to 86°F) |
| 1. INSTALL HOOD SUPPORT ASSEMBLY LH |
|
Install a new hood support assembly.
Check that the hood support assembly is attached to the ball joint and it cannot be pulled out.
| 2. INSTALL HOOD SUPPORT ASSEMBLY RH |
| 3. CONNECT WASHER HOSE ASSEMBLY |
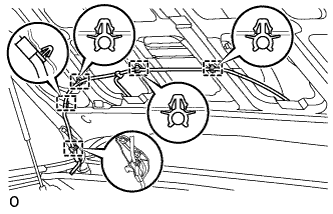 |
Attach the 5 clamps to connect the washer hose assembly.
| 4. INSTALL WASHER NOZZLE SUB-ASSEMBLY |
Connect a new washer nozzle sub-assembly to the washer hose.
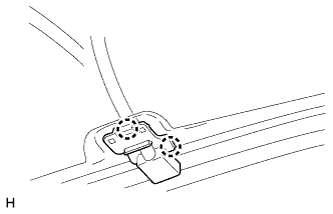 |
Attach the 2 claws to install the washer nozzle sub-assembly.
| 5. INSPECT WASHER NOZZLE SUB-ASSEMBLY |
With the engine running, check the position that the washer fluid hits the windshield.
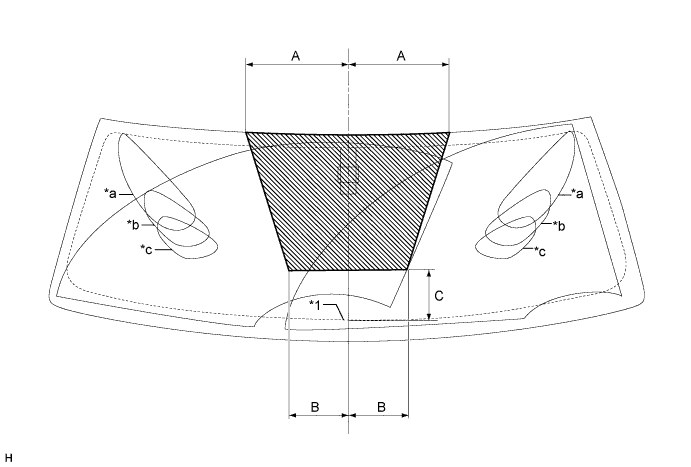
| *1 | Ceramic Line | - | - |
| *a | Upper Limit | *b | Standard |
| *c | Lower Limit | - | - |
 | Washer Fluid Spray Area | - | - |
| Area | Measurement | Area | Measurement |
| A | 254.5 mm (10.0 in.) | B | 150 mm (5.91 in.) |
| C | 127.6 mm (5.02 in.) | - | - |
| 6. ADJUST WASHER NOZZLE SUB-ASSEMBLY |
Select a washer nozzle so that the washer fluid spray area is as specified in On-vehicle Inspection. Replace the washer nozzle with the selected one.
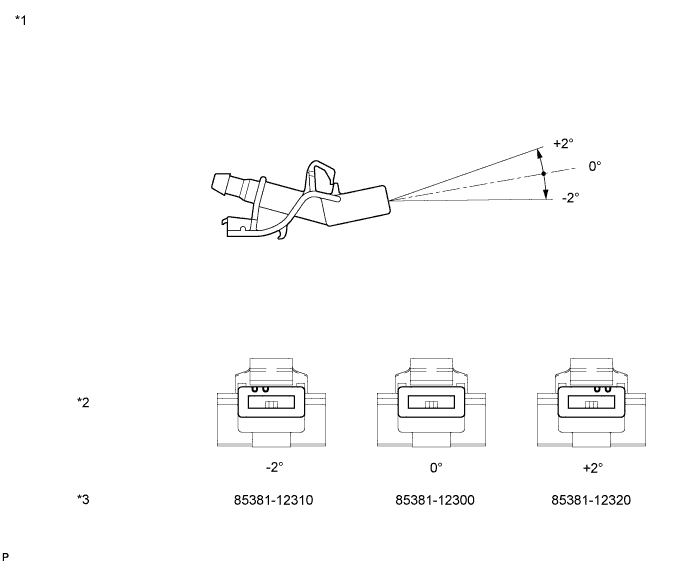
| *1 | Available Washer Nozzles | *2 | Washer Fluid Spray Angle |
| *3 | Part Number | - | - |
| 7. INSTALL NO. 3 HOOD BULGE PROTECTOR (w/ Hood Bulge) |
When using a new hood bulge:
Clean the hood bulge surface.
Using a heat light, heat the hood bulge surface.
When reusing the hood bulge:
Using a heat light, heat the hood bulge surface.
Remove the double-sided tape from the hood bulge.
Wipe off any tape adhesive residue with cleaner.
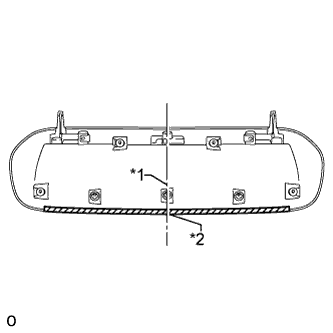 |
Install a new No. 3 hood bulge protector as shown in the illustration.
| *1 | Hood Bulge at the Center |
| *2 | No. 3 Hood Bulge Protector at the Center |
| 8. INSTALL NO. 2 HOOD BULGE PROTECTOR (w/ Hood Bulge) |
When using a new hood bulge:
Clean the hood bulge surface.
Using a heat light, heat the hood bulge surface.
When reusing the hood bulge:
Using a heat light, heat the hood bulge surface.
Remove the double-sided tape from the hood bulge.
Wipe off any tape adhesive residue with cleaner.
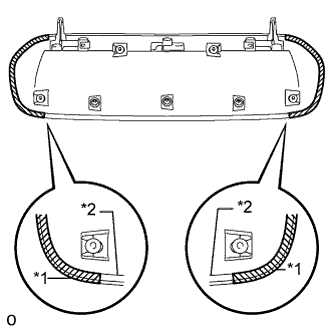 |
Install 2 new No. 2 hood bulge protectors as shown in the illustration.
| *1 | No. 2 Hood Bulge Protector |
| *2 | No. 3 Hood Bulge Protector |
| 9. INSTALL NO. 1 HOOD BULGE PROTECTOR (w/ Hood Bulge) |
When using a new hood bulge:
Clean the hood bulge surface.
Using a heat light, heat the hood bulge surface.
When reusing the hood bulge:
Using a heat light, heat the hood bulge surface.
Remove the double-sided tape from the hood bulge.
Wipe off any tape adhesive residue with cleaner.
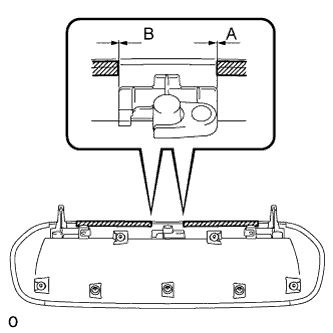 |
Install 2 new No. 1 hood bulge protectors as shown in the illustration.
| Dimension | Measurement |
| A | Approximately 0 mm (0 in.) |
| B | Approximately 0 mm (0 in.) |
| 10. INSTALL HOOD AIR INTAKE GUIDE (w/ Hood Bulge) |
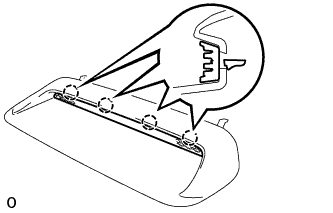 |
Attach the 4 claws to install the hood air intake guide to the hood bulge.
| 11. INSTALL HOOD BULGE (w/ Hood Bulge) |
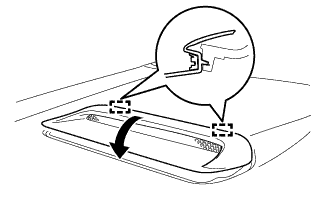 |
Attach the 2 guides to install the hood bulge together with the hood air intake guide as shown in the illustration.
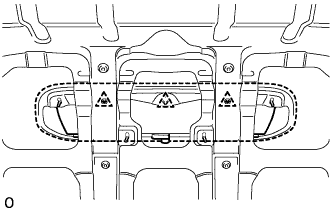 |
Attach the 3 clips.
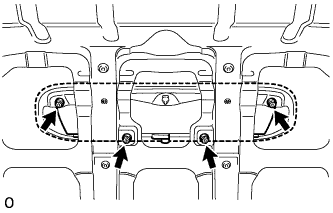 |
Install the 4 nuts.
| 12. INSTALL HOOD TO RADIATOR SUPPORT SEAL |
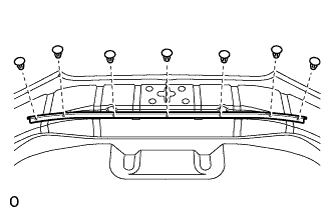 |
Attach the 7 clips to install the hood to radiator support seal.