Home › Vehicle Interior › METER / GAUGE / DISPLAY › METER / GAUGE SYSTEM

METER / GAUGE SYSTEM > OPERATION CHECK

for Preparation Click here


INSPECT INDICATOR/WARNING LIGHT
  1. Check the following indicators and warning lights.
    Indicator/Warning Light
    Switch Condition
    Specified Condition
    Tire pressure warning light
    Ignition switch off → ON
    Comes on for 3 seconds
    SLIP indicator light
    VSC OFF indicator light
    AUTO LSD indicator light*1
    A-TRAC indicator light*2
    CRAWL indicator light*3
    Downhill assist control indicator light*4
    TRAC OFF indicator light
    ABS warning light
    BRAKE warning light
    Eco driving indicator light
    Kinetic dynamic suspension system indicator light*5
    PPS warning light
    Master warning light
    SRS warning light
    Ignition switch off → ON
    Comes on for 6 seconds
    OIL PRESSURE warning light
    Ignition switch off → ON
    1. Illuminates when ignition switch turned to ON
    2. Turns off when engine started
    MIL
    CHARGE warning light

    1. *1: for 2WD
    2. *2: for 4WD
    3. *3: w/ CRAWL Control
    4. *4: w/ Downhill Assist Control System
    5. *5: w/ Kinetic Dynamic Suspension System


INSPECT SPEEDOMETER
  1. Connect the Techstream to the DLC3.

  2. Turn the ignition switch to ON.

  3. Turn the Techstream on.

  4. Enter the following menus: Powertrain / Engine and ECT / Data List.

  5. According to the display on Techstream, read the Data List.

    Reference:
    mph (for U.S.A.) 
    Techstream Display (mph)
    Speedometer Display (mph)
    20
    19.2 to 21.7
    40
    39.5 to 42.3
    60
    59.9 to 62.7
    80
    80.1 to 83.3
    100
    100.5 to 103.7
    km/h (except U.S.A.) 
    Techstream Display
    Speedometer Display (km/h)
    20
    18.4 to 22.4
    40
    38.7 to 43.2
    60
    59.1 to 63.6
    80
    79.2 to 84.2
    100
    99.6 to 104.6
    120
    120.1 to 125.1
    140
    140.5 to 143.5
    160
    160.9 to 165.9
    180
    181.4 to 186.4

    If the result is not as specified, the speedometer may have a malfunction.

    NOTICE:
    Do not use worn, underinflated or overinflated tires, as the speedometer reading will be inaccurate.

  6. Check the deflection width of the speedometer indicator.

    Reference:
    Within 0.3°


INSPECT TACHOMETER
  1. Connect the Techstream and start the engine.

  2. Compare the test results with the tachometer indicator.

    DC 13.5 V, at 25°C (77°F):
    Standard Indication (rpm)
    Acceptable Range
    Data in ( ) is for Reference
    700
    630 to 770
    1000
    (900 to 1100)
    2000
    (1850 to 2150)
    3000
    2800 to 3200
    4000
    (3800 to 4200)
    5000
    4800 to 5200
    6000
    (5750 to 6250)

    If the result is not as specified, the tachometer may have a malfunction.


INSPECT METER/GAUGE
  1. Connect the Techstream to the DLC3.

  2. Perform the Active Test (Click here).

    OK:
    Each meter/gauge needle indication is normal.


INSPECT WARNING/INDICATOR LIGHT
  1. Connect the Techstream to the DLC3.

  2. Perform the Active Test (Click here).

    OK:
    Each warning/indicator light can be turned on and off using the Techstream.


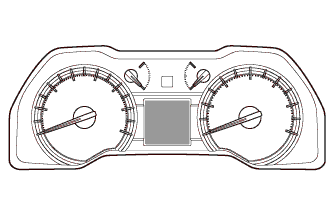
INSPECT MULTI-INFORMATION DISPLAY


    E221150
  1. Connect the Techstream to the DLC3.

  2. Perform the Active Test (Click here).

    HINT:
    If this Active Test is being performed and the ignition switch is turned off and then to ON, the clock and ODO/TRIP display background may turn white. If this occurs, end the Active Test and turn the ignition switch off.

    OK:
    All dots in the multi-information display can be turned on and off using the Techstream.