 |
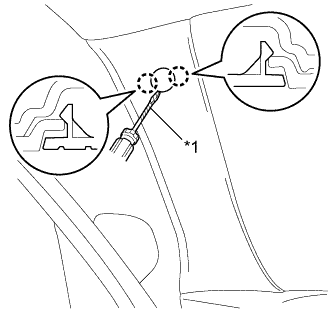
Using a screwdriver, detach the 2 claws to remove the No. 1 front pillar garnish cover LH.
| *1 | Protective Tape |
- HINT:
- Tape the screwdriver tip before use.
INSTRUMENT PANEL SPEAKER > REMOVAL |
| 1. REMOVE FRONT PILLAR GARNISH LH |
|
Using a screwdriver, detach the 2 claws to remove the No. 1 front pillar garnish cover LH.
| *1 | Protective Tape |
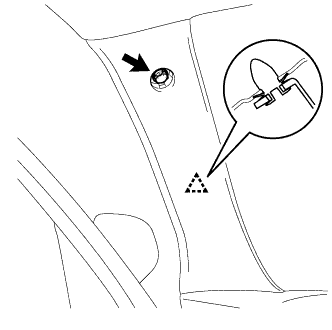 |
Remove the bolt.
Detach the clip.
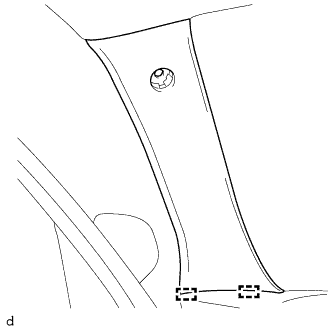 |
Detach the 2 guides to remove the front pillar garnish LH.
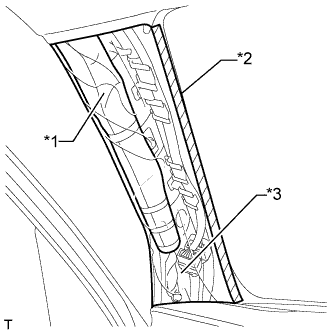 |
Protect the curtain shield airbag assembly.
Completely cover the curtain shield airbag assembly with a protective cover and secure the ends of the cover with adhesive tape as shown in the illustration.
| *1 | Curtain Shield Airbag Assembly |
| *2 | Adhesive Tape |
| *3 | Protective Cover |
| 2. REMOVE NO. 1 INSTRUMENT PANEL SPEAKER PANEL SUB-ASSEMBLY |
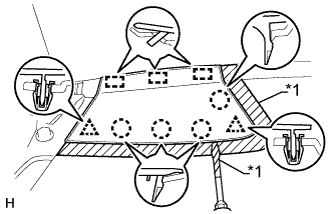 |
Put protective tape around the No. 1 instrument panel speaker panel sub-assembly.
Using a screwdriver, detach the 2 clips, 4 claws and 3 guides to remove the No. 1 instrument panel speaker panel sub-assembly.
| *1 | Protective Tape |
| 3. REMOVE FRONT NO. 2 SPEAKER ASSEMBLY |
Remove the 2 screws.
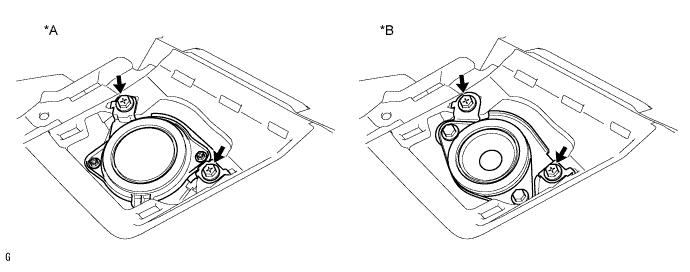
| *A | for 9 Speakers | *B | for 8 Speakers |
Disconnect the connector to remove the front No. 2 speaker assembly.
| 4. REMOVE NO. 1 SPEAKER MOUNTING BRACKET (for 8 Speakers) |
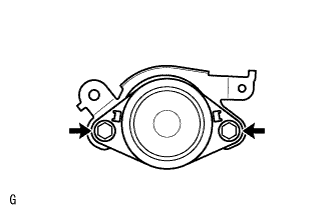 |
Remove the 2 bolts and No. 1 speaker mounting bracket.