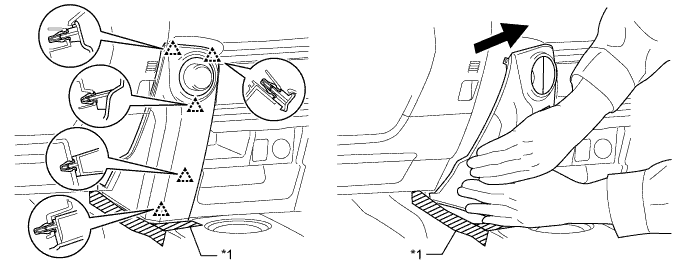
Grip the No. 1 instrument cluster finish panel garnish and pull it diagonally upward toward the rear to detach the 5 clips and remove the No. 1 instrument cluster finish panel garnish.
| *1 | Protective Tape | - | - |
INVERTER MAIN SWITCH > REMOVAL |
| 1. REMOVE NO. 1 INSTRUMENT CLUSTER FINISH PANEL GARNISH |
Put protective tape around the No. 1 instrument cluster finish panel garnish.
Grip the No. 1 instrument cluster finish panel garnish and pull it diagonally upward toward the rear to detach the 5 clips and remove the No. 1 instrument cluster finish panel garnish.
| *1 | Protective Tape | - | - |
| 2. REMOVE DOOR SCUFF PLATE ASSEMBLY LH |
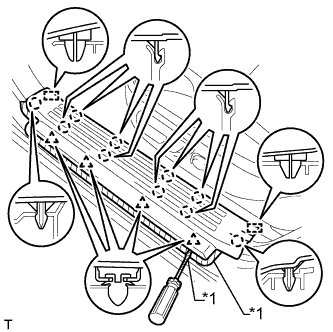 |
Put protective tape around the door scuff plate assembly LH.
| *1 | Protective Tape |
Using a screwdriver, detach the 4 clips, 10 claws and 2 guides to remove the door scuff plate assembly LH.
| 3. REMOVE COWL SIDE TRIM BOARD LH |
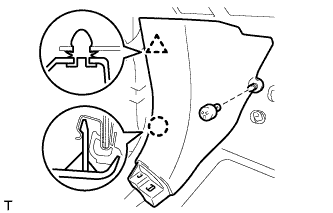 |
Remove the clip.
Detach the clip and claw to remove the cowl side trim board LH.
| 4. REMOVE LOWER INSTRUMENT PANEL FINISH PANEL SUB-ASSEMBLY |
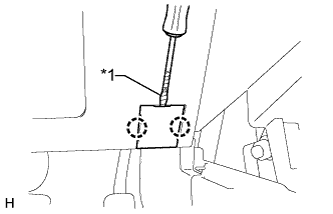 |
Using a screwdriver, detach the 2 claws to open the cover.
| *1 | Protective Tape |
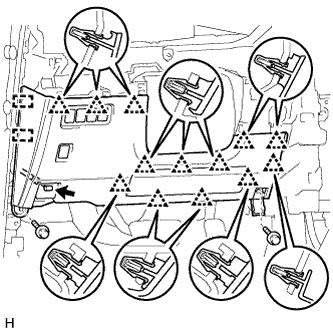 |
Remove the 2 bolts <C>.
Detach the 13 clips and 2 guides.
Disconnect each connector and hood lock control cable assembly and remove the lower instrument panel finish panel sub-assembly.
| 5. REMOVE MAIN SWITCH ASSEMBLY |
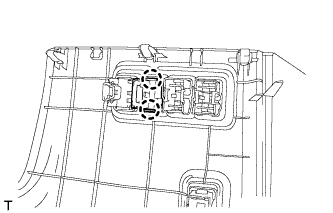 |
Detach the 2 claws and remove the main switch.