POWER SEAT SWITCH > REMOVAL |
| 1. REMOVE FRONT SEAT ASSEMBLY |
Remove the front seat assembly (Click here).
| 2. REMOVE SLIDE AND VERTICAL POWER SEAT SWITCH KNOB |
|
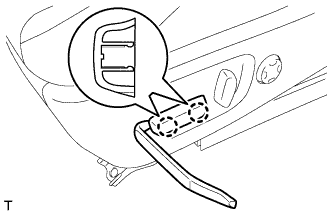
Using a moulding remover, detach the 2 claws and remove the slide and vertical power seat switch knob.
| 3. REMOVE RECLINING POWER SEAT SWITCH KNOB |
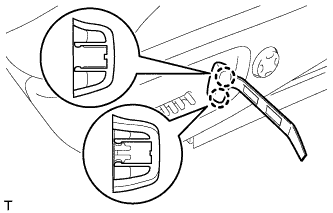 |
Using a moulding remover, detach the 2 claws and remove the reclining power seat switch knob.
| 4. REMOVE FRONT SEAT CUSHION SHIELD LH |
Remove the screw of the front seat No. 1 inner cushion shield LH and detach the guide.
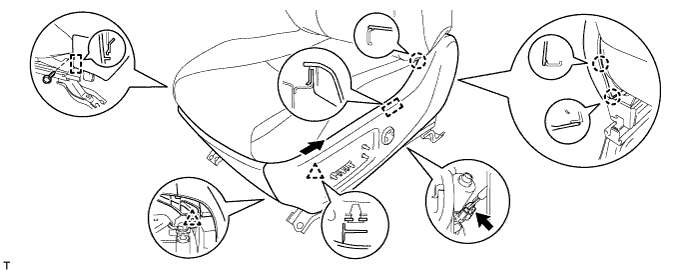
Using a moulding remover, detach the 3 claws and guide.
Move the front seat cushion shield LH in the direction of the arrow to detach the clip and remove the front seat No. 1 inner cushion shield LH together with the front seat cushion shield LH as a unit.
Detach the clip of the front seat No. 1 inner cushion shield LH.
Disconnect the lifter motor connector.
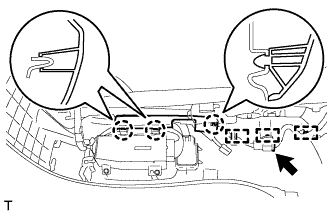 |
Detach the 3 claws and open the wire harness cover.
Detach the 3 wire harness clamps and disconnect the seat wire connector.
| 5. REMOVE FRONT POWER SEAT SWITCH LH |
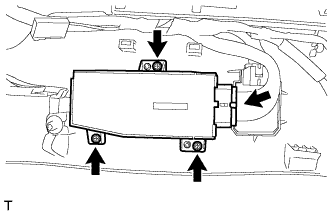 |
Remove the 3 screws.
Disconnect the power seat switch connector and remove the switch.