REAR CENTER SEAT OUTER BELT ASSEMBLY (for 60/40 Split Slide Walk-in Seat Type LH Side) > INSTALLATION |
| 1. INSTALL NO. 1 SEAT 3 POINT TYPE BELT ASSEMBLY LH |
|
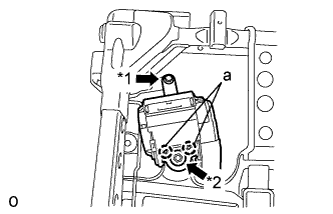
Align the claws with the seat belt positioning holes and install the retractor of the seat belt with the nut and bolt as shown in the illustration.
| *1 | Bolt |
| *2 | Nut |
| 2. INSTALL REAR SEAT SHOULDER BELT GUIDE |
Attach the guide and claw to install the belt guide.
| 3. INSTALL REAR SEATBACK EDGE PROTECTOR |
Install the protector to the seatback frame.
| 4. INSTALL SEATBACK COVER WITH PAD |
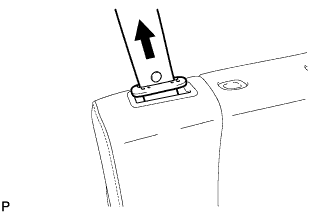 |
Connect the outer belt to the seatback cover with pad.
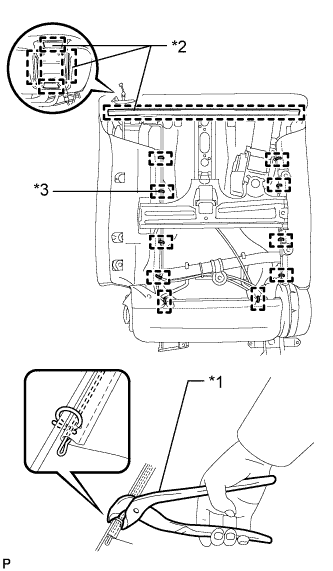 |
Attach the hooks.
| *1 | Hog Ring Pliers |
| *2 | Hook |
| *3 | Hog Ring |
Using hog ring pliers, install the seatback cover with pad with new hog rings.
| 5. INSTALL REAR NO. 1 SEAT HEADREST SUPPORT ASSEMBLY |
Attach the 4 claws to install the 2 supports.
| 6. INSTALL REAR SEATBACK BOARD CARPET ASSEMBLY LH |
Attach the 7 clips to install the carpet.
| 7. INSTALL REAR SEATBACK COVER |
Attach the 4 claws to install the cover.
| 8. INSTALL REAR SEAT SHOULDER BELT COVER |
Connect the outer belt to the cover.
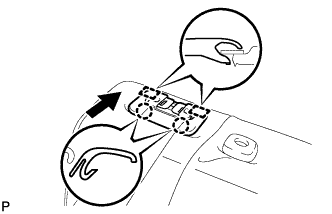 |
Attach the 2 guides and 2 claws to install the cover.
| 9. INSTALL SEAT BELT ANCHOR COVER CAP |
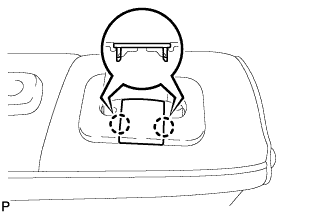 |
Attach the 2 claws to install the cap.
| 10. INSTALL REAR SEAT LOCK CONTROL LEVER SUB-ASSEMBLY LH |
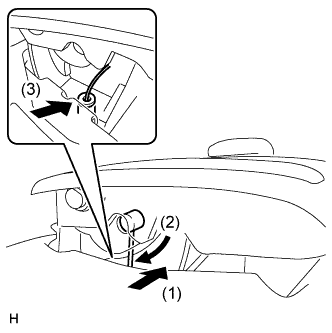 |
Connect the cable in the order shown in the illustration to install the lever.
Install the 2 screws.
| 11. INSTALL RECLINING ADJUSTER KNOB CAP LH |
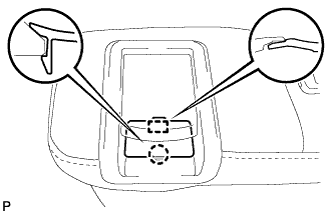 |
Attach the guide and claw to install the cap.
| 12. INSTALL REAR NO. 1 SEAT INNER BELT ASSEMBLY LH |
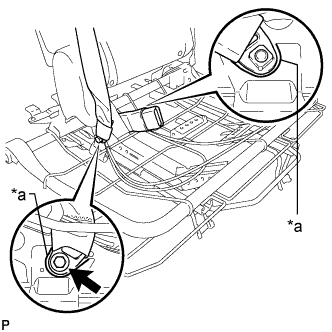 |
Install the inner belt and connect the 3 point type belt anchor with the bolt.
| *1 | Protruding Part |
| 13. INSTALL CENTER SEATBACK ASSEMBLY |
Install the center seatback with the 2 bolts.
| 14. INSTALL SEAT CUSHION COVER WITH PAD |
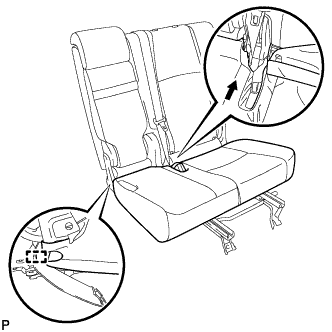 |
Attach the hook.
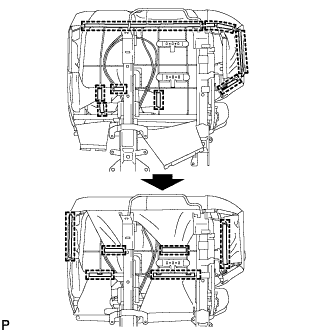 |
Attach the hooks to install the seat cushion cover with pad.
| 15. INSTALL REAR SEATBACK LOCK STRIKER COVER LH |
Attach the 3 clips to install the cover.
| 16. INSTALL REAR SEAT CUSHION MOULDING LH |
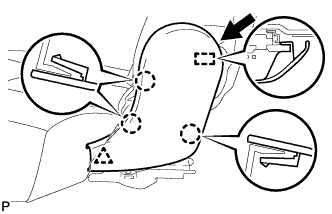 |
Move the moulding in the direction of the arrow to attach the guide.
Attach the 3 claws and clip to install the moulding.
| 17. INSTALL CENTER SEAT HINGE COVER RH |
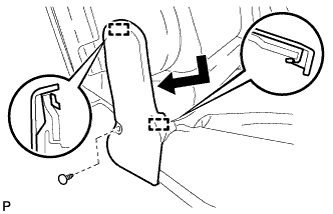 |
Attach the 2 guides and install the cover with the clip.
| 18. INSTALL RECLINING ADJUSTER RELEASE HANDLE LH |
Install the handle with the 3 screws.
| 19. INSTALL REAR SEAT UPPER RECLINING COVER LH |
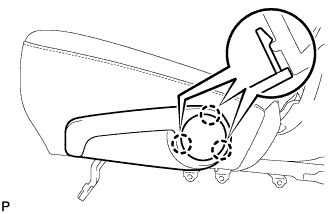 |
Attach the 3 claws to install the cover.
| 20. INSTALL REAR NO. 1 SEAT ASSEMBLY LH |
Install the rear No. 1 seat assembly LH (Click here).