ROOF HEADLINING > REASSEMBLY |
| 1. INSTALL NO. 2 ANTENNA CORD SUB-ASSEMBLY |
w/o Sliding Roof:
Install the No. 2 antenna cord sub-assembly .
w/ Sliding Roof:
Install the No. 2 antenna cord sub-assembly .
| 2. INSTALL NO. 1 ROOF WIRE |
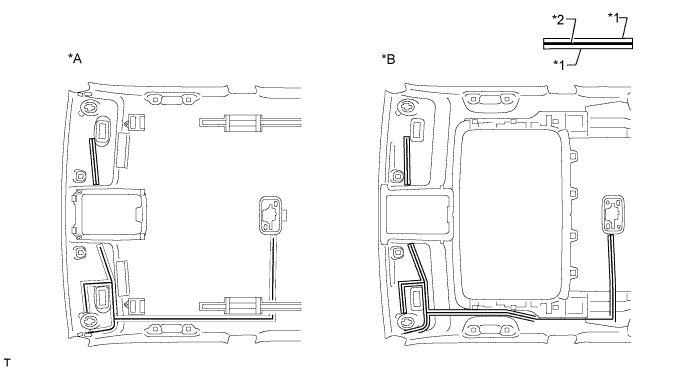
Apply butyl tape to the roof headlining so that the tape is aligned with the wire harness marking as shown in the illustration.

| *A | w/o Sliding Roof | *B | w/ Sliding Roof |
| *1 | Wire Harness Marking | *2 | Butyl Tape |
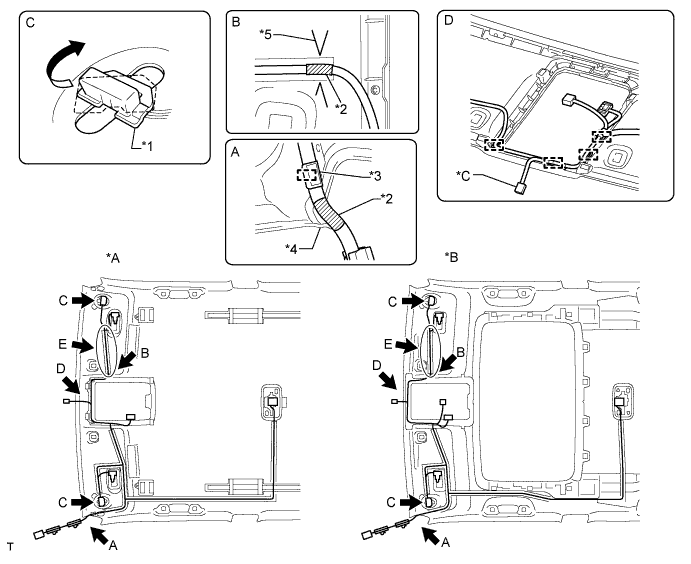
Align the marking tape on the No. 1 roof wire with the roof tongue of the roof headlining as shown in the part of the illustration labeled A and attach the wire to the hook.
Align the marking tape on the No. 1 roof wire with the V mark on the roof headlining as shown in the part of the illustration labeled B and attach the wire to the roof headlining to install it.
Attach each clamp.
Turn the visor connectors approximately 90° clockwise to install them to the roof headlining.

| *A | w/o Sliding Roof | *B | w/ Sliding Roof |
| *C | w/ EC Mirror | - | - |
| *1 | Visor Connector | *2 | Marking Tape |
| *3 | Hook | *4 | Roof Tongue |
| *5 | V Mark | - | - |
| 3. INSTALL VANITY LIGHT ASSEMBLY |
Attach the 3 claws to install the vanity light.
| 4. INSTALL NO. 4 ROOF SILENCER PAD |
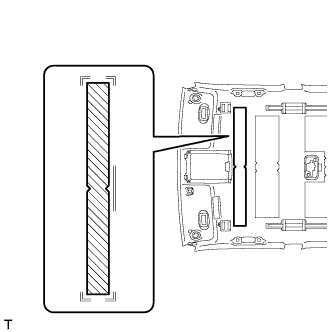
![]() |
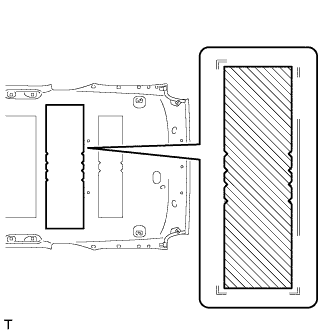
w/o Sliding Roof:
Align the No. 4 roof silencer pad with the markings on the roof headlining and install the No. 4 roof silencer pad to the position shown in the illustration using hot-melt glue or double-sided tape.
![]() |
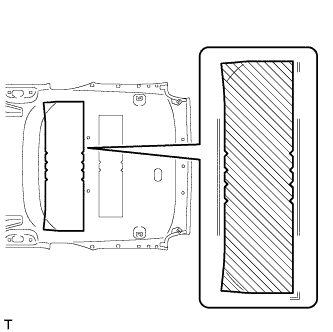
w/ Sliding Roof:
Align the No. 4 roof silencer pad with the markings on the roof headlining and install the No. 4 roof silencer pad to the position shown in the illustration using hot-melt glue or double-sided tape.
| 5. INSTALL NO. 3 ROOF SILENCER PAD (w/o Sliding Roof) |
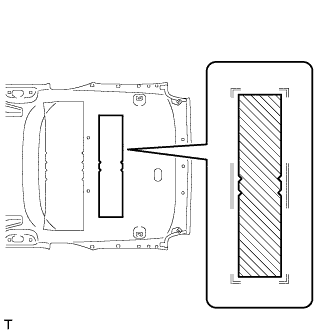
![]() |
Align the No. 3 roof silencer pad with the markings on the roof headlining and install the No. 3 roof silencer pad to the position shown in the illustration using hot-melt glue or double-sided tape.
| 6. INSTALL NO. 2 ROOF SILENCER PAD |
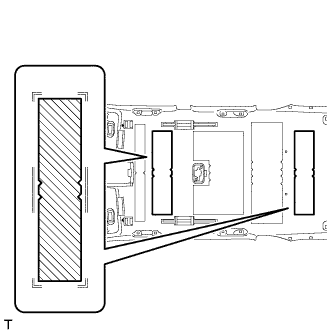
![]() |
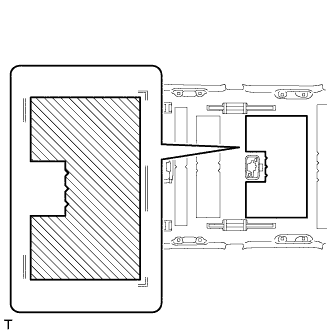
w/o Sliding Roof:
Align the 2 No. 2 roof silencer pads with the markings on the roof headlining and install the 2 No. 2 roof silencer pads to the position shown in the illustration using hot-melt glue or double-sided tape.
![]() |
w/ Sliding Roof:
Align the No. 2 roof silencer pad with the markings on the roof headlining and install the No. 2 roof silencer pad to the position shown in the illustration using hot-melt glue or double-sided tape.
| 7. INSTALL NO. 1 ROOF SILENCER PAD (w/o Sliding Roof) |
![]() |
Align the No. 1 roof silencer pad with the markings on the roof headlining and install the No. 1 roof silencer pad to the position shown in the illustration using hot-melt glue or double-sided tape.