FIT STANDARD / ADJUSTMENT METHOD > ADJUSTMENT |
| INSPECT HOOD SUB-ASSEMBLY |
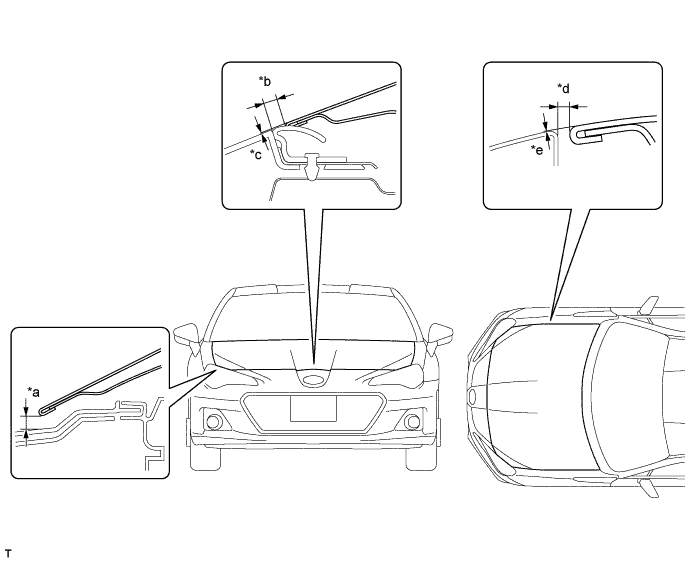
Check that the clearance measurements of areas *a through *e are within each standard range.
| Area | Measurement | Area | Measurement |
| *a | 5.8 to 9.8 mm (0.2283 to 0.3858 in.) | *b | 3.0 to 7.0 mm (0.1181 to 0.2756 in.) |
| *c | -2.0 to 2.0 mm (-0.0787 to 0.0787 in.) | *d | 2.0 to 5.0 mm (0.0787 to 0.1969 in.) |
| *e | -2.0 to 1.0 mm (-0.0787 to 0.0394 in.) | - | - |
| ADJUST HOOD SUB-ASSEMBLY |
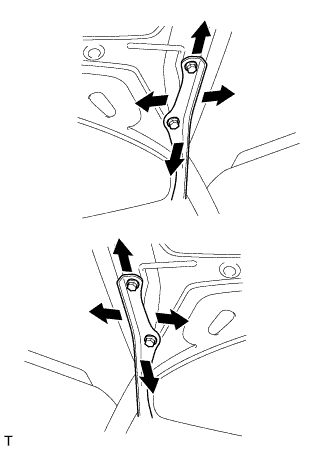 |
Horizontally and vertically adjust the hood.
Loosen the 4 hinge bolts of the hood.
Adjust the clearance between the hood and front fender by moving the hood.
Tighten the 4 hinge bolts after the adjustment.
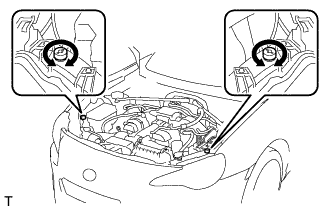 |
Adjust the height of the front end of the hood using the cushion rubbers.
Adjust the 2 cushion rubbers so that the heights of the hood and fender are aligned.
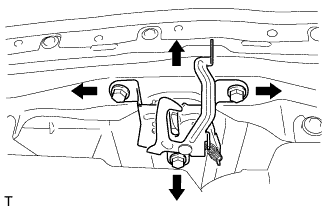 |
Adjust the hood lock.
Loosen the 3 bolts.
Adjust the hood lock position so that the striker can enter it smoothly.
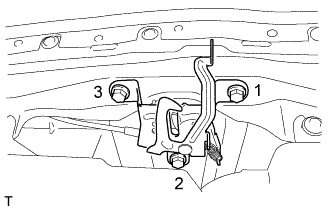 |
Tighten the 3 bolts after the adjustment in the order shown in the illustration.
Check that the striker can engage smoothly with the hood lock.
| INSPECT FRONT DOOR |
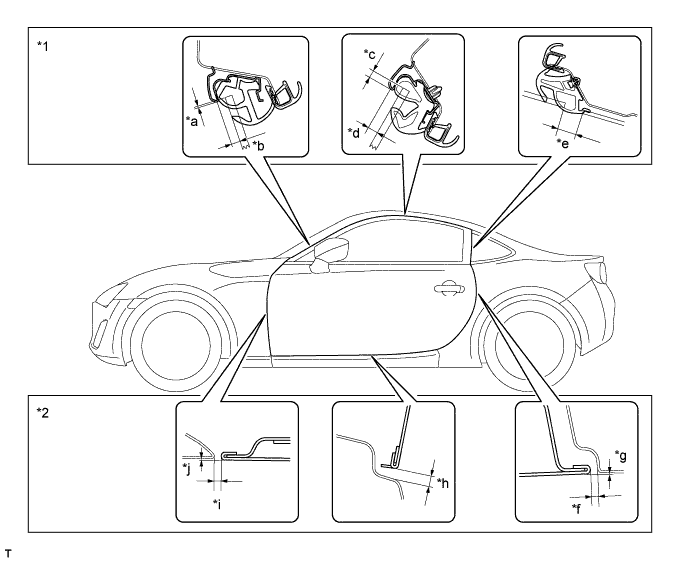
Check that the clearance measurements of areas *a through *j are within each standard range.
| Area | Measurement | Area | Measurement |
| *a | 0.5 mm (0.0197 in.) | *b | 7.0 mm (0.2756 in.) |
| *c | 5.0 mm (0.1969 in.) | *d | 6.7 mm (0.2638 in.) |
| *e | 13.5 to 16.5 mm (0.5315 to 0.6496 in.) | *f | 2.5 to 5.5 mm (0.0984 to 0.2165 in.) |
| *g | 0.0 to 1.5 mm (0.0 to 0.0591 in.) | *h | 4.8 to 7.8 mm (0.1890 to 0.3071 in.) |
| *i | 3.1 to 5.6 mm (0.122 to 0.220 in.) | *j | -1.0 to 1.5 mm (-0.0394 to 0.0591 in.) |
| *1 | Front Glass | *2 | Front Door |
| ADJUST FRONT DOOR GLASS |
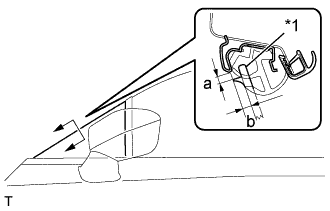
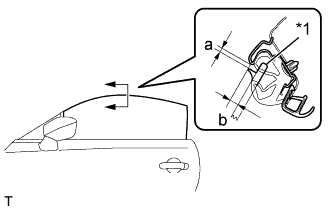 |
Using a SST, check that the clearance measurements of areas "a" to "b" are within each standard range
| *1 | SST |
| Area | Measurement |
| *a | 5.0 mm (0.1969 in.) |
| *b | 6.7 mm (0.2638 in.) |
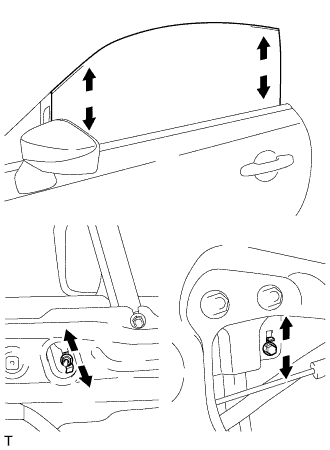 |
Adjust the front door glass so that the fitting dimensions come within the reference values.
Loosen the nut on the front door sush stopper and front door rear sush stopper, and adjust the glass position.
After the adjustment, tighten the nut on the front door sush stopper and front door rear sush stopper.
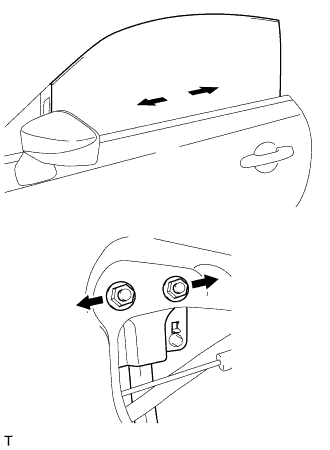 |
Loosen the 2 nuts on the front door rear lower frame sub-assembly, and adjust the glass position.
After the adjustment, tighten the 2 nuts on the front door rear lower frame sub-assembly.
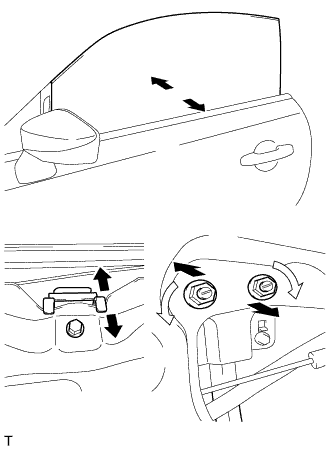 |
Loosen the bolt on the door glass inner stabilizer and adjust the glass position.
After the adjustment, tighten the bolt on the door glass inner stabilizer.
Loosen the 2 nuts on the front door rear lower frame sub-assembly.
Using a screwdriver, rotate the bolts and then adjust the position of the front door glass in lateral direction.
After the adjustment, tighten the 2 nuts on the front door rear lower frame sub-assembly.
 |
Using a SST, check that the clearance measurements of areas "a" to "b" are within each standard range .
| *1 | SST |
| Area | Measurement |
| *a | 2.5 to 5.5 mm (0.0984 to 0.2165 in.) |
| *b | 5.2 to 8.2 mm (0.2047 to 0.3228 in.) |
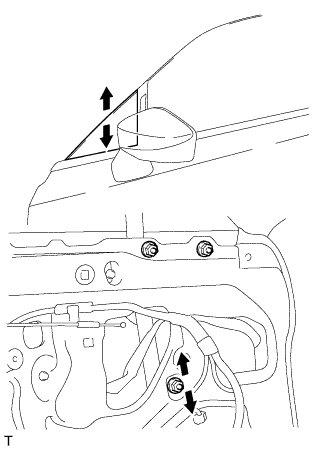 |
Adjust the front door sush so that the fitting dimensions come within the reference values.
Loosen the nut on the front door sush and adjust the front door sush position.
After the adjustment, tighten the nut on the front door sush.
| ADJUST FRONT DOOR |
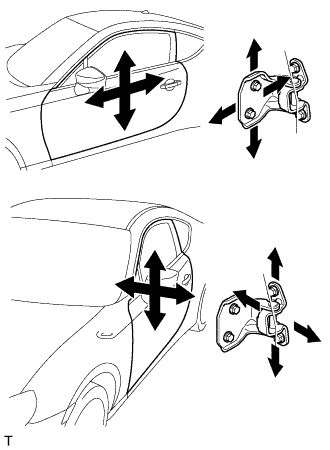 |
Loosen the hinge bolts on the vehicle body and adjust the door position.
After the adjustment, tighten the hinge bolts on the vehicle body.
Loosen the hinge bolts on the door and adjust the door position.
After the adjustment, tighten the hinge bolts on the door.
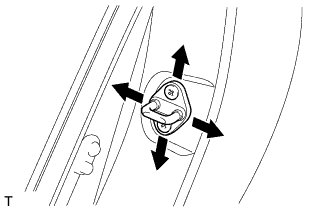 |
Adjust the striker position by slightly loosening the striker mounting screws and hitting the striker with a plastic-faced hammer.
After the adjustment, tighten the striker mounting screws.
| INSPECT LUGGAGE COMPARTMENT DOOR PANEL SUB-ASSEMBLY |
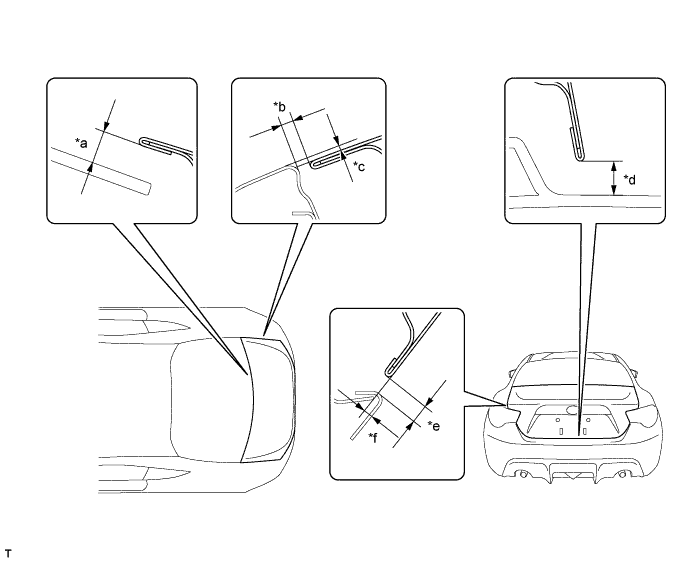
Check that the clearance measurements of areas *a to *f are within each standard range.
| Area | Measurement | Area | Measurement |
| *a | 8.2 mm (0.3228 in.) | *b | 2.0 to 5.0 mm (0.0787 to 0.1969 in.) |
| *c | -2.0 to 1.0 mm (-0.0787 to 0.0394 in.) | *d | 5.8 to 10.2 mm (0.2283 to 0.4016 in.) |
| *e | 4.3 to 7.3 mm (0.1693 to 0.2874 in.) | *f | -2.0 to 1.0 mm (-0.0787 to 0.0394 in.) |
| ADJUST LUGGAGE COMPARTMENT DOOR PANEL SUB-ASSEMBLY |
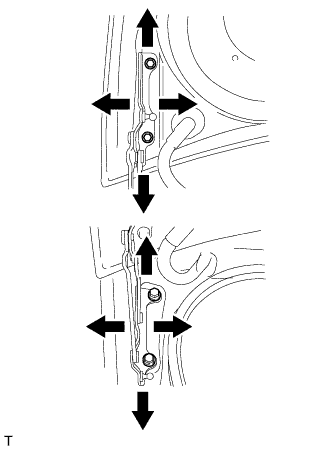 |
Horizontally and vertically adjust the door by loosening the door side hinge bolts.
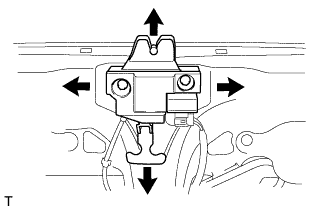 |
When adjusting the rear edge of the doors left or right, or adjusting the luggage door closer assembly, loosen the bolts before making adjustments.
Using a brass bar and a hammer, hit the striker to adjust its position.
After the adjustment, tighten the 2 bolts on the luggage door closer assembly.