 |
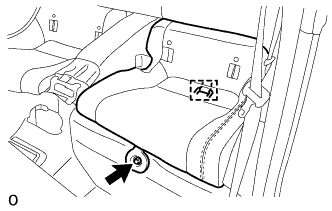
Remove the bolt.
BACK WINDOW GLASS > REMOVAL |
| 1. REMOVE SEPARATE TYPE REAR SEAT CUSHION ASSEMBLY LH |
|
Remove the bolt.
Disengage the hook and remove the separate type rear seat cushion assembly LH.
| 2. REMOVE SEPARATE TYPE REAR SEAT CUSHION ASSEMBLY RH |
| 3. REMOVE FRONT DOOR SCUFF PLATE LH |
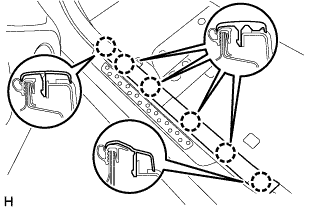 |
Disengage the 6 claws and remove the front door scuff plate LH.
| 4. REMOVE FRONT DOOR SCUFF PLATE RH |
| 5. DISCONNECT FRONT DOOR OPENING TRIM WEATHERSTRIP LH |
| 6. DISCONNECT FRONT DOOR OPENING TRIM WEATHERSTRIP RH |
| 7. DISCONNECT LUGGAGE COMPARTMENT INNER TRIM COVER LH |
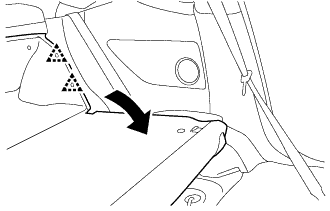 |
Fold down the bench type rear seatback assembly.
Disengage the 2 clips and disconnect the luggage compartment inner trim cover LH.
| 8. DISCONNECT LUGGAGE COMPARTMENT INNER TRIM COVER RH |
| 9. REMOVE LUGGAGE COMPARTMENT TRIM COVER LH |
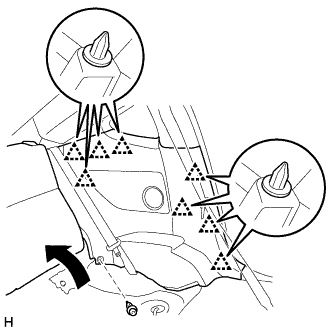 |
Pull up the rear seatback assembly.
Remove the clip.
Disengage the 8 clips and remove the luggage compartment trim cover LH.
| 10. REMOVE LUGGAGE COMPARTMENT TRIM COVER RH |
| 11. REMOVE QUARTER TRIM LID SUB-ASSEMBLY LH |
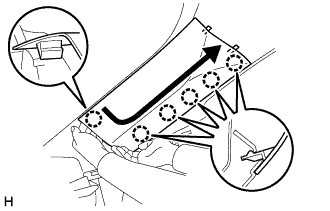 |
Along the arrow in the illustration, disengage the 6 claws.
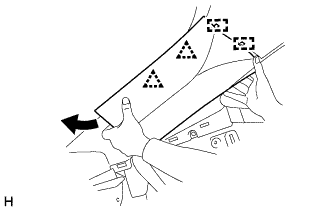 |
Disengage the 2 clips and 2 guides.
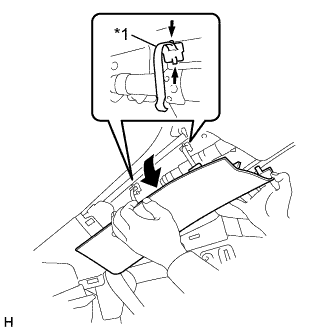 |
Push the lid cover clip knobs in the direction of the arrow to remove the 2 lid cover clips along with the quarter trim lid sub-assembly LH.
| *1 | Lid Cover Clip |
Remove the 2 lid cover clips from the lid cover LH.
| 12. REMOVE QUARTER TRIM LID SUB-ASSEMBLY RH |
| 13. REMOVE REAR WINDOW SIDE GARNISH LH |
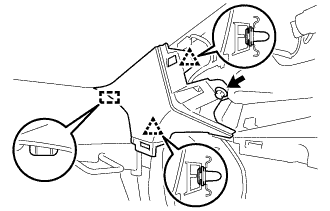 |
Remove the bolt.
Disengage the 2 clips and guide remove the rear window side garnish LH.
| 14. REMOVE REAR WINDOW SIDE GARNISH RH |
| 15. REMOVE PACKAGE TRAY TRIM PANEL ASSEMBLY |
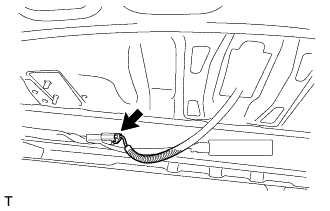 |
Disconnect the connector.
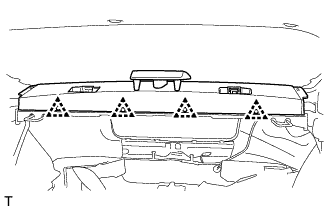 |
Remove the 4 clips.
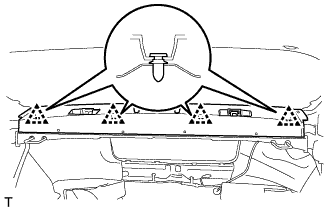 |
Disengage the 4 clips and remove the package tray trim panel assembly with the center stop light assembly.
| 16. REMOVE BACK WINDOW GLASS |
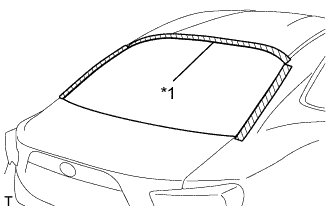 |
Apply protective tape to the installation position of the back window glass on the vehicle body.
| *1 | Protective Tape |
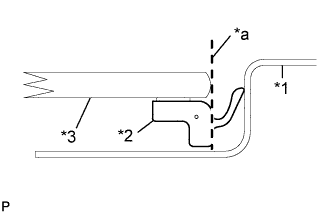 |
Using a knife, cut off the moulding, as shown in the illustration.
| *1 | Body |
| *2 | Moulding |
| *3 | Back Window Glass |
| *a | Cut |
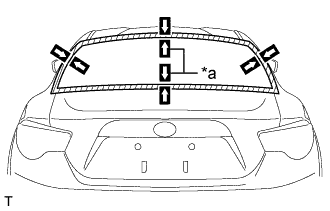 |
Place matchmarks on the back window glass and vehicle body on the locations indicated in the illustration.
| *a | Matchmark |
Disconnect the connector.
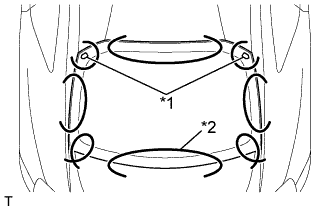 |
Pass a piano wire between the vehicle body and back window glass from the interior.
| *1 | Back Window Glass Stopper |
| *2 | Piano Wire |
Tie both wire ends to wooden blocks or similar objects.
Cut off the adhesive by pulling the piano wire around the back window glass.
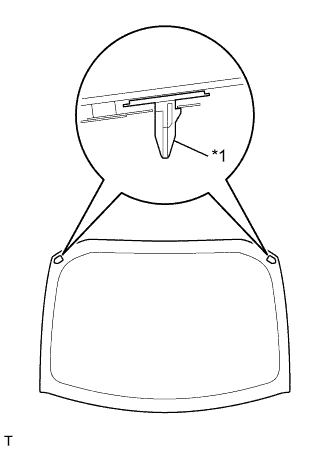 |
Using suction cups, disengage the windshield glass stoppers and remove the back window glass.
| *1 | Back Window Glass Stopper |
| 17. REMOVE BACK WINDOW GLASS ADHESIVE DAM |
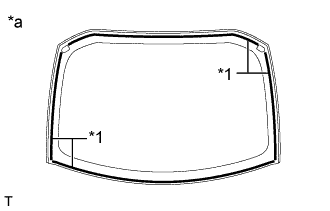 |
Using a scraper, remove the back window glass adhesive dam.
| *1 | Back Window Glass Adhesive Dam |
| *a | Back Side |
| 18. REMOVE NO. 1 BACK WINDOW MOULDING |
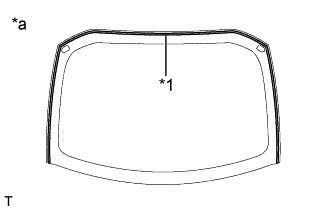 |
Using a scraper, remove the No. 1 back window moulding.
| *1 | No. 1 Back Window Moulding |
| *a | Back Side |
| 19. CLEAN BACK WINDOW GLASS |
Using a scraper, remove the adhesive tape and adhesive sticking to the back window glass.
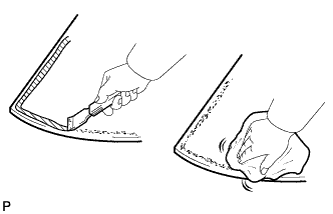 |
Clean the outer circumference of the back window glass with a non-residue solvent.
| 20. CLEAN VEHICLE BODY |
Clean and shape the contact surface of the vehicle body.
Using a knife, cut away any rough adhesive on the contact surface of the vehicle body to ensure the appropriate surface shape.
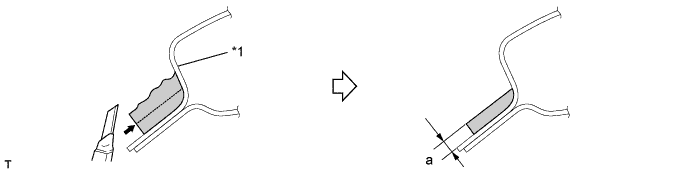
| Area | Dimension |
| a | 2.0 mm (0.0787 in.) |
| *1 | Body | - | - |
 | Adhesive | - | - |
Clean the contact surface of the vehicle body with a piece of cloth saturated with cleaner.