 |
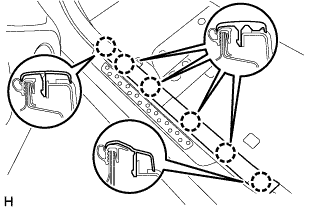
Disengage the 6 claws and remove the front door scuff plate LH.
FRONT SEAT OUTER BELT ASSEMBLY > REMOVAL |
| 1. PRECAUTION |
| 2. DISCONNECT CABLE FROM NEGATIVE BATTERY TERMINAL |
| 3. REMOVE FRONT DOOR SCUFF PLATE |
|
Disengage the 6 claws and remove the front door scuff plate LH.
| 4. DISCONNECT FRONT DOOR OPENING TRIM WEATHERSTRIP |
Disconnect the front door opening trim weatherstrip.
| 5. REMOVE LUGGAGE COMPARTMENT TRIM COVER |
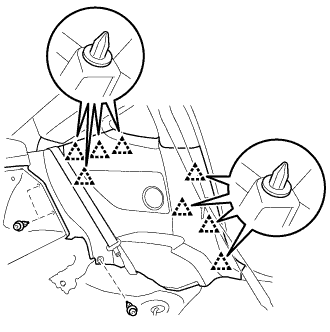 |
Remove the 3 clips.
Disengage the 8 clips and remove the luggage compartment trim cover LH.
| 6. REMOVE QUARTER TRIM LID SUB-ASSEMBLY |
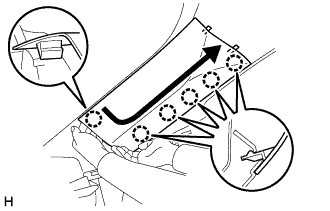 |
Along the arrow in the illustration, disengage the 6 claws.
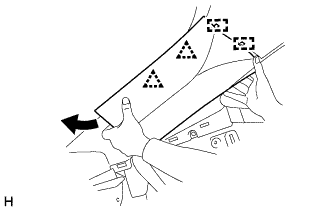 |
Disengage the 2 clips and 2 guides.
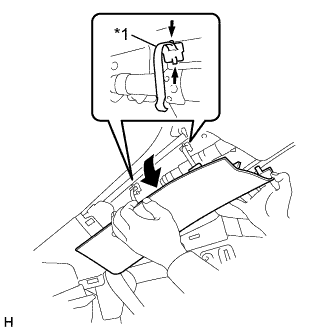 |
Push the lid cover clip knobs in the direction of the arrow to remove the 2 lid cover clips along with the quarter trim lid sub-assembly LH.
| *1 | Lid Cover Clip |
Remove the 2 lid cover clips from the lid cover LH.
| 7. REMOVE REAR WINDOW SIDE GARNISH |
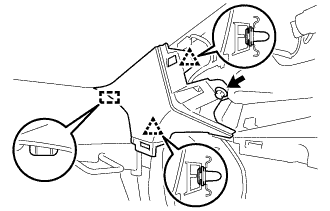 |
Remove the bolt.
Disengage the 2 clips and guide remove the rear window side garnish LH.
| 8. REMOVE REAR QUARTER TRIM FRONT GARNISH |
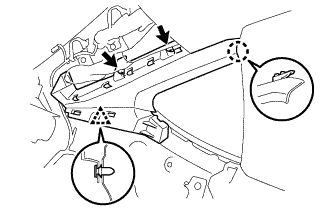 |
Remove the 2 bolts.
Disengage the clip and claw remove the rear quarter trim front garnish LH.
| 9. DISCONNECT FRONT SEAT OUTER BELT ASSEMBLY |
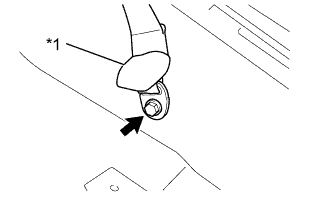 |
Turn back the floor anchor cover.
| *1 | Floor Anchor Cover |
Loosen the bolt and disconnect the floor anchor of the front seat outer belt assembly.
| 10. REMOVE CENTER PILLAR GARNISH |
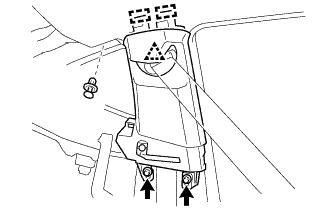 |
Remove the 2 bolts and clip.
Disengage the clips and 2 guides to remove the center pillar garnish LH.
| 11. REMOVE FRONT SEAT OUTER BELT ASSEMBLY |
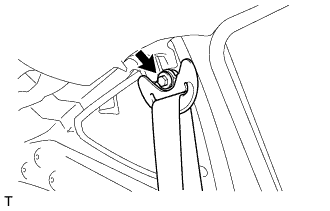 |
Loosen the bolt and disconnect the shoulder anchor of the front seat outer belt assembly.
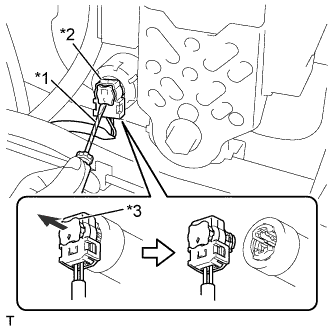 |
Using a screwdriver with the tip wrapped with protective tape, release the pretensioner connector lock and disconnect the pretensioner connector.
| *1 | Protective Tape |
| *2 | Pretensioner Connector |
| *3 | Pretensioner Connector Lock |
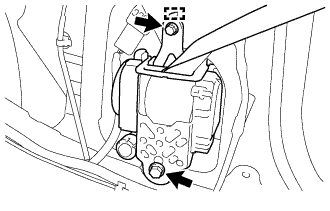 |
Remove the 2 bolts and disengage the hook to remove the front seat outer belt assembly.