 |
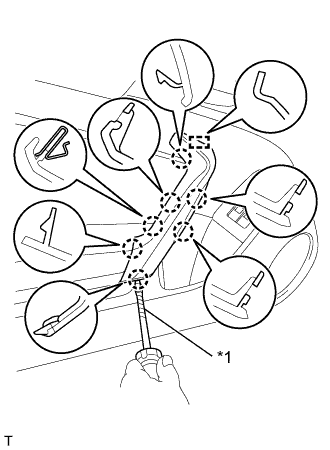
Using a screwdriver with its tip wrapped in protective tape, disengage the 7 claws.
FRONT DOOR SPEAKER > REMOVAL |
| 1. REMOVE DOOR ARMREST COVER |
|
Using a screwdriver with its tip wrapped in protective tape, disengage the 7 claws.
Disengage the guides and remove the door armrest cover.
| *1 | Protective Tape |
| 2. REMOVE FRONT DOOR TRIM BOARD SUB-ASSEMBLY |
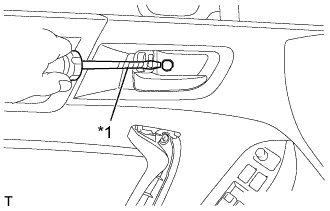 |
Using a screwdriver with its tip wrapped in protective tape, open the cap.
| *1 | Protective Tape |
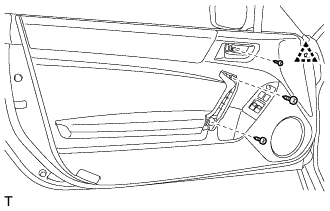 |
Using a clip remover, disengage the clip.
Remove the 3 screws.
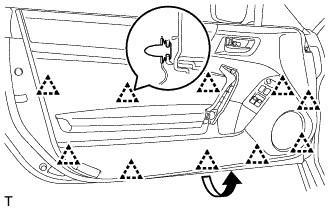 |
Using a moulding remover, disengage the 10 clips.
Pull out the front door trim board sub-assembly in the direction indicated by the arrow in the illustration.
Disconnect each connector.
Raise the front door trim board sub-assembly and remove the front door trim board sub-assembly together with the front door glass weatherstrip inner.
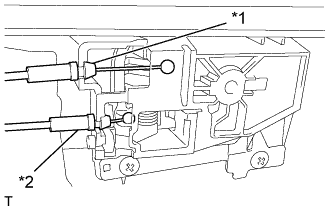 |
Disconnect the front door lock remote control cable and the front door inside locking cable.
| *1 | Front Door Inside Locking Cable |
| *2 | Front Door Lock Remote Control Cable |
| 3. REMOVE FRONT NO. 1 SPEAKER ASSEMBLY |
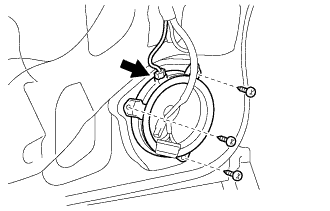 |
Disconnect the connector.
Remove the 3 screws and front No. 1 speaker assembly.