 |
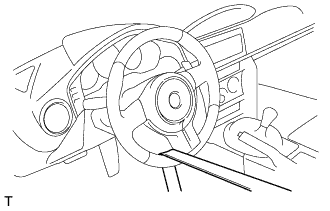
Secure the steering wheel assembly with the seat belt in order to prevent rotation.
- HINT:
- This operation is useful to prevent damage to the spiral cable.
STEERING GEAR > REMOVAL |
| 1. PLACE FRONT WHEELS FACING STRAIGHT AHEAD |
| 2. REMOVE FRONT WHEELS |
| 3. SECURE STEERING WHEEL ASSEMBLY |
|
Secure the steering wheel assembly with the seat belt in order to prevent rotation.
| 4. REMOVE NO. 1 ENGINE UNDER COVER |
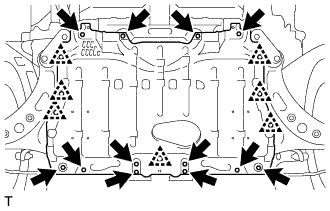 |
Disengage the 7 clips and remove the 12 bolts and No. 1 engine under cover.
| 5. REMOVE NO. 2 ENGINE UNDER COVER |
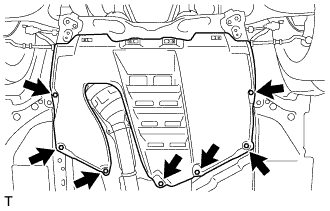 |
Remove the 7 bolts and the No. 2 engine under cover.
| 6. DISCONNECT FRONT STABILIZER LINK ASSEMBLY LH |
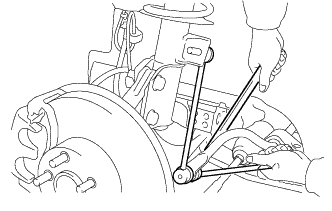 |
Remove the nut and front stabilizer link assembly LH from the front stabilizer bar.
If the ball joint turns together with the nut, use a hexagon wrench to hold the stud bolt.
| 7. DISCONNECT FRONT STABILIZER LINK ASSEMBLY RH |
| 8. REMOVE FRONT STABILIZER BAR |
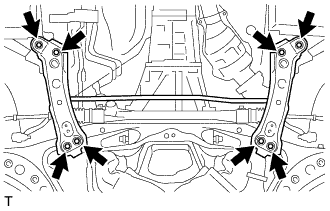 |
Remove the 8 bolts, and remove the front stabilizer bar together with the rear body mounting cushion sub-assembly LH and RH from the front suspension cross member.
| 9. SEPARATE STEERING INTERMEDIATE SHAFT ASSEMBLY |
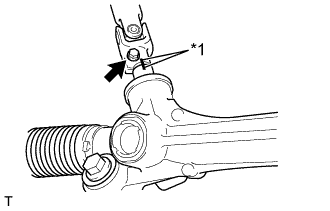 |
Put matchmarks on the steering intermediate shaft assembly and rack and pinion power steering gear assembly.
| *1 | Matchmark |
Remove the bolt.
Disconnect the steering intermediate shaft assembly from the rack and pinion power steering gear assembly.
| 10. DISCONNECT TIE ROD END SUB-ASSEMBLY LH |
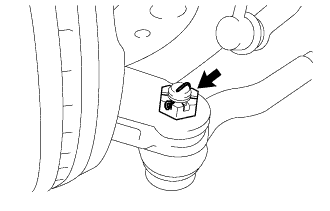 |
Remove the cotter pin and nut.
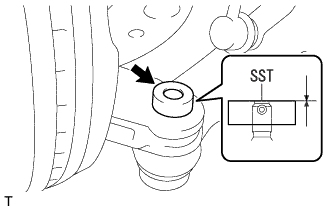 |
Install SST to the tie rod end sub-assembly LH.
Secure SST using a string.
Using SST, separate the tie rod end sub-assembly LH from the steering knuckle.
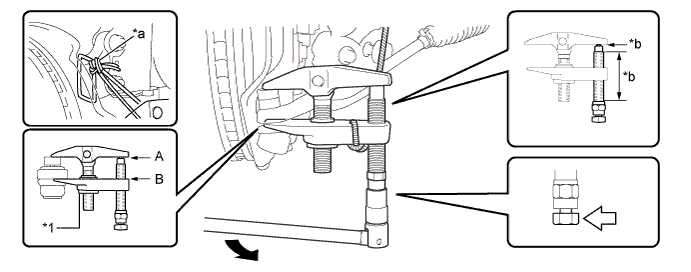
| *1 | Center Nut | - | - |
| *a | String | *b | Grease Application Area |
 | Place the wrench here. | - | - |
| 11. DISCONNECT TIE ROD END SUB-ASSEMBLY RH |
| 12. REMOVE RACK AND PINION POWER STEERING GEAR ASSEMBLY |
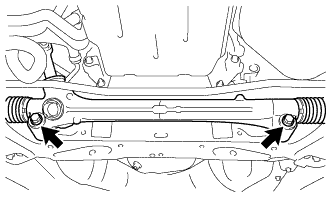 |
Remove the 2 bolts and rack and pinion power steering gear assembly.