Home › Audio / Visual / Telematics › AUDIO / VIDEO › STEREO JACK ADAPTER ASSEMBLY

STEREO JACK ADAPTER ASSEMBLY > REMOVAL

for Preparation Click here


1. REMOVE FRONT CONSOLE BOX COVER (w/ Entry and Start System)
  1. Move the shift lever to N.


    B316857E01
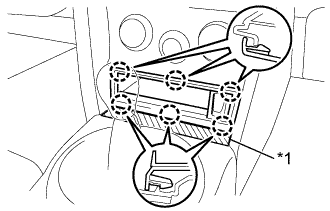
  1. Apply protective tape to the area shown in the illustration.
    Text in Illustration 
    *1
    Protective Tape


    B316858
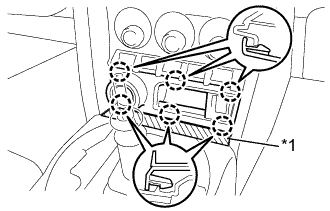
    B320022E01
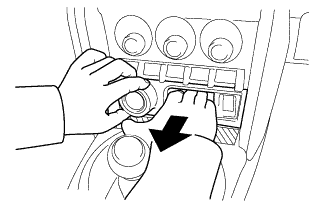
  1. Disengage the 6 claws and remove the front console box cover.
    HINT:
    Hold the engine switch area and the inside of the pocket with your hand, and pull off the front console box cover.

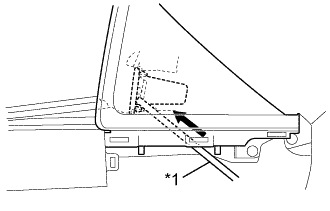
    HINT:
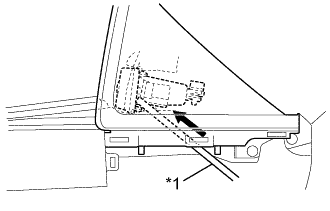
    Remove the instrument panel finish panel end RH, and then push the reverse side of the front console box cover with a bar (tool handle, etc.) to remove it.

    Text in Illustration 
    *1
    Bar

    NOTICE:
    Do not push the switches or the antenna with the bar (tool handle, etc.).

  1. Disconnect each connector.


2. REMOVE FRONT CONSOLE BOX COVER (w/o Entry and Start System)
  1. Move the shift lever to N.


    B316859E01
  1. Apply protective tape to the area shown in the illustration.
    Text in Illustration 
    *1
    Protective Tape


    B316860
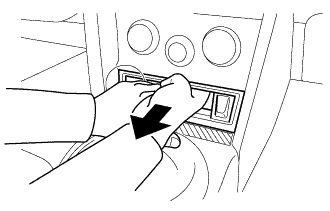
  1. Disengage the 6 claws and remove the front console box cover.

    HINT:
    Hold the inside of the pocket with your hand, and pull off the front console box cover.


    HINT:
    B321786E01
    Remove the instrument panel finish panel end RH, and then push the reverse side of the front console box cover with a bar (tool handle, etc.) to remove it.
    Text in Illustration 
    *1
    Bar

    NOTICE:
    Do not push the switches or the antenna with the bar (tool handle, etc.).


3. REMOVE NO. 1 STEREO JACK ADAPTER ASSEMBLY


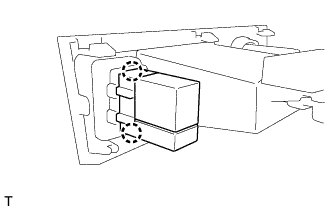
    E247237
  1. Disengage the 2 claws and remove the No. 1 stereo jack adapter assembly.