 |
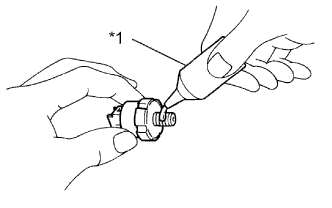
Apply adhesive to 2 or 3 threads of the engine oil pressure switch assembly.
| *1 | Adhesive |
- Adhesive:
- Toyota Genuine Adhesive 1324, Three Bond 1324 or equivalent
OIL PRESSURE SWITCH > INSTALLATION |
| 1. INSTALL ENGINE OIL PRESSURE SWITCH ASSEMBLY |
|
Apply adhesive to 2 or 3 threads of the engine oil pressure switch assembly.
| *1 | Adhesive |
Using a 24 mm deep socket wrench, install the engine oil pressure switch assembly.
Connect the engine oil pressure switch connector.
| 2. INSTALL AIR CLEANER CAP WITH AIR CLEANER HOSE |
Install the air cleaner cap with air cleaner hose with the 3 blots.
Install the air cleaner cap with air cleaner hose with the 2 hose clamps.
Connect the No. 2 ventilation hose.
Connect the mass air flow meter connector.
Engage the wire harness clamp and install the wire harness to the air cleaner cap.
| 3. CONNECT CABLE TO NEGATIVE BATTERY TERMINAL |
| 4. INSPECT FOR OIL LEAK |
Start the engine.
Check for engine oil leaks from the engine oil pressure switch assembly.
| 5. CHECK ENGINE OIL LEVEL |
Park the vehicle in a level place.
With the engine turned off, check that the engine oil level is between the full level and low level marks.
If low, check for leakage and add oil up to the full level mark.