 |
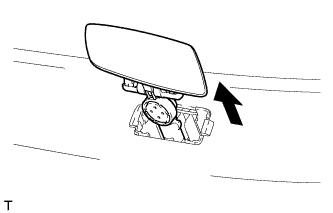
Extend the headlight cleaner washer nozzle by hand.
- NOTICE:
- Be careful not to damage the headlight washer actuator sub-assembly or headlight cleaner washer nozzle.
FRONT BUMPER > REMOVAL |
| 1. REMOVE HEADLIGHT CLEANER WASHER NOZZLE COVER (w/ Headlight Cleaner System) |
|
Extend the headlight cleaner washer nozzle by hand.
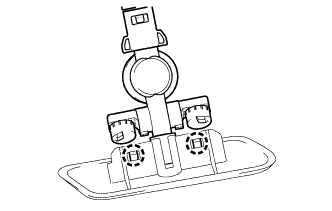 |
Disengage the 2 claws and remove the headlight cleaner washer nozzle cover.
| 2. REMOVE SIDE TURN SIGNAL LIGHT ASSEMBLY LH (w/o Side Marker Light) |
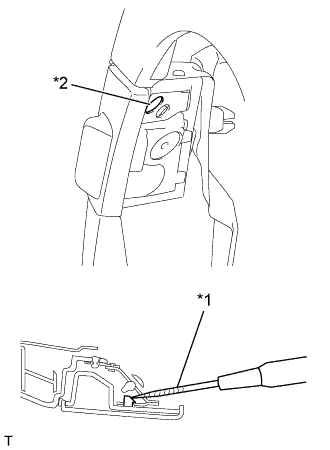 |
Using a screwdriver wrapped with protective tape, disengage the claw from service hole.
| *1 | Protective Tape |
| *2 | Service Hole |
Disconnect the connector to remove the side turn signal light assembly.
| 3. REMOVE SIDE TURN SIGNAL LIGHT ASSEMBLY RH (w/o Side Marker Light) |
| 4. REMOVE FRONT MARKER LIGHT ASSEMBLY LH (w/ Side Marker Light) |
|
Using a screwdriver wrapped with protective tape, disengage the claw from service hole.
| *1 | Protective Tape |
| *2 | Service Hole |
Disconnect the connector to remove the front marker light assembly.
| 5. REMOVE FRONT MARKER LIGHT ASSEMBLY RH (w/ Side Marker Light) |
| 6. REMOVE FRONT BUMPER UPPER RETAINER |
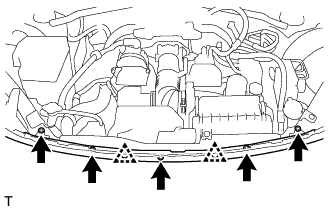 |
Remove the 2 clips.
Remove the 5 bolts and the front bumper upper retainer.
| 7. REMOVE FRONT BUMPER COVER |
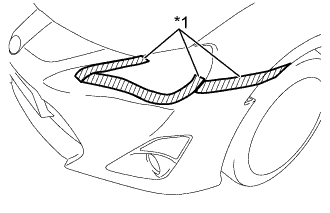 |
Put protective tape around the front bumper assembly.
| *1 | Protective Tape |
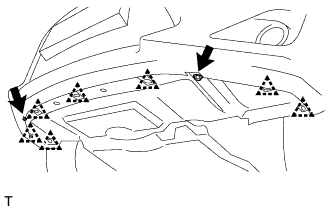 |
Remove the 7 clips.
Remove the 2 bolts.
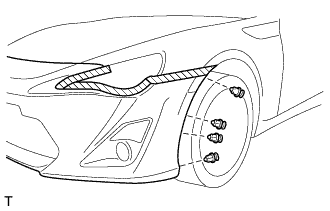 |
Remove the 4 clips.
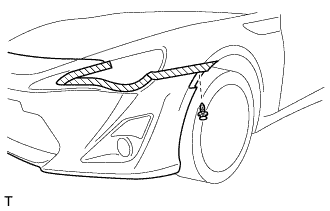 |
Remove the clip.
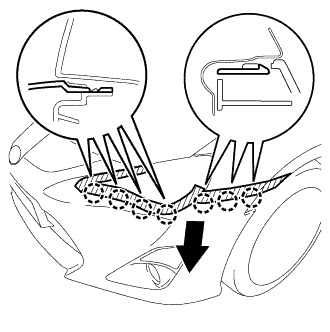 |
Disengage the 7 claws as indicated by the arrow in the illustration.
Disconnect each connector and remove the front bumper cover.