 |
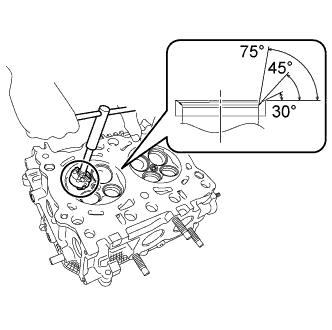
Using a 45° cutter, resurface the valve seat so that the valve seat width is more than the specification.
CYLINDER HEAD > REPAIR |
| 1. REPAIR INTAKE VALVE SEATS |
|
Using a 45° cutter, resurface the valve seat so that the valve seat width is more than the specification.
Hand-lap the valve and valve seat with an abrasive compound.
Check the valve seating position.
Using 30° or 75° cutters, correct the valve seat so that the contact condition between the valve and valve seat is within the standard.
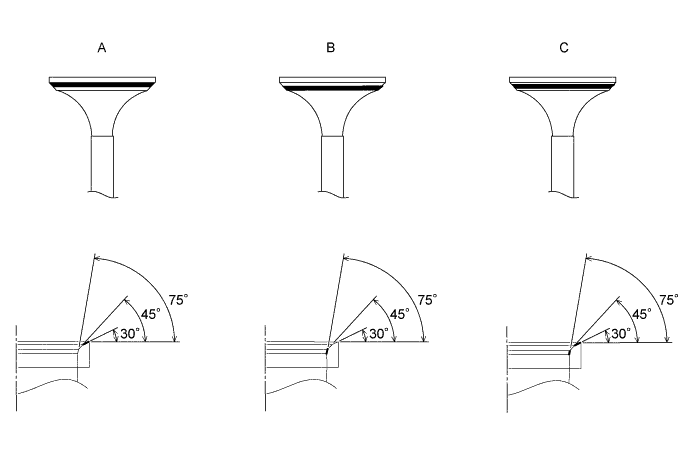
| Contact position | Cutter to be selected |
| A in the illustration | If the valve face position is high, use a 30° valve seat cutter in order to grind the surface so that the contact surface between the valve and the valve seat is at a standard value. |
| B in the illustration | If the valve face position is low, use a 75° valve seat cutter in order to grind the surface so that the contact surface between the valve and the valve seat is at a standard value. |
| C in the illustration | If the valve face position is centered, use a 30°and 75° valve seat cutter in order to grind the surface so that the contact surface between the valve and the valve seat is at a standard value. |
Hand-lap the valve and valve seat with an abrasive compound.
| 2. REPAIR EXHAUST VALVE SEATS |
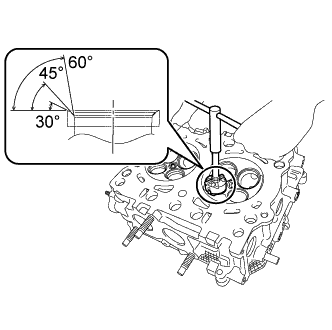 |
Using a 45° cutter, resurface the valve seat so that the valve seat width is more than the specification.
Hand-lap the valve and valve seat with an abrasive compound.
Check the valve seating position.
Using 30° or 60° cutters, correct the valve seat so that the contact condition between the valve and valve seat is within the standard.
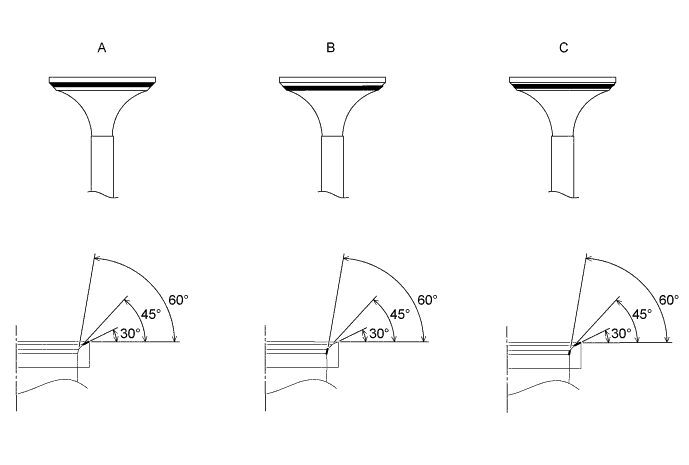
| Contact position | Cutter to be selected |
| A in the illustration | If the valve face position is high, use a 30° valve seat cutter in order to grind the surface so that the contact surface between the valve and the valve seat is at a standard value. |
| B in the illustration | If the valve face position is low, use a 60° valve seat cutter in order to grind the surface so that the contact surface between the valve and the valve seat is at a standard value. |
| C in the illustration | If the valve face position is centered, use a 30°and 60° valve seat cutter in order to grind the surface so that the contact surface between the valve and the valve seat is at a standard value. |
Hand-lap the valve and valve seat with an abrasive compound.
| 3. REPAIR VALVE |
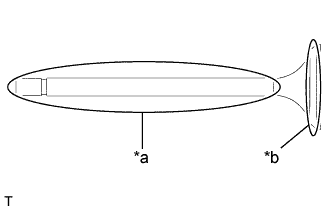 |
Apply a light layer of engine oil to the valve stem, and a small amount of an abrasive compound uniformly to the valve face.
| *a | Valve stem |
| *b | Valve face |
Slowly insert the valve stem into the valve guide bush and lap the valve and valve seat.
After lapping, completely remove the abrasive compound.
Check the valve seating position and width.