 |
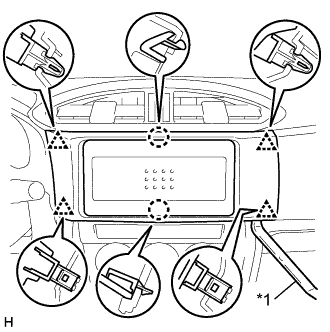
Using a moulding remover, disengage the 2 claws and 4 clips to remove the center instrument cluster finish panel sub-assembly.
| *1 | Moulding Remover |
RADIO RECEIVER > REMOVAL |
| 1. DISCONNECT CABLE FROM NEGATIVE BATTERY TERMINAL |
| 2. REMOVE CENTER INSTRUMENT CLUSTER FINISH PANEL SUB-ASSEMBLY |
|
Using a moulding remover, disengage the 2 claws and 4 clips to remove the center instrument cluster finish panel sub-assembly.
| *1 | Moulding Remover |
| 3. REMOVE RADIO RECEIVER ASSEMBLY WITH BRACKET |
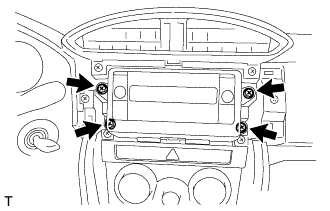 |
Remove the 4 bolts and pull the radio receiver assembly with bracket toward the rear of the vehicle.
Disconnect each connector and remove the radio receiver assembly with bracket.
| 4. REMOVE NO. 1 RADIO BRACKET |
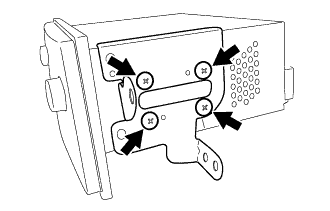 |
Remove the 4 screws and remove the No. 1 radio bracket from the radio receiver assembly.
| 5. REMOVE NO. 2 RADIO BRACKET |