 |
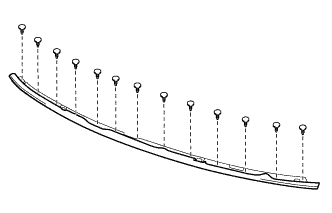
Remove the 13 clips and hood to front end panel seal from the front bumper upper retainer.
FRONT BUMPER > DISASSEMBLY |
| 1. REMOVE HOOD TO FRONT END PANEL SEAL |
|
Remove the 13 clips and hood to front end panel seal from the front bumper upper retainer.
| 2. REMOVE LICENSE PLATE BRACKET |
Type A
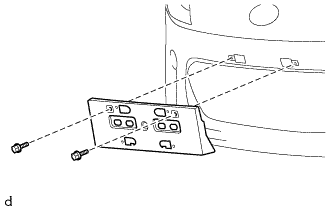 |
Remove the 2 bolts and license plate bracket.
Type B
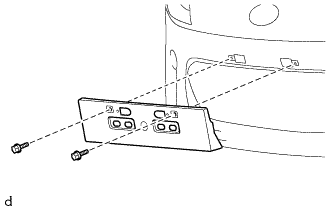 |
Remove the 2 bolts and license plate bracket.
| 3. REMOVE NO. 2 FRONT BUMPER SIDE SUPPORT LH |
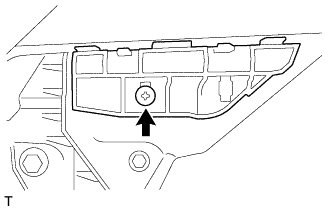 |
Remove the screw.
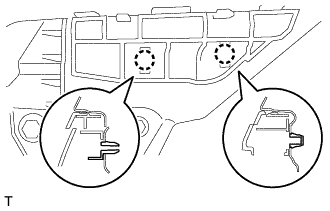 |
Disengage the 2 claws and remove the No. 2 front bumper side support LH.
| 4. REMOVE NO. 2 FRONT BUMPER SIDE SUPPORT RH |
| 5. REMOVE FRONT BUMPER REINFORCEMENT PLATE LH |
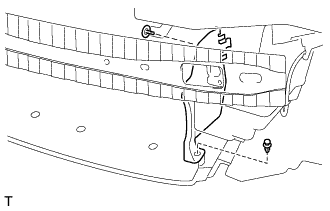 |
Remove the 2 clips and the front bumper reinforcement plate LH.
| 6. REMOVE FRONT BUMPER REINFORCEMENT PLATE RH |
| 7. REMOVE FRONT LOWER BUMPER COVER |
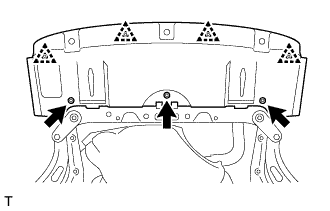 |
Remove the 3 bolts.
Remove the 4 clips and the front lower bumper cover.
| 8. REMOVE FRONT BUMPER STAY BRACKET |
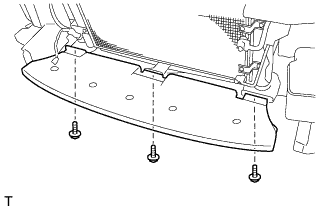 |
Remove the 3 bolts and the front bumper stay bracket.
| 9. REMOVE FRONT BUMPER ENERGY ABSORBER |
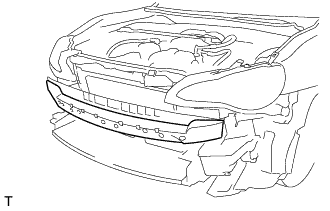 |
Remove the front bumper energy absorber.
| 10. REMOVE RADIATOR COVER PLATE |
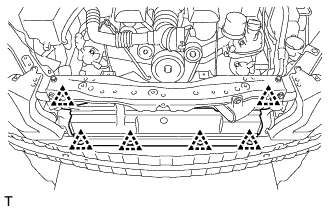 |
Remove the 6 clips and the radiator cover plate.
| 11. REMOVE HIGH PITCHED HORN ASSEMBLY (except China) |
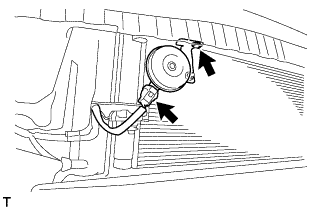 |
Disconnect the connector.
Remove the bolt, and the high pitched horn assembly with horn bracket sub-assembly.
| 12. REMOVE LOW PITCHED HORN ASSEMBLY (for China) |
|
Disconnect the connector.
Remove the bolt, and the low pitched horn assembly with horn bracket sub-assembly.
| 13. REMOVE FRONT BUMPER REINFORCEMENT SUB-ASSEMBLY |
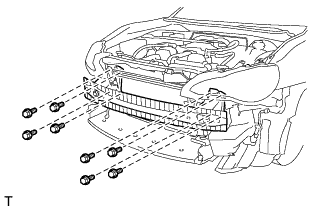 |
Remove the 8 bolts and the front bumper reinforcement sub-assembly.
| 14. REMOVE RADIATOR GRILLE (OR FRONT PANEL) EMBLEM |
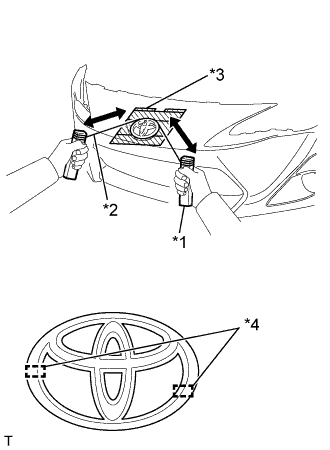 |
Apply protective tape to the front bumper cover in the area around the radiator grille emblem.
| *1 | Wooden Block |
| *2 | Piano Wire |
| *3 | Protective Tape |
| *4 | Location Pin |
Using an infrared light, heat the front bumper cover and the radiator grille emblem.
| Item | Temperature |
| Front Bumper Cover | 40 to 60°C (104 to 140°F) |
| Radiator Grille Emblem | 20 to 30°C (68 to 86°F) |
Insert piano wire between the front bumper cover and radiator grille emblem.
Tie objects that can serve as handles (for example, wooden blocks) to the piano wire ends.
Pull the piano wire and scrape off the double-sided tape that holds the radiator grille emblem to the front bumper cover.
Remove the 2 push nuts and the radiator grille emblem.
| 15. REMOVE NO. 1 LOWER RADIATOR GRILLE |
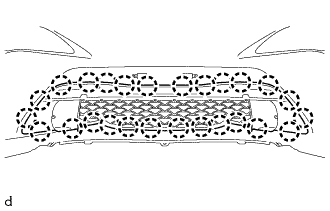 |
Disengage the 26 claws and remove the No. 1 lower radiator grille.
| 16. REMOVE FRONT BUMPER HOLE COVER LH |
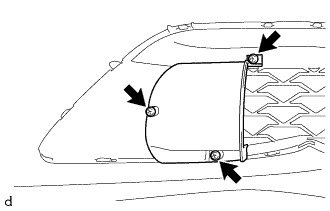 |
Remove the 3 screws and the front bumper hole cover LH.
| 17. REMOVE FRONT BUMPER HOLE COVER RH |
| 18. REMOVE FOG LIGHT ASSEMBLY LH (w/ Fog Light) |
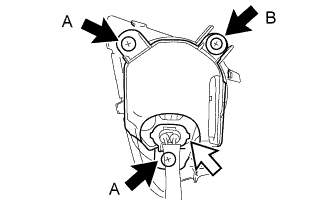 |
Disconnect the connector.
Remove the 2 screws A.
Disengage the clip B and remove the fog light assembly.
| 19. REMOVE FOG LIGHT ASSEMBLY RH (w/ Fog Light) |
| 20. REMOVE FOG LIGHT COVER LH |
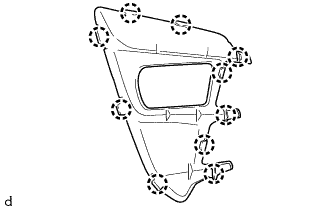 |
Disengage the 10 claws and remove the fog light cover LH.
| 21. REMOVE FOG LIGHT COVER RH |
| 22. REMOVE FRONT BUMPER HOLE COVER |
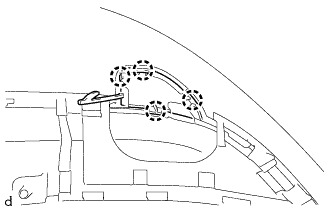 |
Disengage the 4 claws and remove the front bumper hole cover (upper side).
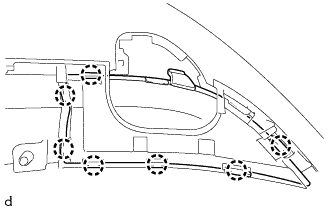 |
Disengage the 7 claws and remove the front bumper hole cover (lower side).
| 23. REMOVE FRONT BUMPER SIDE RETAINER LH |
Put a 4 mm (0.1575 in.) drill bit into a drill.
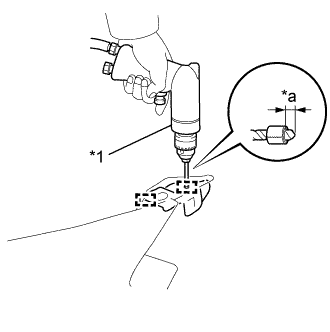 |
Wind tape around the drill bit approximately 5 mm (0.1969 in.) from the tip of the drill, as shown in the illustration.
| *1 | Drill |
| *a | Matchmark |
Lightly press the drill against the 2 rivets and drill off the flanges of the 2 rivets.
| 24. REMOVE FRONT BUMPER SIDE RETAINER RH |