 |
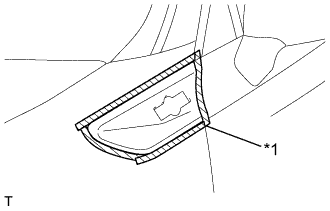
Apply protective tape to the front fender panel in the area around the front fender moulding sub-assembly.
| *1 | Protective Tape |
FRONT FENDER GARNISH > REMOVAL |
| 1. REMOVE FRONT FENDER MOULDING SUB-ASSEMBLY LH |
|
Apply protective tape to the front fender panel in the area around the front fender moulding sub-assembly.
| *1 | Protective Tape |
Using an infrared light, heat the front fender panel and the front fender moulding sub-assembly.
| Item | Temperature |
| Front Fender Panel | 40 to 60°C (104 to 140°F) |
| Front Fender Moulding Sub-Assembly | 20 to 30°C (68 to 86°F) |
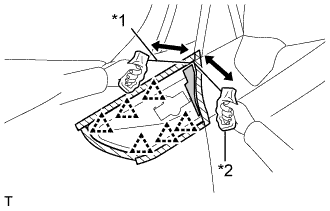 |
Insert piano wire between the front fender panel and the front fender moulding sub-assembly.
| *1 | Piano Wire |
| *2 | Wooden Block |
Tie objects that can serve as handles (for example, wooden blocks) to the piano wire ends.
Pull the piano wire and scrape off the double-sided tape that holds the front fender moulding sub-assembly to the front fender panel.
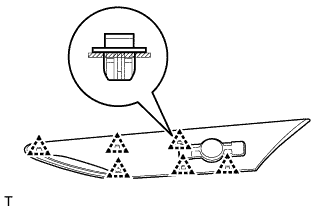 |
Using a moulding remover, disengage the 6 clips and remove the front fender moulding sub-assembly.