Home › Vehicle Interior › SEAT BELT › REAR SEAT OUTER BELT ASSEMBLY

REAR SEAT OUTER BELT ASSEMBLY > INSTALLATION

for Preparation Click here


HINT:
  1. Use the same procedure for the RH and LH sides.
  2. The procedure listed below is for the LH side.


1. INSPECT REAR SEAT 3 POINT TYPE OUTER BELT ASSEMBLY


    B311344E01
  1. Before installing the rear seat 3 point type outer belt assembly, check the ELR function.

    NOTICE:
    Do not disassemble the retractor.


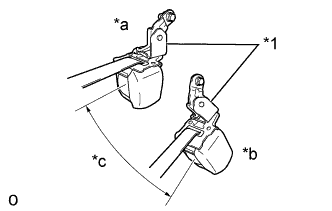
    1. When the inclination of the retractor is 12° or less, check that the belt can be pulled from the retractor. When the inclination of the retractor is over 27°, check that the belt locks.
      Text in Illustration 
      *1
      Retractor
      *a
      Unlocked
      *b
      Locked
      *c
      27°
      If the result is not as specified, replace the rear seat 3 point type outer belt assembly.


2. INSTALL REAR SEAT 3 POINT TYPE OUTER BELT ASSEMBLY


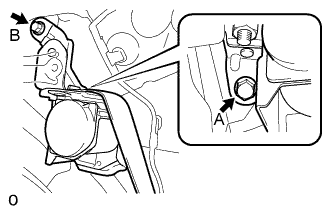
    B311341E01
  1. Tighten the bolt B to temporarily install the rear seat 3 point type outer belt assembly.

  1. Install the bolt A.

    Torque:
    30 N*m{ 306 kgf*cm , 22 ft.*lbf }

  1. Check if the ELR locks.

    NOTICE:
    The check should be performed with the rear seat 3 point type outer belt assembly installed.


    1. With the rear seat 3 point type outer belt assembly installed, check that the belt locks when it is pulled out quickly.


    B311340E01
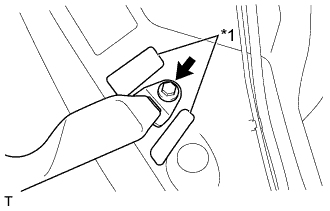
  1. Connect the floor anchor of the rear seat 3 point type outer belt assembly with the bolt.
    Text in Illustration 
    *1
    Protruding Part

    Torque:
    30 N*m{ 306 kgf*cm , 22 ft.*lbf }

    NOTICE:
    Do not allow the anchor part of the rear seat 3 point type outer belt assembly to overlap the protruding parts of the floor panel.


3. INSTALL REAR WINDOW SIDE GARNISH
  1. Engage the guide and 2 clips.

  1. Install the rear window side garnish LH with the bolt.

    Torque:
    7.5 N*m{ 76 kgf*cm , 66 in.*lbf }


4. INSTALL QUARTER TRIM LID SUB-ASSEMBLY
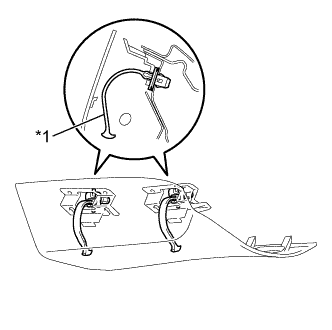
  1. Install the 2 lid cover clips from the quarter trim lid sub-assembly LH.

    NOTICE:
    If there is any damage, be sure to replace the lid cover clip with a new one.


    B321466E01
  1. Engage the 2 guides and 6 claws and install the quarter trim lid sub-assembly LH.
    Text in Illustration 
    *1
    Lid Cover Clip


5. INSTALL LUGGAGE COMPARTMENT TRIM COVER
  1. Engage the 8 clips install the quarter trim panel assembly LH.

  1. Install the clip.


6. INSTALL FRONT DOOR OPENING TRIM WEATHERSTRIP


    B315249E01
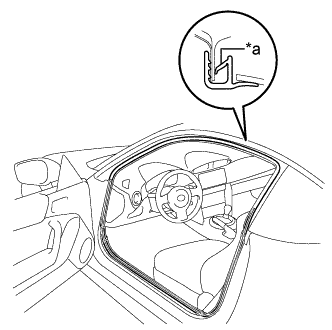
  1. Align the alignment mark on the weatherstrip with the protruding portion on the body indicated by the arrow in the illustration, and install the front door opening trim weatherstrip LH.
    Text in Illustration 
    *a
    Alignment Mark

    NOTICE:
    After installation, check that the corners fit correctly.


7. INSTALL FRONT DOOR SCUFF PLATE
  1. Engage the 6 claws install the front door scuff plate LH.


8. INSTALL SEPARATE TYPE REAR SEAT CUSHION ASSEMBLY
  1. Engage the hook and install the separate type rear seat cushion assembly LH.

  1. Install the bolt.

    Torque:
    13 N*m{ 133 kgf*cm , 10 ft.*lbf }