 |
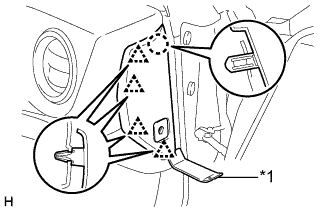
Using a moulding remover, disengage the claw and 4 clips.
| *1 | Moulding Remover |
ECM > REMOVAL |
| 1. DISCONNECT CABLE FROM NEGATIVE BATTERY TERMINAL |
| 2. REMOVE INSTRUMENT SIDE PANEL RH (w/ Airbag Cut Off Switch) |
|
Using a moulding remover, disengage the claw and 4 clips.
| *1 | Moulding Remover |
Disconnect the connector and remove the instrument side panel RH.
| 3. REMOVE INSTRUMENT SIDE PANEL RH (w/o Airbag Cut Off Switch) |
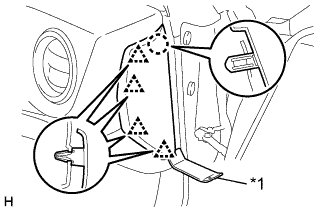 |
Using a moulding remover, disengage the claw and 4 clips and remove the instrument side panel RH.
| *1 | Moulding Remover |
| 4. REMOVE GLOVE COMPARTMENT DOOR ASSEMBLY |
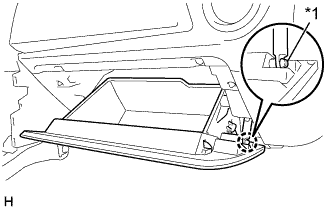 |
Disengage the claw and release the glove compartment door damper.
| *1 | Glove Compartment Door Damper |
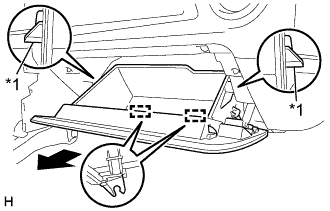 |
Release the 2 stoppers and open the glove compartment door assembly until it is horizontal.
| *1 | Stopper |
Pull the glove compartment door assembly horizontally backward to disengage the 2 hinges and remove the glove compartment door assembly.
| 5. REMOVE CONTROL UNIT RELAY ASSEMBLY (w/o Entry and Start System) |
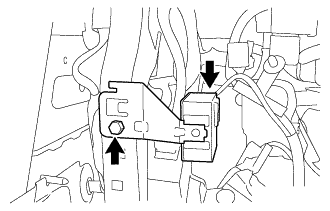 |
Disconnect the control unit relay assembly connector.
Remove the bolt and control unit relay assembly unit.
| 6. REMOVE ECM |
Disconnect the 4 connectors from the ECM.
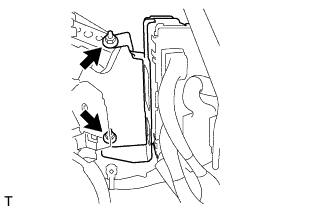 |
Remove the 2 nuts and the ECM.
| 7. REMOVE ECM BRACKET |
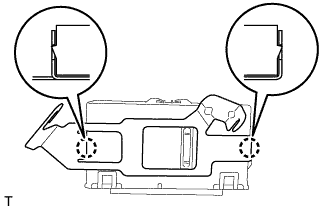 |
Disengage the 2 claws, and remove the ECM bracket.