OIL PUMP > REASSEMBLY |
| 1. INSTALL CAMSHAFT TIMING OIL CONTROL VALVE (for Exhaust Side of Bank 2) |
|
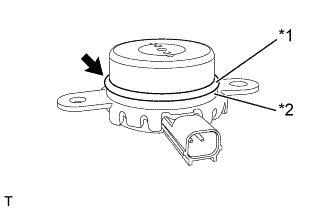
Install the back-up ring to the camshaft timing oil control valve.
| *1 | O-ring |
| *2 | Back-up Ring |
Apply a light coat of engine oil to a new O-ring and install it to the camshaft timing oil control valve.
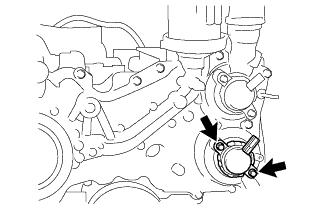 |
Install the camshaft timing oil control valve with the 2 bolts.
| 2. INSTALL CAMSHAFT TIMING OIL CONTROL VALVE (for Intake Side of Bank 2) |
|
Install the back-up ring to the camshaft timing oil control valve.
| *1 | O-ring |
| *2 | Back-up Ring |
Apply a light coat of engine oil to a new O-ring and install it to the camshaft timing oil control valve.
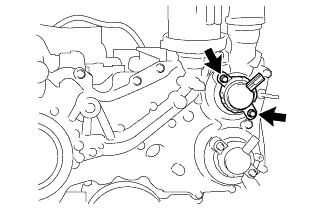 |
Install the camshaft timing oil control valve with the 2 bolts.
| 3. INSTALL CAMSHAFT TIMING OIL CONTROL VALVE (for Exhaust Side of Bank 1) |
|
Install the back-up ring to the camshaft timing oil control valve.
| *1 | O-ring |
| *2 | Back-up Ring |
Apply a light coat of engine oil to a new O-ring and install it to the camshaft timing oil control valve.
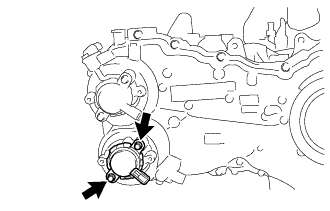 |
Install the camshaft timing oil control valve with the 2 bolts.
| 4. INSTALL CAMSHAFT TIMING OIL CONTROL VALVE (for Intake Side of Bank 1) |
|
Install the back-up ring to the camshaft timing oil control valve.
| *1 | O-ring |
| *2 | Back-up Ring |
Apply a light coat of engine oil to a new O-ring and install it to the camshaft timing oil control valve.
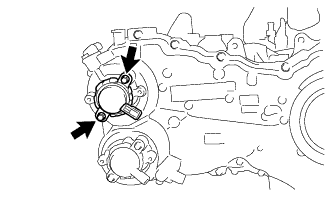 |
Install the camshaft timing oil control valve with the 2 bolts.
| 5. INSTALL VVT SENSOR (for Exhaust Side of Bank 2) |
Apply a light coat of engine oil to the new O-ring of the VVT sensor.
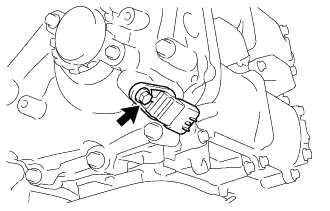 |
Install the VVT sensor with the bolt.
| 6. INSTALL VVT SENSOR (for Intake Side of Bank 2) |
Apply a light coat of engine oil to the new O-ring of the VVT sensor.
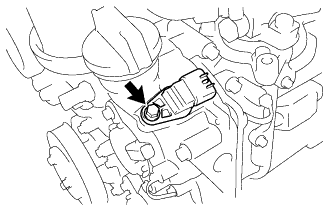 |
Install the VVT sensor with the bolt.
| 7. INSTALL VVT SENSOR (for Exhaust Side of Bank 1) |
Apply a light coat of engine oil to the new O-ring of the VVT sensor.
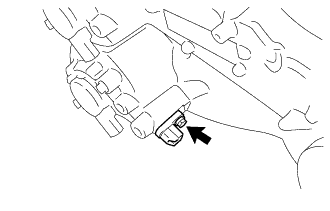 |
Install the VVT sensor with the bolt.
| 8. INSTALL VVT SENSOR (for Intake Side of Bank 1) |
Apply a light coat of engine oil to the new O-ring of the VVT sensor.
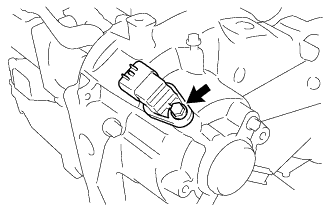 |
Install the VVT sensor with the bolt.
| 9. INSTALL ENGINE OIL TEMPERATURE SENSOR |
Install a new gasket to the engine oil temperature sensor.
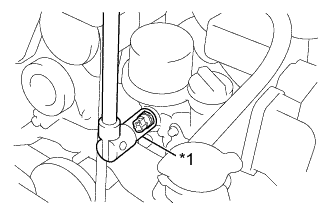 |
Using a 19 mm deep socket wrench, install the engine oil temperature sensor to the cylinder head sub-assembly.
| *1 | 19 mm Deep Socket Wrench |
| 10. INSTALL ENGINE OIL PRESSURE SWITCH ASSEMBLY |
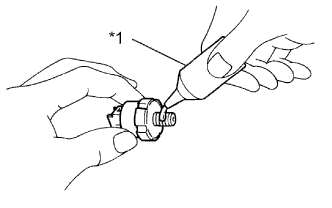 |
Apply adhesive to 2 or 3 threads of the engine oil pressure switch assembly.
| *1 | Adhesive |
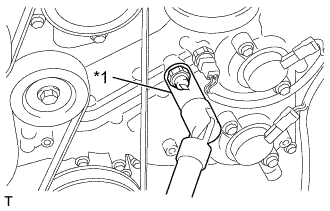 |
Using a 24 mm deep socket wrench, install the engine oil pressure switch assembly.
| *1 | 24 mm Deep Socket Wrench |
| 11. INSTALL OIL FILTER UNION |
Install the oil filter union.
| 12. INSTALL OIL FILTER SUB-ASSEMBLY |
Remove any foreign matter and clean the inside and installation surface of the engine.
Apply a light layer of engine oil to the seal rubber of a new oil filter sub-assembly.
Tighten the oil filter sub-assembly by hand.
Using SST, tighten the oil filter sub-assembly.