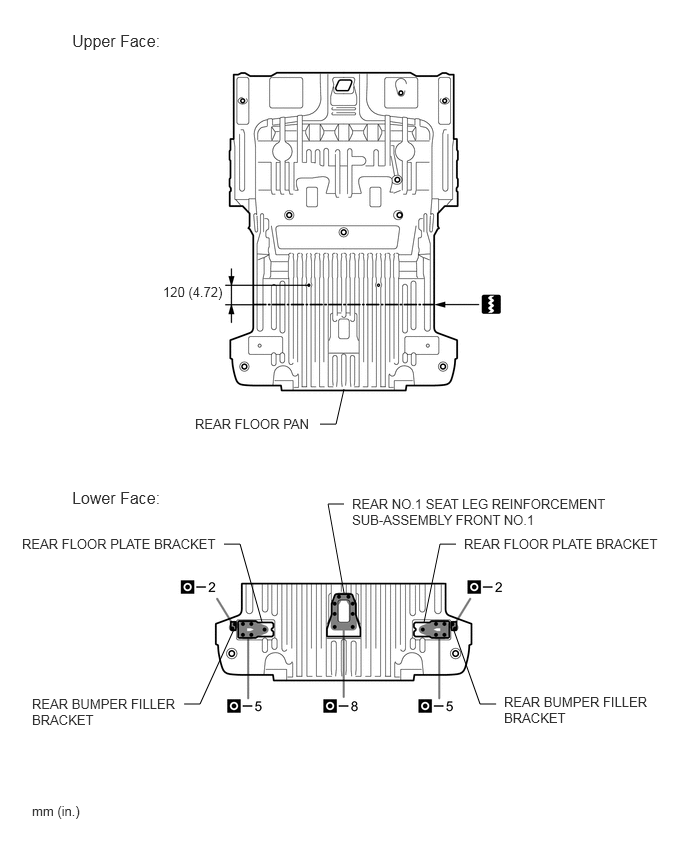
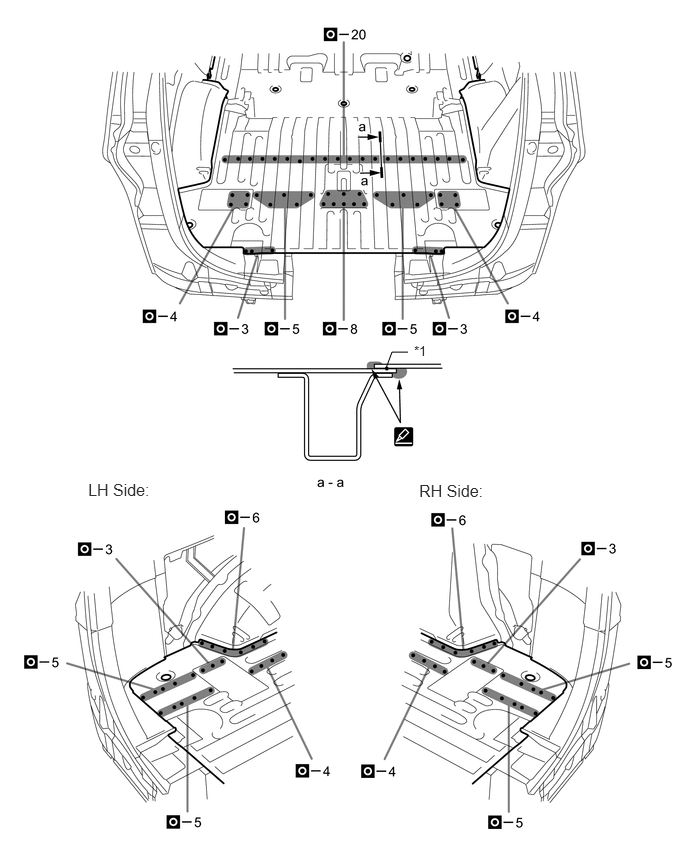
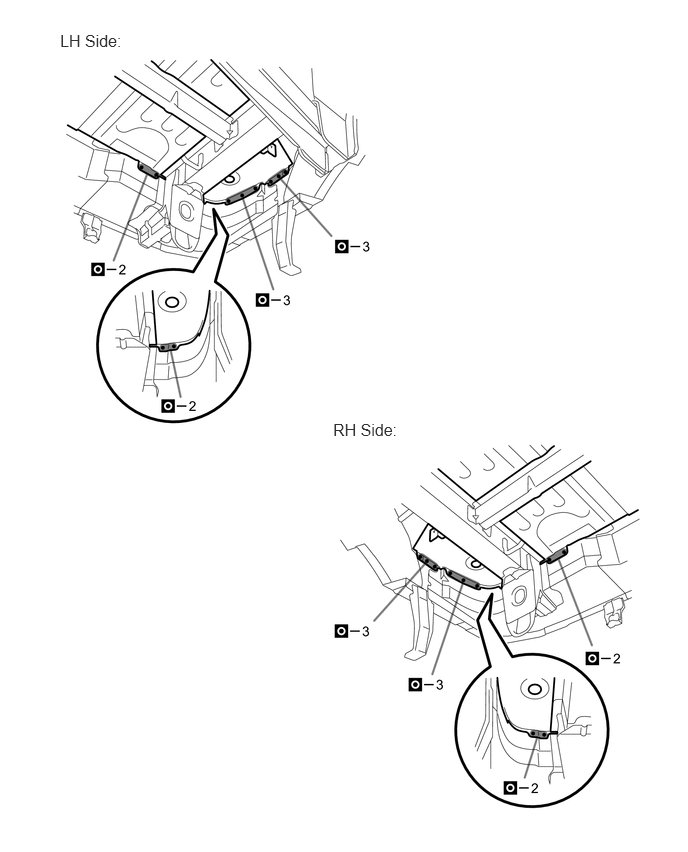
BODY WELD POINT REAR FLOOR PAN CUT AND JOIN REPLACEMENT SECTIONS
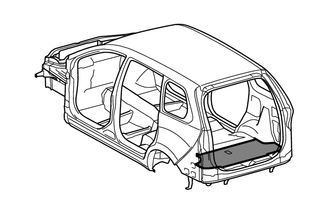
With the rear floor rear inner crossmember removed.
REMOVAL
| Symbol Meaning | |
|---|---|

|
Remove Weld Points |

|
Cut Location |
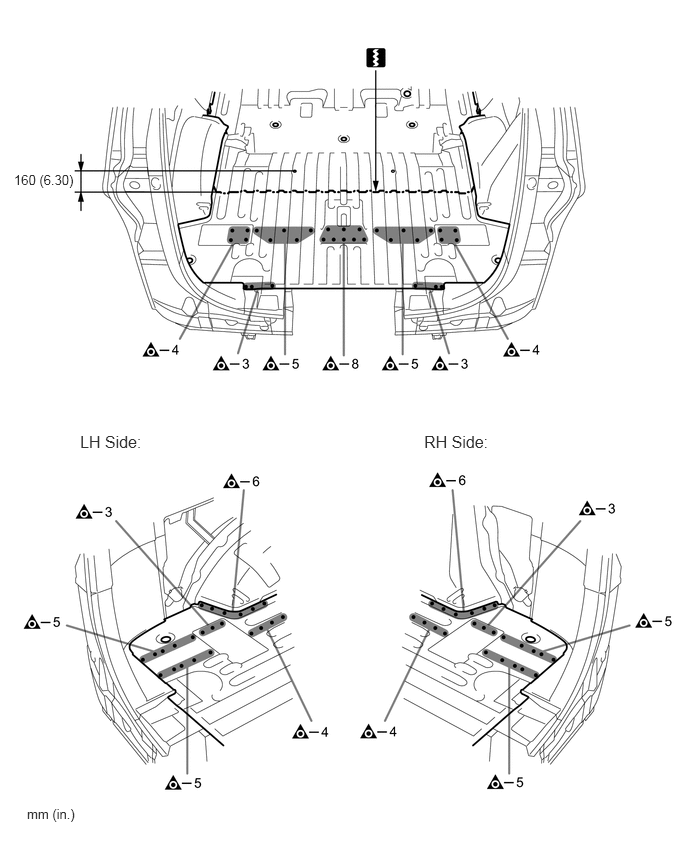
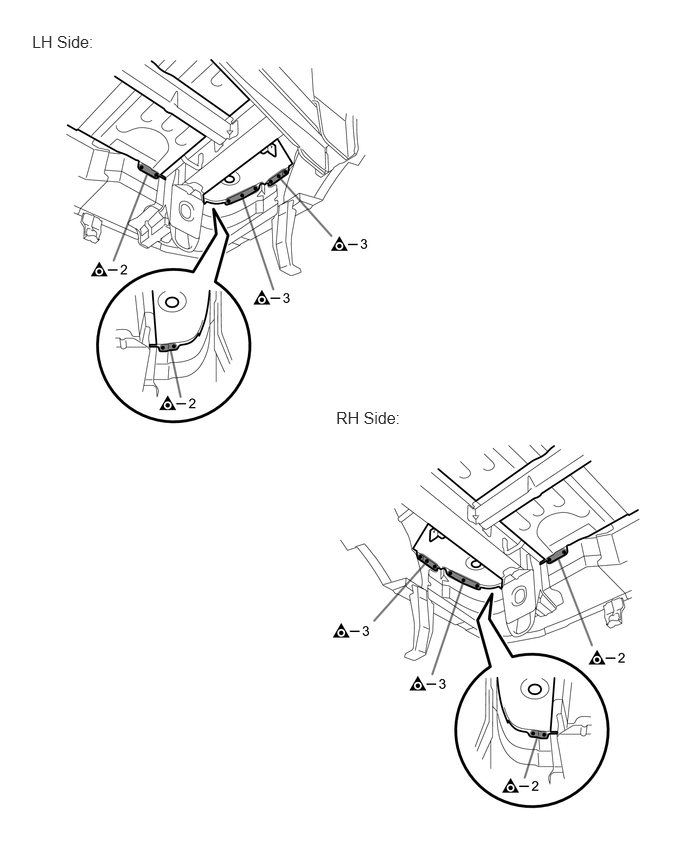
INSTALLATION
| Symbol Meaning | |
|---|---|

|
Plug Weld |
|
|
Cut Location |

|
Body Sealer |
If the entire supply part is not needed, remove the part of the supply part that is needed.
Before temporarily installing the new parts, weld the rear floor pan, rear No.1 seat leg reinforcement sub-assembly front No.1, rear floor plate bracket and rear bumper filler bracket with the standard number of welding points.
*1: Perform plug-welding in the area where the panel are overlapped. Apply body sealer to both sides of each panel.
- HINT:
- ·
Confirm that the panels are securely welded together.
·Apply body sealer in an even, continuous bead.
After welding, apply body sealer and undercoating to the corresponding parts. (See the painting / coating)
After applying the top coat, apply anti-rust agent to the internal panel portion of the closed section structural weld points.