K3-VE ENGINE MECHANICAL CYLINDER BLOCK DISASSEMBLY
PROCEDURE

 13101
1.REMOVE PISTON SUB-ASSEMBLY WITH CONNECTING ROD
Remove the 8 bolts, then remove the 4 connecting rod bearing caps from the connecting rod.
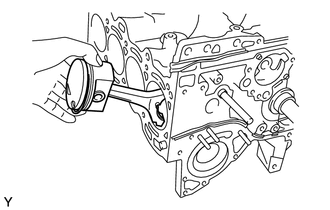
While being careful not to damage the cylinder and crankshaft with the connecting rod tip, tap out the piston sub-assembly with connecting rod using the handle of a hammer.
13041
2.REMOVE CONNECTING ROD BEARING
3.REMOVE PISTON RING SET
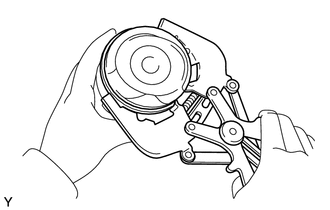
- HINT:
-
Keep the piston rings in the correct combination and order so that they can be returned to their original locations when reassembled.
Using a piston ring expander, remove the No. 1 and No. 2 compression rings.
Remove the oil ring set by hand.
4.REMOVE PISTON SUB-ASSEMBLY WITH PIN
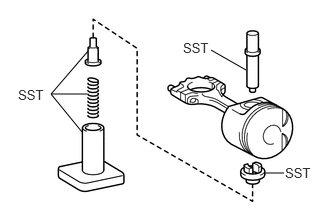
Using SST and a press, remove the piston sub-assembly with pin.
- SST
- 09221-25026 (09221-00021, 09221-00170, 09221-00130, 09221-00030, 09221-00050)
09221-00240
13411
5.REMOVE CRANKSHAFT
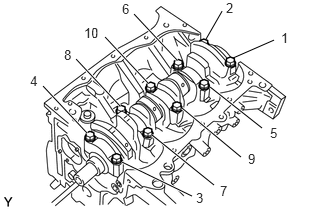
Uniformly loosen the bearing caps in several steps in the sequence shown in the illustration.
Remove the bearing caps and crankshaft.
6.REMOVE CRANKSHAFT BEARING
7.REMOVE DRAIN COCK PLUG
15310J
8.REMOVE OIL REGULATOR ASSEMBLY
Remove the oil regulator assembly from the cylinder block.
9.REMOVE STUD BOLT
10.REMOVE TIGHT PLUG