A4Q AUTOMATIC TRANSMISSION / TRANSAXLE VALVE BODY ASSEMBLY DISASSEMBLY
CAUTION / NOTICE / HINT
- NOTICE:
- ·
When disassembling the transmission valve body assembly, do not damage or deform the edges or surfaces of the transmission valve body assembly.
·When removing the solenoid, do not use any tools to pry it out.
PROCEDURE

 35960
1.REMOVE SOLENOID WIRE ASSEMBLY
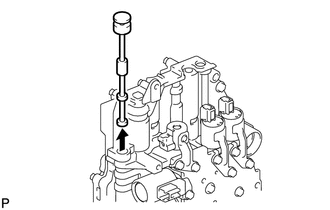
Remove the manual valve.
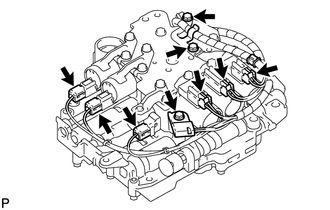
Disconnect the 6 connectors.
Remove the bolt and separate the ATF temperature sensor.
Remove the 2 bolts, wire bracket and solenoid wire assembly.
35210
2.REMOVE NO. 1 CLUTCH CONTROL SOLENOID ASSEMBLY (SL2)
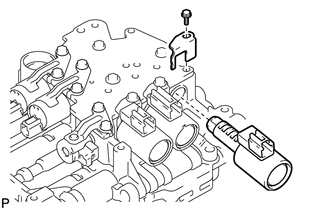
Remove the bolt and retainer.
Remove the No. 1 clutch control solenoid assembly (SL2).
35220
3.REMOVE NO. 2 CLUTCH CONTROL SOLENOID ASSEMBLY (SL1)
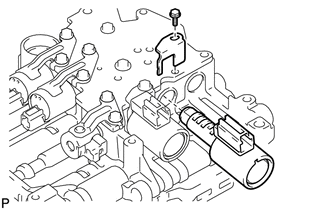
Remove the bolt and retainer.
Remove the No. 2 clutch control solenoid assembly (SL1).
35210
4.REMOVE NO. 1 CLUTCH CONTROL SOLENOID ASSEMBLY (SL3)
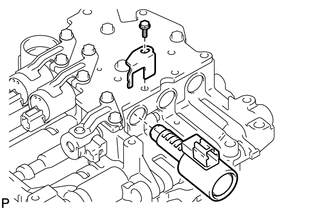
Remove the bolt and retainer.
Remove the No. 1 clutch control solenoid assembly (SL3).
35280
5.REMOVE LOCK UP CONTROL SOLENOID ASSEMBLY (DSU)
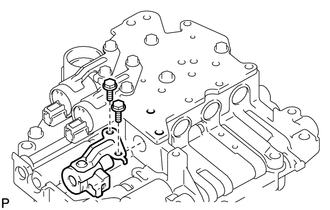
Remove the 2 bolts and lock up control solenoid assembly (DSU).
35240
6.REMOVE TRANSMISSION 3 WAY SOLENOID ASSEMBLY (SR)
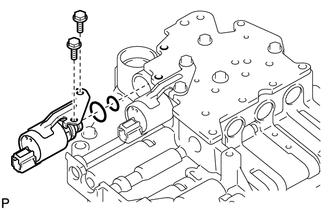
Remove the 2 bolts and transmission 3 way solenoid assembly (SR).
Remove the 2 O-rings.
35240
7.REMOVE TRANSMISSION 3 WAY SOLENOID ASSEMBLY (SL)
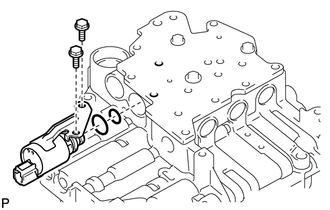
Remove the 2 bolts and transmission 3 way solenoid assembly (SL).
Remove the 2 O-rings.