HEATING / AIR CONDITIONING CONDENSER(for 3SZ-VE) REMOVAL
CAUTION / NOTICE / HINT
- HINT:
- ·
Use the same procedure for the LHD and RHD vehicle.
·The procedure listed below is for the RHD vehicle.
PROCEDURE

 1. PRECAUTION
- NOTICE:
-
After turning the ignition switch off, waiting time may be required before disconnecting the cable from the battery terminal. Therefore, make sure to read the disconnecting the cable from the battery terminal notice before proceeding with work (See page General>INTRODUCTION>REPAIR INSTRUCTION>INITIALIZATION).
2.RECOVER REFRIGERANT FROM REFRIGERATION SYSTEM
3.DISCONNECT CABLE FROM NEGATIVE BATTERY TERMINAL
52119A
4.REMOVE FRONT BUMPER COVER
81150
5.REMOVE HEADLIGHT ASSEMBLY
86520
6.REMOVE LOW PITCHED HORN ASSEMBLY
7.REMOVE NO. 1 HOOD LOCK CONTROL CABLE COVER
53510
8.REMOVE HOOD LOCK ASSEMBLY
88561D
9.REMOVE NO. 3 AIR INLET GRILLE
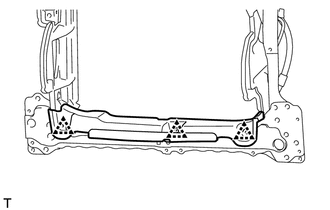
Remove the 3 clips and the No. 3 air inlet grille.
88561J
10.REMOVE NO. 1 AIR INLET GRILLE
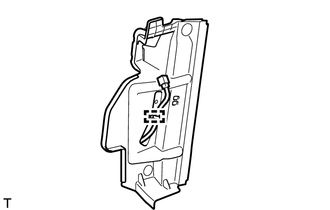
Disengage the harness clamp.
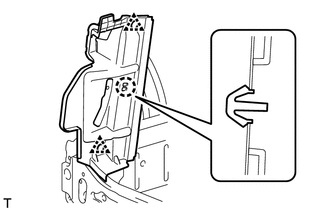
Remove the 2 clips.
Disengage the claw and remove the No. 1 air inlet grille.
88561K
11.REMOVE NO. 2 AIR INLET GRILLE
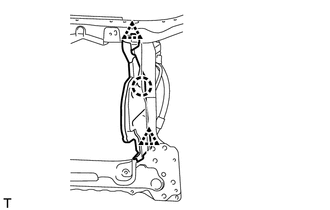
Remove the 2 clips.
Disengage the claw and remove the No. 2 air inlet grille.
53208A
12.REMOVE HOOD LOCK SUPPORT SUB-ASSEMBLY
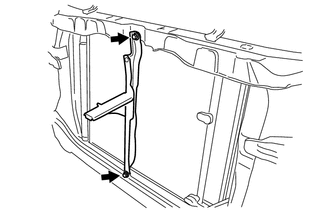
Remove the 2 bolts and the hood lock support sub-assembly.
88711
13.DISCONNECT NO. 1 COOLER REFRIGERANT DISCHARGE HOSE
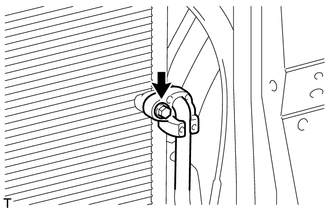
Remove the bolt and disconnect the No. 1 cooler refrigerant discharge hose from the cooler condenser assembly.
Remove the O-ring from the No. 1 cooler refrigerant discharge hose.
- NOTICE:
-
Seal the openings of the disconnected parts using vinyl tape to prevent the entry of moisture and foreign matter.
88716A
14.DISCONNECT LIQUID TUBE SUB-ASSEMBLY
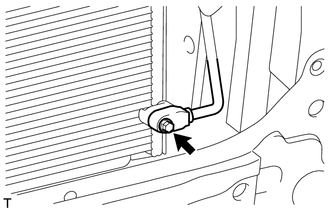
Remove the bolt and disconnect the liquid tube sub-assembly from the cooler condenser assembly.
Remove the O-ring from the liquid tube sub-assembly.
- NOTICE:
-
Seal the openings of the disconnected parts using vinyl tape to prevent the entry of moisture and foreign matter.
88460
15.REMOVE COOLER CONDENSER ASSEMBLY
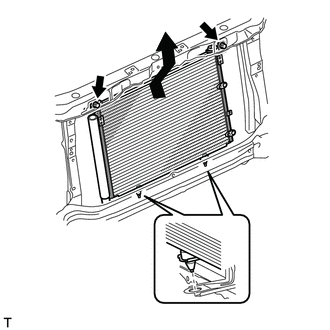
Remove the 2 bolts and 2 condenser brackets.
Disengage the 2 guides and remove the cooler condenser assembly as shown indicated by the arrow in the illustration from the vehicle.
- NOTICE:
-
Do not damage the cooler condenser assembly or radiator assembly when removing the cooler condenser assembly.