WIPER / WASHER FRONT WIPER MOTOR REMOVAL
CAUTION / NOTICE / HINT
- HINT:
- ·
Use the same procedure for the LHD and RHD vehicle.
·The procedure listed below is for the RHD vehicle.
PROCEDURE

 85110
1.REMOVE WINDSHIELD WIPER MOTOR ASSEMBLY
- HINT:
-
Temporarily connect the cable to the negative (-) battery terminal when checking the operation.
Operate the wiper, then stop the windshield wiper motor in the automatic stop position.
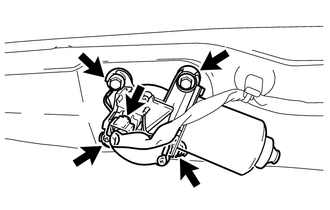
Disconnect the connector and remove the 4 bolts.
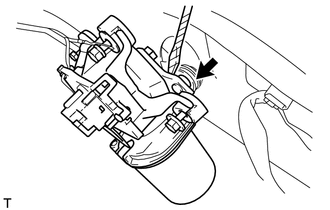
| *1 | Protective Tape |
Using a screwdriver with its tip wrapped in protective tape, disengage the meshing of the crank arm pivot, and remove the windshield wiper motor assembly from the windshield wiper link assembly.
85292B
2.REMOVE FRONT WIPER ARM HEAD CAP
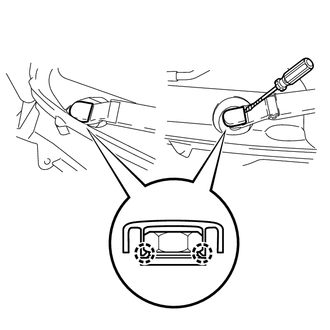
| *1 | Protective Tape |
Using a screwdriver with its tip wrapped in protective tape, disengage the claws and remove the 2 front wiper arm head caps.
85221B
3.REMOVE FRONT WIPER ARM AND BLADE LH
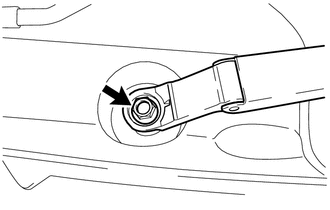
Remove the nut and front wiper arm and blade LH.
85211B
4.REMOVE FRONT WIPER ARM AND BLADE RH
- HINT:
-
Use the same procedure as for the LH side.
53445
5.REMOVE HOOD HINGE COVER RH
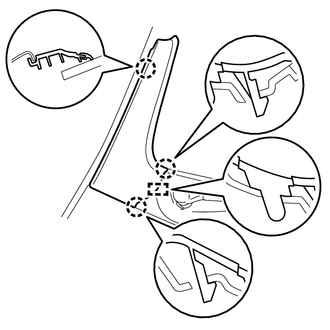
Disengage the 3 claws and the guide in the order shown in the illustration.
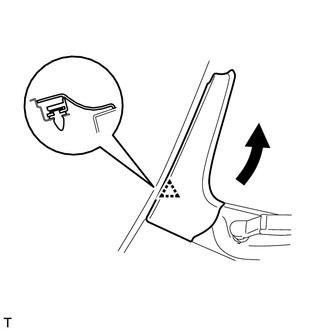
Disengage the clip and remove the hood hinge cover RH indicated by the arrow in the illustration.
53446
6.REMOVE HOOD HINGE COVER LH
- HINT:
-
Use the same procedure as for the RH side.
53383
7.REMOVE HOOD TO COWL TOP SEAL
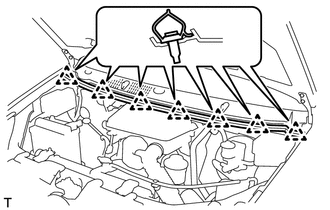
Remove the 7 clips and hood to cowl top seal.
55781E
8.REMOVE COWL TOP VENTILATOR LOUVER SUB-ASSEMBLY
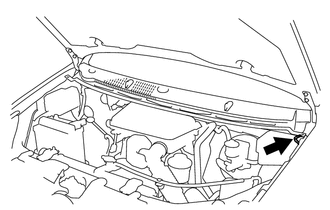
Disconnect the washer hose.
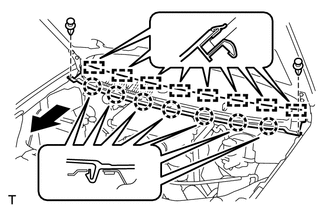
Remove the 2 clips.
Disengage the 7 claws.
Disengage the 8 guides and remove the cowl top ventilator louver sub-assembly by the arrow in the illustration.
85160
9.REMOVE WINDSHIELD WIPER LINK ASSEMBLY
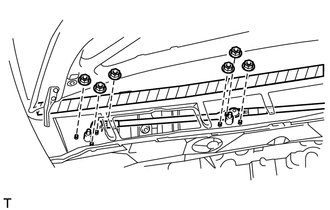
| *1 | Protective Tape |
Apply protective tape to the installation position of the windshield wiper link assembly on the windshield glass.
Remove the 6 nuts and windshield wiper link assembly.