WIPER / WASHER FRONT WIPER MOTOR REMOVAL
CAUTION / NOTICE / HINT
- NOTICE:
-
Make sure to hold the front wiper arm while lifting it as lifting the front wiper arm by the front wiper blade may damage or deform the front wiper blade.
- HINT:
- ·
Use the same procedure for LHD and RHD vehicles.
·The procedure listed below is for the LHD vehicles.
PROCEDURE

 85292B
1.REMOVE FRONT WIPER ARM HEAD CAP
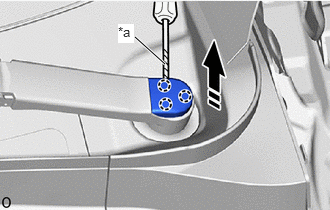
| *a | Protective Tape |

|
Remove in this Direction |
Using a screwdriver with its tip wrapped in protective tape, disengage the claws to remove the front wiper arm head cap as shown in the illustration.
- HINT:
-
Use the same procedure for the RH side and LH side.
2.REMOVE FRONT WIPER ARM AND BLADE ASSEMBLY LH
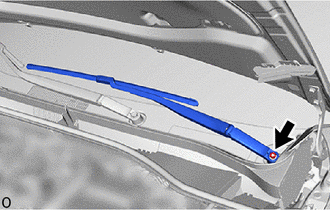
Remove the nut and front wiper arm and blade assembly LH.
3.REMOVE FRONT WIPER ARM AND BLADE ASSEMBLY RH
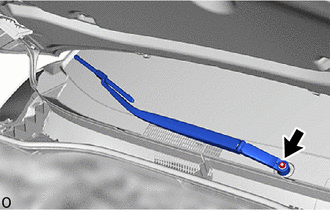
Remove the nut and front wiper arm and blade assembly RH.
75534
4.REMOVE WINDSHIELD OUTSIDE MOULDING LH
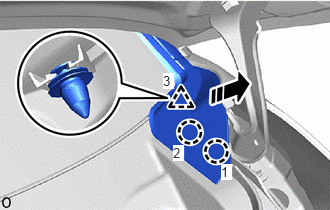
|
|
Remove in this Direction |
Disengage the claws and clip to remove the windshield moulding outside LH as shown in the illustration.
75533
5.REMOVE WINDSHIELD OUTSIDE MOULDING RH
- HINT:
-
Use the same procedure as for the LH side.
55708
6.REMOVE COWL TOP VENTILATOR LOUVER SUB-ASSEMBLY
- NOTICE:
-
To prevent damage to the windshield glass, remove any foreign matter (sand, dust, etc.) from around the contacting surfaces of the cowl top ventilator louver sub-assembly and windshield glass.
Remove the 2 clips.
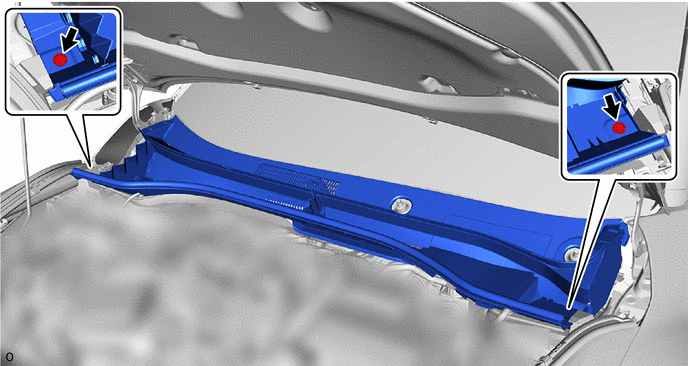
Close the hood sub-assembly.
Insert the moulding remover at the starting position, pushing it in as far as it will go as shown in the illustration.
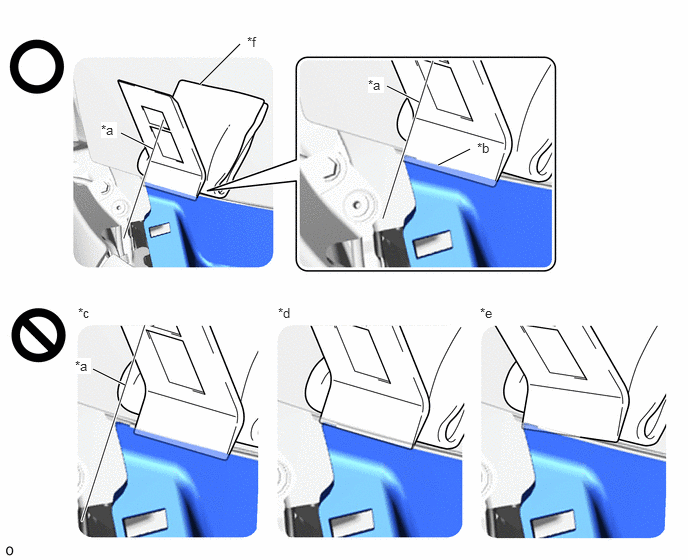
| *a | Starting Position:
Side of Cowl Top Ventilator Louver Sub-assembly and Moulding Remover Aligned |
*b | Inserted as far as it will go |
| *c | Not Inserted at Starting Position | *d | Not fully inserted |
| *e | Not Inserted Straight | *f | Piece of Cloth or Equivalent |
- NOTICE:
- ·
To prevent damage to the windshield glass, set a piece of cloth between the moulding remover and windshield glass.
- ·
Make sure to fully insert the moulding remover as far as it will go, otherwise the cowl top ventilator louver sub-assembly may be deformed or damaged.
- HINT:
-
If the moulding remover is difficult to insert, slightly lift up the cowl top ventilator louver sub-assembly.
While pushing the moulding remover in the direction indicated by the arrow (A), push the moulding remover in the direction indicated by the arrow (B) to disengage the cowl top ventilator louver sub-assembly.
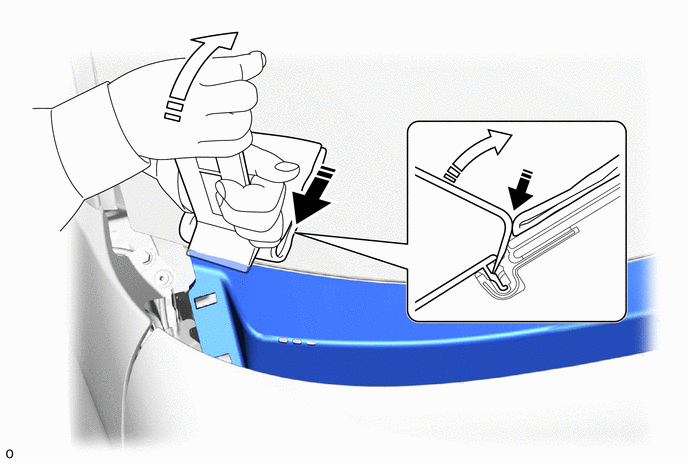
|
|
Push in this Direction (A) | 
|
Push in this Direction (B) |
- NOTICE:
- ·
Make sure to repeat this procedure to disengage the entire cowl top ventilator louver sub-assembly.
- ·
Make sure to perform this procedure while pushing the moulding remover in the direction indicated by the arrow (A), otherwise the cowl top ventilator louver sub-assembly may be deformed or damaged.
- ·
Make sure not to pry the cowl top ventilator louver sub-assembly more than necessary to disengage it, otherwise it may be deformed or damaged.
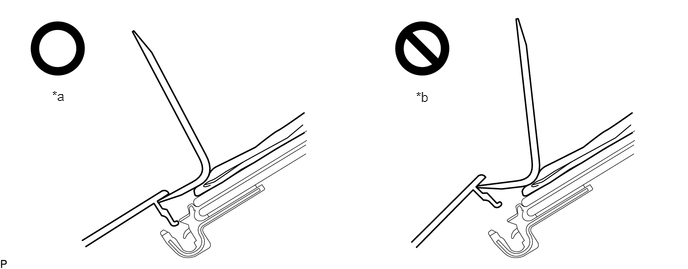 4.333,0.927 4.646,1.083 0.313,0.156 10 false *b 0.542,0.917 0.854,1.073 0.313,0.156 10 false *a
*a Pried Until Disengaged *b Pried Excessively
Using the moulding remover, repeatedly pry up the cowl top ventilator louver sub-assembly while gradually moving the moulding remover half of its width laterally toward the center of the vehicle and then repeat the procedure from the other side of the vehicle as shown in the illustration to disengage the cowl top ventilator louver sub-assembly from the windshield glass.
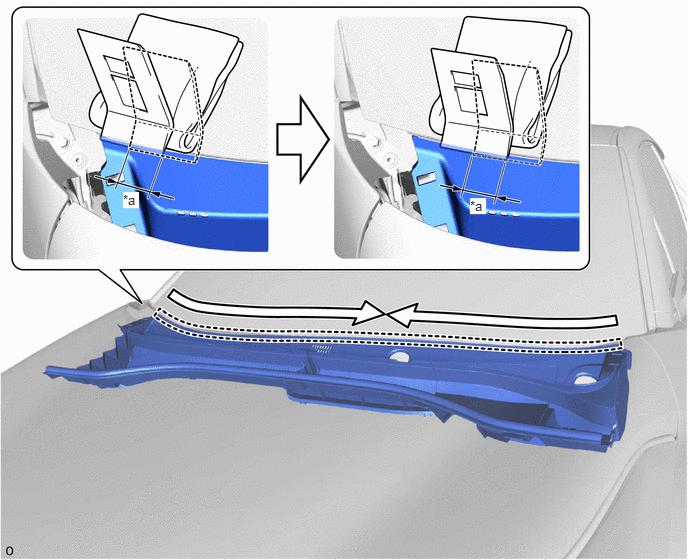
| *a | Half Width of Moulding Remover | - | - |

|
Order of Removal | - | - |
- NOTICE:
- ·
Make sure to move the moulding remover only half of its width laterally after prying up the cowl top ventilator louver sub-assembly, otherwise the cowl top ventilator louver sub-assembly may be damaged or deformed.
·Make sure not to lift up or pull the cowl top ventilator louver sub-assembly by hand before it is completely disengaged, otherwise it may be deformed or damaged.
Open the hood sub-assembly.
Disengage the guides to remove the cowl top ventilator louver sub-assembly as shown in the illustration.
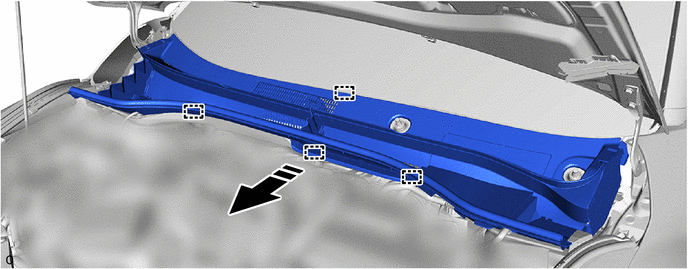
|
|
Remove in this Direction | - | - |
- NOTICE:
-
When removing the cowl top ventilator louver sub-assembly, it may contact the brake master cylinder reservoir filler cap assembly and cause it to fall off. Check the installation condition of the brake master cylinder reservoir filler cap assembly after removing the cowl top ventilator louver sub-assembly.
7.REMOVE WINDSHIELD WIPER MOTOR AND LINK ASSEMBLY
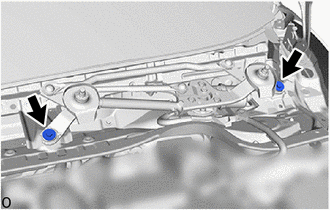
Remove the 2 bolts.
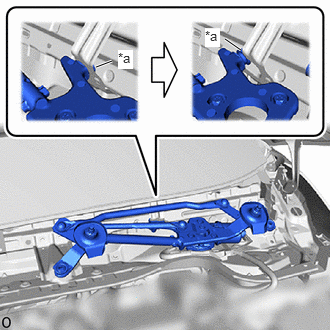
| *a | Motor Grommet |
Disengage the motor grommet as shown in the illustration.
- NOTICE:
-
Be careful not to damage the windshield glass when removing the windshield wiper motor and link assembly.
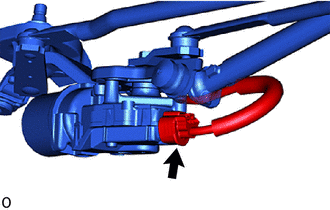
Disconnect the connector to remove the windshield wiper motor and link assembly.
85110
8.REMOVE WINDSHIELD WIPER MOTOR ASSEMBLY
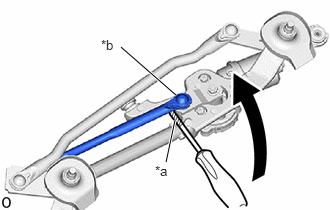
| *a | Protective Tape |
| *b | Pivot of Windshield Wiper Motor Assembly |
Using a screwdriver with its tip wrapped in protective tape, separate the No. 1 windshield wiper link rod from the pivot of the windshield wiper motor assembly as shown in the illustration.
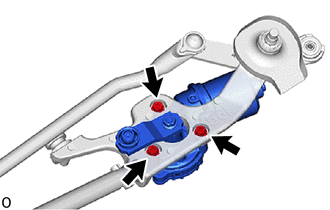
Remove the 3 bolts.
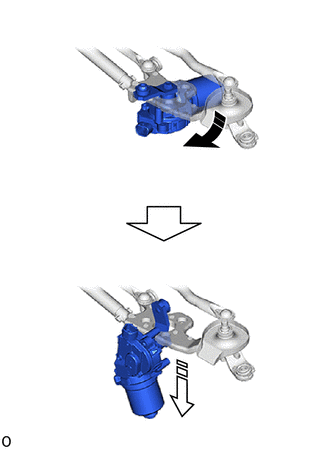
|
|
Remove in this Direction (1) |
|
|
Remove in this Direction (2) |
Move the windshield wiper motor assembly in the direction indicated by the arrow (1), then pull the windshield wiper motor assembly in the direction indicated by the arrow (2) shown in the illustration to remove it from the windshield wiper link assembly.