INTERIOR PANELS / TRIM INSTRUMENT PANEL SAFETY PAD REASSEMBLY
CAUTION / NOTICE / HINT
- HINT:
- ·
Use the same procedure for LHD and RHD vehicles.
·The procedure listed below is for the LHD vehicles.
PROCEDURE

 55355
1.INSTALL NO. 1 INSTRUMENT PANEL CUSHION
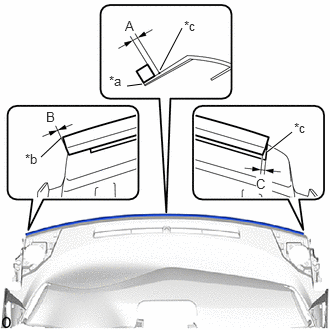
| *a | Instrument Panel Front Side End |
| *b | Instrument Panel Left Side End |
| *c | Marking |
Install a new instrument panel cushion as shown in the illustration.
- Standard Measurement:
Area Measurement A 3.0 mm (0.118 in.) B 0 mm (0 in.) C 2.0 mm (0.0787 in.)
- HINT:
-
Peel off the backing paper from the double-sided tape before installing the No. 1 instrument panel cushion.
55328
2.INSTALL NO. 1 INSTRUMENT PANEL PIN
- HINT:
-
Use the same procedure as for the opposite side.
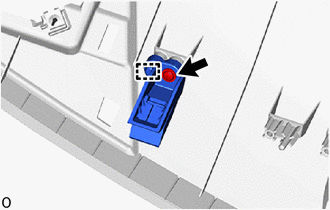
Engage the guide to install the No. 1 instrument panel pin.
Install the screw <D>.
82142
3.INSTALL NO. 2 INSTRUMENT PANEL WIRE
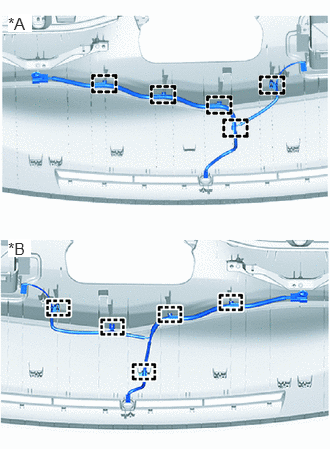
| *A | for LHD |
| *B | for RHD |
w/ Ion Generator:
Engage the clamps to install the No. 2 instrument panel wire.
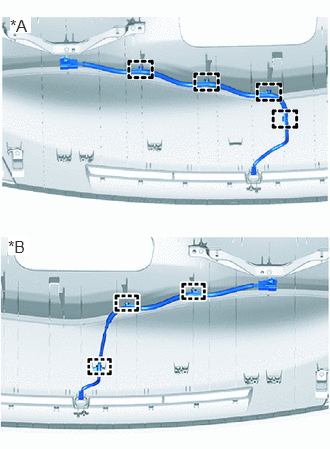
| *A | for LHD |
| *B | for RHD |
w/o Ion Generator:
Engage the clamps to install the No. 2 instrument panel wire.
89120A
4.INSTALL AUTOMATIC LIGHT CONTROL SENSOR
86101
5.INSTALL ANTENNA CORD SUB-ASSEMBLY
for LHD:
Click hereAudio / Visual / Telematics>AUDIO / VIDEO>RADIO ANTENNA CORD>INSTALLATION
for RHD:
Click hereAudio / Visual / Telematics>AUDIO / VIDEO>RADIO ANTENNA CORD>INSTALLATION
88051A
6.INSTALL ION GENERATOR SUB-ASSEMBLY (w/ Ion Generator)
73960A
7.INSTALL INSTRUMENT PANEL PASSENGER AIRBAG ASSEMBLY
55660
8.INSTALL NO. 2 INSTRUMENT PANEL REGISTER ASSEMBLY
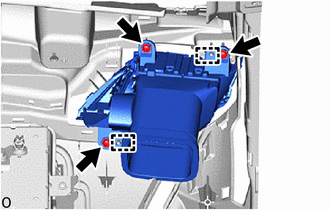
Engage the guides to install the No. 2 instrument panel register assembly.
Install the 3 screws <D>.
55650
9.INSTALL NO. 1 INSTRUMENT PANEL REGISTER ASSEMBLY
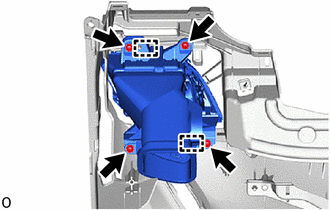
Engage the guides to install the No. 1 instrument panel register assembly.
Install the 4 screws <D>.
55086
10.INSTALL NO. 3 HEATER TO REGISTER DUCT SUB-ASSEMBLY
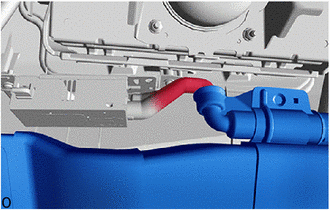
w/ Ion Generator:
Connect the rear air duct sub-assembly.
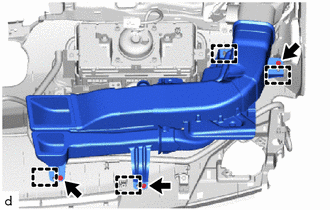
Engage the guides to install the No. 3 heater to register duct sub-assembly.
Install the 3 screws <D>.
55084E
11.INSTALL NO. 1 HEATER TO REGISTER DUCT SUB-ASSEMBLY
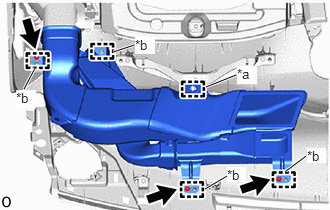
| *a | Clamp |
| *b | Guide |
Engage the guides to install the No. 1 heater to register duct sub-assembly.
Install the 3 screws <D>.
Engage the clamp to connect the No. 2 instrument panel wire.
55950G
12.INSTALL DEFROSTER NOZZLE ASSEMBLY
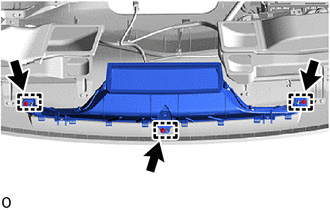
Engage the guides to install the defroster nozzle assembly.
Install the 3 screws <D>.
55962
13.INSTALL NO. 2 SIDE DEFROSTER NOZZLE
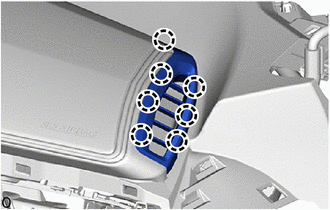
Engage the claws to install the No. 2 side defroster nozzle.
55961
14.INSTALL NO. 1 SIDE DEFROSTER NOZZLE
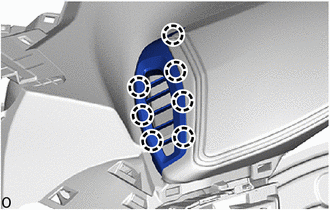
Engage the claws to install the No. 1 side defroster nozzle.