TELEMATICS TELEMATICS TRANSCEIVER REMOVAL
CAUTION / NOTICE / HINT
The necessary procedures (adjustment, calibration, initialization, or registration) that must be performed after parts are removed, installed, or replaced during the telematics transceiver removal/installation are shown below.
| Replacement Part or Procedure | Necessary Procedure | Effect/Inoperative when not Performed | Link |
|---|---|---|---|
| Telematics transceiver | Register vehicle information | ·
Telematics System ·
Emergency call service |
for eCall with Single Knob Type Radio and Display:
(  ) for eCall with Dual Knob Type Radio and Display: ( )
|
PROCEDURE

 1.REMOVE REAR CONSOLE BOX ASSEMBLY
86740
2.REMOVE TELEMATICS TRANSCEIVER (for eCall with Dual Knob Type Radio and Display)
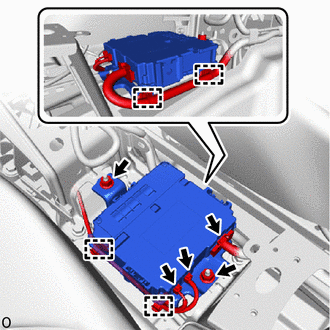
Disconnect the 3 connectors.
Disengage the clamps.
Remove the 2 nuts and telematics transceiver.
86740
3.REMOVE TELEPHONE TRANSCEIVER ASSEMBLY (for eCall with Single Knob Type Radio and Display)
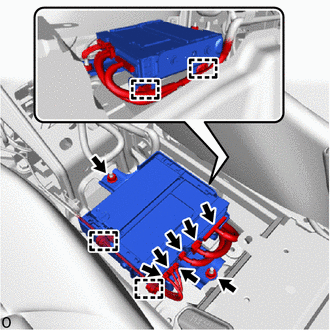
Disconnect the 6 connectors.
Disengage the clamps.
Remove the 2 nuts and telephone transceiver assembly.
86719A
4.REMOVE NO. 1 TELEPHONE BRACKET (for eCall with Single Knob Type Radio and Display)
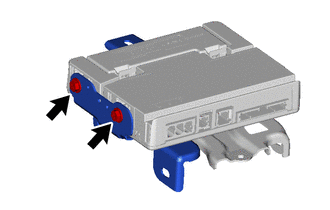
Remove the 2 screws and No. 1 telephone bracket from the telephone transceiver assembly.
86719B
5.REMOVE NO. 2 TELEPHONE BRACKET (for eCall with Single Knob Type Radio and Display)
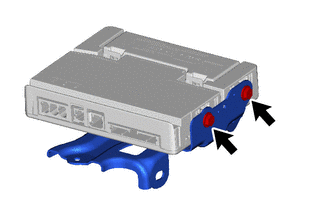
Remove the 2 screws and No. 2 telephone bracket from the telephone transceiver assembly.