BRAKE SYSTEM (OTHER) VACUUM PUMP(for 8NR-FTS) REASSEMBLY
PROCEDURE

 29331A
1.INSTALL VACUUM PUMP VANE
Apply engine oil to the vacuum pump vane and 2 vacuum pump vane caps.
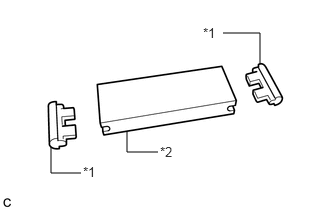
| *1 | Vacuum Pump Vane Cap |
| *2 | Vacuum Pump Vane |
Install the vacuum pump vane caps to the vacuum pump vane.
- NOTICE:
-
When reusing the vacuum pump vane and vacuum pump vane caps, install them in the same position as when they were removed.
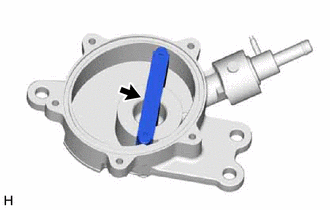

|
Engine Oil |
Apply engine oil to the vacuum pump vane with vacuum pump vane caps and install it to the vacuum pump housing.
- NOTICE:
-
When reusing the vacuum pump vane and 2 vacuum pump vane caps, install them in the same position and orientation as when they were removed.
29314A
2.INSTALL END COVER
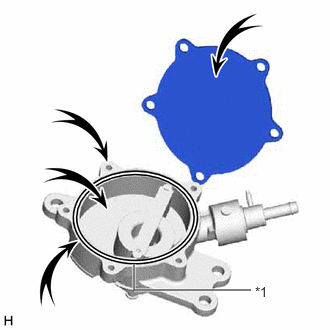
| *1 | No. 1 O-ring |
Install a new No. 1 O-ring to the vacuum pump housing.
- NOTICE:
- ·
Wipe off any oil on the vacuum pump end cover installation surface and end cover.
·Check that no foreign matter is on the No. 1 O-ring or inside the vacuum pump housing.
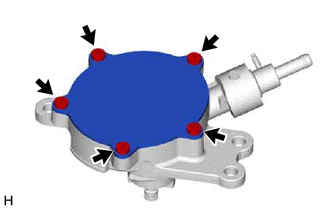
Using a T30 "TORX" socket wrench, install the end cover with 5 new screws.
- Torque:
- 7.5 N*m (76 kgf*cm, 66 in.*lbf)
- NOTICE:
- ·
Hold the pump so that the pump installation surface, fitting parts and oil pump will not be damaged.
·As the housing deforms when force is applied, do not secure the housing with a tool such as a vise.
·Securely fit the T30 "TORX" socket wrench to the screws.
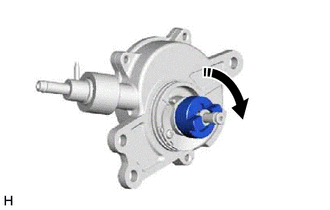
Turn the coupling clockwise as shown in the illustration and check that the coupling is not stuck or that there is no abnormal resistance.