GF1A TRANSFER / 4WD / AWD TRANSFER ASSEMBLY REMOVAL
CAUTION / NOTICE / HINT
The necessary procedures (adjustment, calibration, initialization, or registration) that must be performed after parts are removed and installed, or replaced during transfer assembly removal/installation are shown below.
| Replacement Part or Procedure | Necessary Procedure | Effect/Inoperative when not Performed | Link |
|---|---|---|---|
| Disconnect cable from negative battery terminal | Perform steering sensor zero point calibration | ·
Lane departure alert system (w/ Steering Control) ·
Toyota parking assist-sensor system*1 ·
Parking support brake system*1 ·
Simple intelligent parking assist system*1 ·
Pre-collision system |
( ) |
| Memorize steering angle neutral point | Panoramic view monitor system | ()
|
|
| Initialize back door lock | Power door lock control system | ()
|
|
·
Air leaks from intake system ·
Gas leaks from exhaust system |
Inspection After Repair | ·
Poor idle, etc. ·
Engine start function, etc. |
()
|
| Replacement of CVT fluid | ATF thermal degradation estimate reset | The value of the Data List item "ATF Thermal Degradation Estimate" is not estimated correctly | ()
|
| Replacement of continuously variable transaxle assembly | Perform the following procedures in the order shown:
1.
Reset memory 2.
Deceleration sensor zero point calibration 3.
CVT oil pressure calibration |
Deterioration of fuel efficiency | ()
|
| Front wheel alignment adjustment | Perform the following procedures in the order shown:
1.
Clear zero point calibration data and store system information 2.
Perform yaw rate and acceleration sensor zero point calibration and store system information |
·
VSC disabled or malfunctions ·
Slip indicator light illuminates ·
ABS warning light illuminates |
()
|
| Suspension, tires, etc.
(The vehicle height changes because of suspension or tire replacement) |
Initialize headlight ECU sub-assembly LH | Automatic headlight beam level control system | ()
|
*1: When performing learning using the GTS.
Click hereAudio / Visual / Telematics>PARK ASSIST / MONITORING>PARKING SUPPORT BRAKE SYSTEM>CALIBRATION
- CAUTION:
- ·
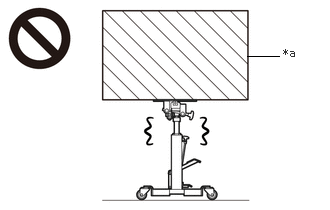 2.573,0.583 2.906,0.583 false 2.948,0.479 3.26,0.677 0.313,0.198 10 false *a
*a Heavy object exceeding the capacity of the transmission jack
Because the continuously variable transaxle assembly is extremely heavy, make sure to follow the work procedures described in the repair manual.
·If work is not performed according to the procedures described in the repair manual, there is a danger that the transmission jack could drop and components could fall down.
- ·
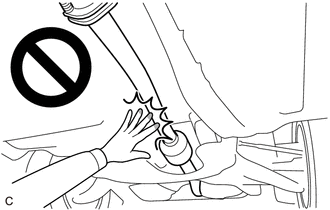
When the engine is hot, do not touch high-temperature areas such as the engine or exhaust pipe.
·Touching high-temperature areas such as the engine and exhaust pipe could result in burns.
PROCEDURE

 30400
1.REMOVE CONTINUOUSLY VARIABLE TRANSAXLE ASSEMBLY
36100
2.REMOVE TRANSFER ASSEMBLY
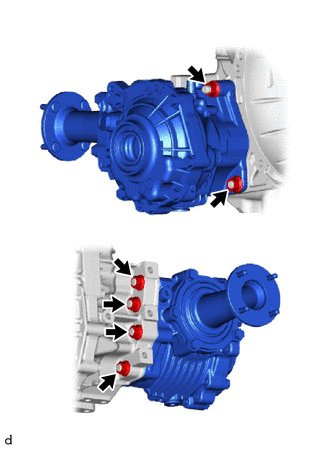
Remove the 6 nuts and transfer assembly from the transaxle.
36100A
3.REMOVE TRANSFER AND TRANSAXLE SETTING STUD BOLT
- HINT:
-
It is not necessary to remove the transfer and transaxle setting stud bolts unless they are being replaced.
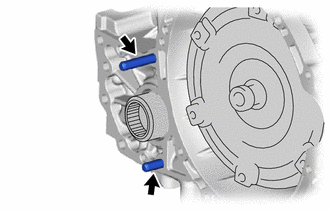
Remove the 2 transfer and transaxle setting stud bolts.