LIGHTING (EXT) HEADLIGHT ASSEMBLY(for Single Beam Headlight) REMOVAL
CAUTION / NOTICE / HINT
The necessary procedures (adjustment, calibration, initialization, or registration) that must be performed after parts are removed, installed, or replaced during the headlight assembly removal/installation are shown below.
| Replacement Part or Procedure | Necessary Procedures | Effects/Inoperative when not performed | Link |
|---|---|---|---|
|
*1: When performing learning using the GTS. Click here( |
|||
| Disconnect cable from negative battery terminal | Perform steering sensor zero point calibration | Lane departure alert system (w/ Steering Control) | ( ) |
| Toyota parking assist-sensor system*1 | |||
| Parking support brake system*1 | |||
| Simple intelligent parking assist system*1 | |||
| Pre-collision system | |||
| Memorize steering angle neutral point | Panoramic view monitor system | ()
|
|
| Initialize back door lock | Power door lock control system | ()
|
|
| Headlight ECU sub-assembly LH | ·
Synchronize vehicle information ·
Initialize headlight ECU sub-assembly LH |
Automatic headlight beam level control system | ()
|
- NOTICE:
-
If the headlight ECU sub-assembly RH is replaced with a new one, vehicle information registration and initialization are not necessary.
- HINT:
- ·
Use the same procedure for the RH side and LH side.
·The following procedure is for the LH side.
PROCEDURE

 1.REMOVE FRONT BUMPER ASSEMBLY
2. PRECAUTION
- NOTICE:
-
After turning the ignition switch off, waiting time may be required before disconnecting the cable from the negative (-) battery terminal. Therefore, make sure to read the disconnecting the cable from the negative (-) battery terminal notices before proceeding with work.
-
Click hereGeneral>INTRODUCTION>REPAIR INSTRUCTION>PRECAUTION
3.DISCONNECT CABLE FROM NEGATIVE BATTERY TERMINAL
for 8NR-FTS:
for 3ZR-FAE:
- NOTICE:
-
When disconnecting the cable, some systems need to be initialized after the cable is reconnected.
-
Click hereGeneral>INTRODUCTION>REPAIR INSTRUCTION>INITIALIZATION
85319A
4.SEPARATE INLET HOSE (for RH Side)
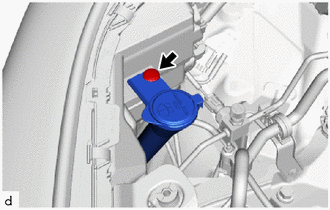
Remove the clip to separate the inlet hose.
5.REMOVE HEADLIGHT ASSEMBLY
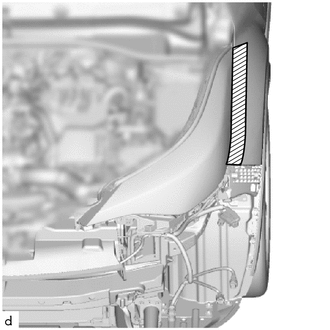

|
Protective Tape |
Apply protective tape around the headlight assembly as shown in the illustration.
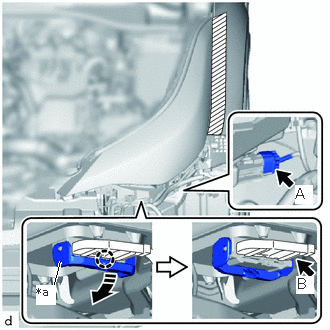
| *a | Connector Lock Lever |

|
Remove in this Direction |
Disconnect the connector A.
Disengage the claw, pull down the connector lock lever as shown in the illustration to disconnect the connector B.
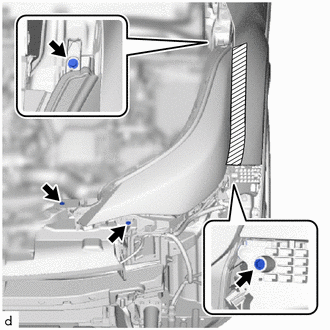
Remove the bolt and 3 screws.
|
|
Remove in this Direction |
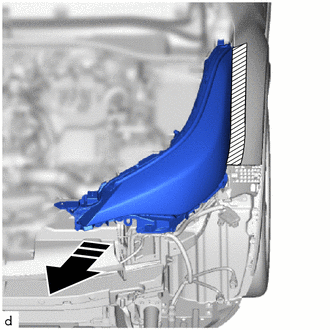
Remove the headlight assembly as shown in the illustration.