Return the front section of the roof headlining assembly to the original position (Click here).
10.
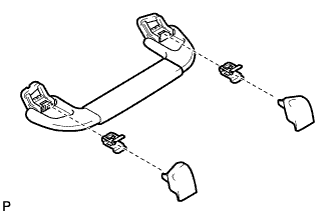
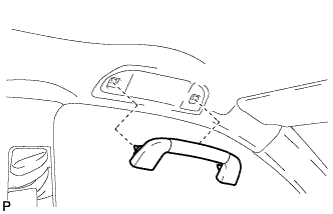
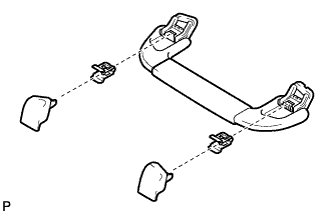
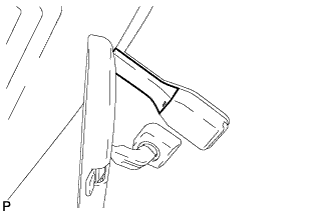
INSTALL FRONT ASSIST GRIP SUB-ASSEMBLY (for Driver Side)
with Assist Grip:
Assemble the front assist grip sub-assembly as shown in the illustration.
Install the front assist grip sub-assembly.
11.
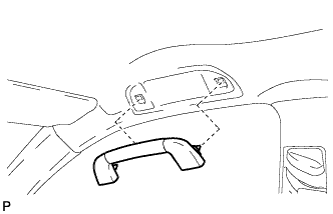
INSTALL FRONT ASSIST GRIP SUB-ASSEMBLY (for Front Passenger Side)
Assemble the front assist grip sub-assembly as shown in the illustration.
Install the front assist grip sub-assembly.
12.
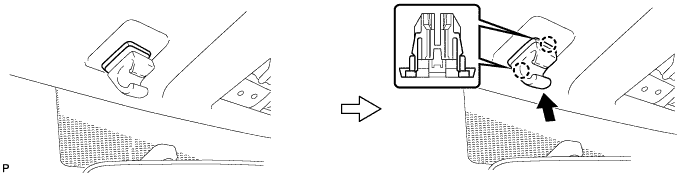
INSTALL VISOR HOLDER
Engage the 2 claws.
Push in the visor holder as shown in the illustration.
HINT:
Use the same procedure for the RH side and the LH side.
13.
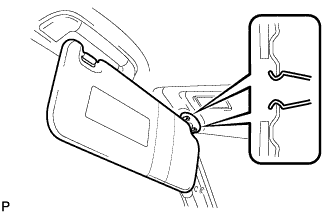
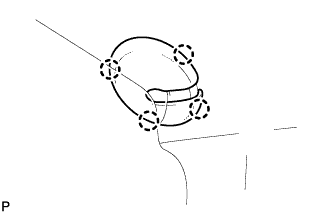
INSTALL VISOR ASSEMBLY LH
Engage the 2 clips and install the visor assembly LH.
Engage the 4 claws and install the visor bracket cover.
14.
INSTALL VISOR ASSEMBLY RH
HINT:
Use the same procedure for the RH side and the LH side.
15.
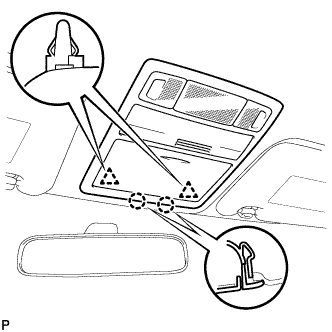
INSTALL ROOF CONSOLE BOX ASSEMBLY
Connect the connectors.
Engage the 2 claws and 2 clips, and then install the roof console box assembly.
16.
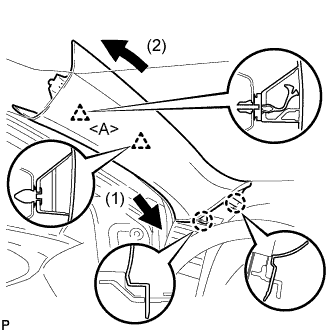
INSTALL FRONT PILLAR GARNISH LH (w/o Curtain Shield Airbag)
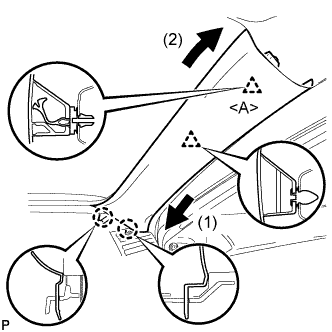
Install a new clip <A> on the front pillar garnish LH.
Engage the 2 claws and 2 clips, then install the front pillar garnish LH.
17.
INSTALL FRONT PILLAR GARNISH LH (w/ Curtain Shield Airbag)
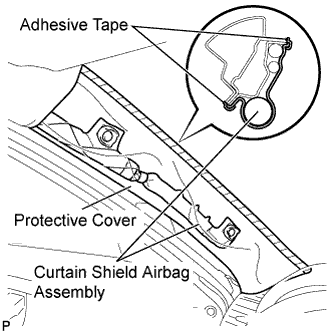
Remove the protective cover.
Install a new clip <A> on the front pillar garnish LH.
Engage the 2 claws and 2 clips, then install the front pillar garnish LH.
18.
INSTALL FRONT PILLAR GARNISH RH (w/o Curtain Shield Airbag)
Install a new clip <A> on the front pillar garnish RH.
Engage the 2 claws and 2 clips, then install the front pillar garnish RH.
19.
INSTALL FRONT PILLAR GARNISH RH (w/ Curtain Shield Airbag)
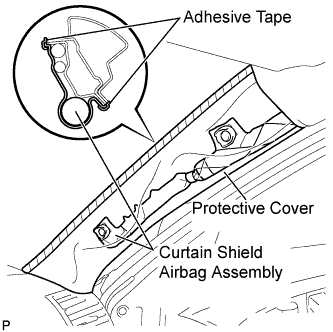
Remove the protective cover.
Install a new clip <A> on the front pillar garnish RH.
Engage the 2 claws and 2 clips, then install the front pillar garnish RH.
20.
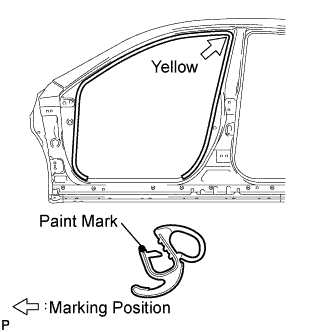
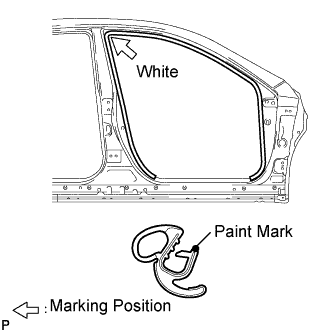
INSTALL FRONT DOOR OPENING TRIM WEATHERSTRIP LH
Install the front door opening trim weatherstrip LH as shown in the illustration.
NOTICE:
After installation, check that the corners fit correctly.
21.
INSTALL FRONT DOOR OPENING TRIM WEATHERSTRIP RH
Install the front door opening trim weatherstrip RH as shown in the illustration.
NOTICE:
After installation, check that the corners fit correctly.
22.
INSTALL RAIN SENSOR TAPE (w/ Rain Sensor)
NOTICE:
The rain sensor tape can be reused, however, replace it with a new one if it is dirty or damaged.
HINT:
This step should be performed only when the rain sensor tape needs to be replaced.
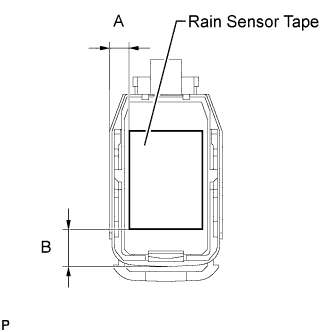
Remove the releasing sheet (yellow side) from new rain sensor tape and attach the tape to the position indicated in the illustration (the sensor part of the rain sensor) while pushing out air bubbles with your fingers.
Remove the releasing sheet (white side) from the rain sensor tape.
NOTICE:
Check that the old rain sensor tape is not left on the windshield glass. If the tape is still on the windshield glass, remove it before installing the rain sensor.
Do not touch the sensor tape surface or the glass surface directly with your fingers.
Clean up dirt on the glass with a cloth, etc.
Area
Measurement
A
7.3 mm (0.287 in.)
B
13.5 mm (0.531 in.)
23.
INSTALL RAIN SENSOR (w/ Rain Sensor)
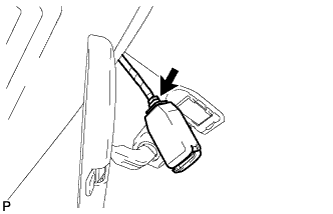
Connect the connector.
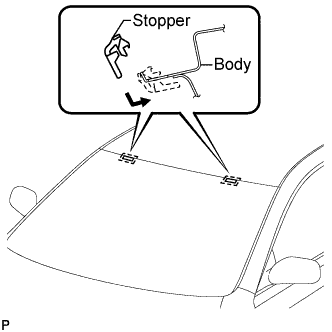
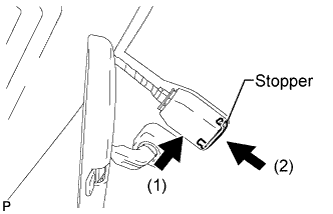
Gradually attach the rain sensor to the glass surface to prevent air bubbles from forming between them.
Hold the rain sensor and push in the stopper.
NOTICE:
Do not touch the sensor tape surface or the glass surface directly with your fingers.
Clean up dirt on the glass with a cloth, etc.
After installing the rain sensor, there should be no air bubbles between the windshield glass and the rain sensor tape.
24.
INSTALL RAIN SENSOR COVER (w/ Rain Sensor)
Install the rain sensor cover.
25.
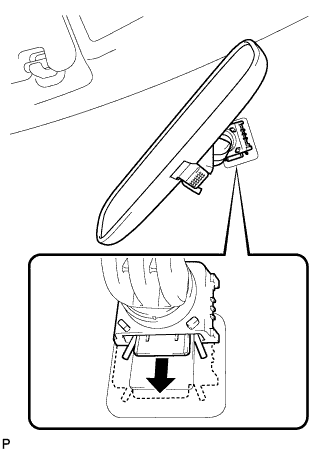
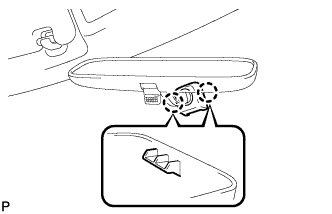
INSTALL INNER REAR VIEW MIRROR ASSEMBLY
Slide the inner rear view mirror assembly in the direction indicated by the arrow shown in the illustration to install it.
Engage the 2 claws and install the cover.
26.
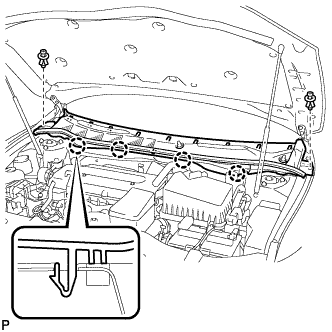
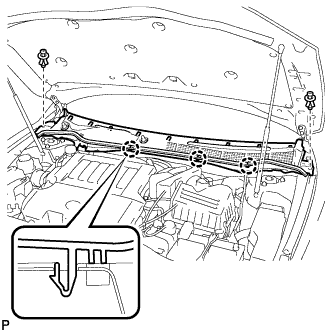
INSTALL COWL TOP VENTILATOR LOUVER SUB-ASSEMBLY (for LHD)
Engage the 4 claws and install the cowl top ventilator louver sub-assembly.
Install the 2 clips.
27.
INSTALL COWL TOP VENTILATOR LOUVER SUB-ASSEMBLY (for RHD)
Engage the 3 claws and install the cowl top ventilator louver sub-assembly.
Install the 2 clips.
28.
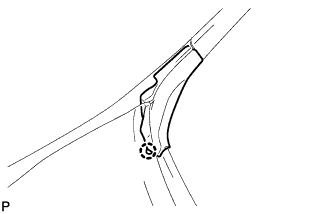
INSTALL FRONT FENDER TO COWL SIDE SEAL RH
Engage the claw and install the front fender to cowl side seal RH.
29.
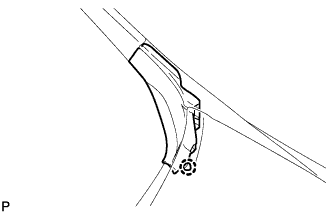
INSTALL FRONT FENDER TO COWL SIDE SEAL LH
Engage the claw and install the front fender to cowl side seal LH.
30.
CONNECT CABLE TO NEGATIVE BATTERY TERMINAL
31.
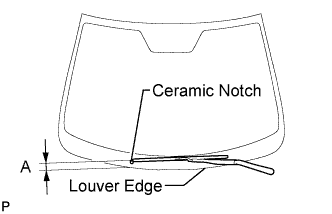
INSTALL FRONT WIPER ARM AND BLADE ASSEMBLY LH
Operate the wiper and stop the windshield wiper motor at the automatic stop position.
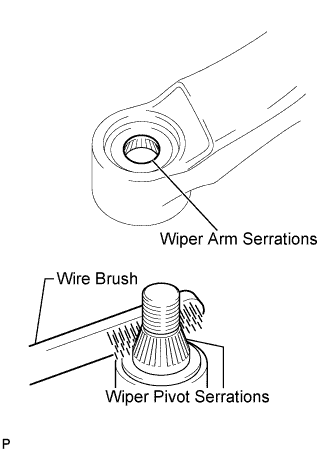
Clean the wiper arm serrations.
When reinstalling:
Clean the wiper pivot serrations with a wire brush.
Install the front wiper arm and blade assembly LH with the nut to the position shown in the illustration.
Torque:
20 N*m{
204 kgf*cm
, 15 ft.*lbf
}
HINT:
Hold the arm hinge by hand to fasten the nut.
Area
Measurement
A
37 to 52 mm (1.46 to 2.05 in.)
32.
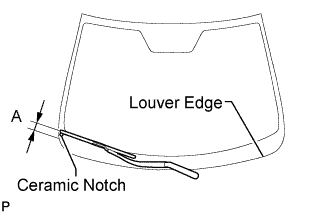
INSTALL FRONT WIPER ARM AND BLADE ASSEMBLY RH
Operate the wiper and stop the windshield wiper motor at the automatic stop position.
Clean the wiper arm serrations.
When reinstalling:
Clean the wiper pivot serrations with a wire brush.
Install the front wiper arm and blade assembly RH with the nut to the position shown in the illustration.
Torque:
20 N*m{
204 kgf*cm
, 15 ft.*lbf
}
HINT:
Hold the arm hinge by hand to fasten the nut.
Area
Measurement
A
23 to 38 mm (0.90 to 1.49 in.)
Operate the front wipers while spraying washer fluid on the windshield glass. Make sure that the front wipers function properly and the wipers do not come into contact with the vehicle body.