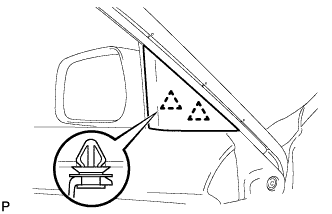
Using a heat light, heat the vehicle body surface.
Heating temperature:
Item
Temperature
Vehicle Body
40 to 60°C (104 to 140°F)
NOTICE:
Do not heat the vehicle body excessively.
Wipe off any tape adhesive residue with cleaner.
Installation temperature
When ambient temperature is below 15°C (59°F), perform the installation procedure after warming the vehicle body surface (installation surface of the door frame) and tape up to between 20 and 30°C (68 and 86°F) using a heat light. When ambient temperature is above 35°C (95°F), cool the vehicle body surface (installation surface of the door frame) and tape down to between 20 and 30°C (68 and 86°F) prior to installation.
HINT:
The most appropriate temperature for installing the tape is 25°C (77°F).
When the temperature is low, the tape turns stiff and comes off easily. When the temperature is high, the tape loses elasticity.
Before installation
Remove any roughness of coating and dirt on and around the vehicle body surface where the tape will be installed (installation surface of the door frame). If any roughness or dirt remains when pressing the tape onto the surface, air will be trapped under the tape and result in a poor appearance.
HINT:
Spray water on the shop floor to settle any dust.
Key points for handling the tape
The tape bends and rolls up easily. Store the tape between flat pieces of cardboard or other similar objects and keep it dry and level.
NOTICE:
Do not bend the tape or leave it in high temperature places.
Key points for installation of the tape (how to use a squeegee and installation procedure for flat surfaces)
NOTICE:
Conduct positioning of the tape with a high accuracy to achieve a neat finish and to avoid peeling.
The tape cannot be reused because it deforms or does not fit any more after being removed.
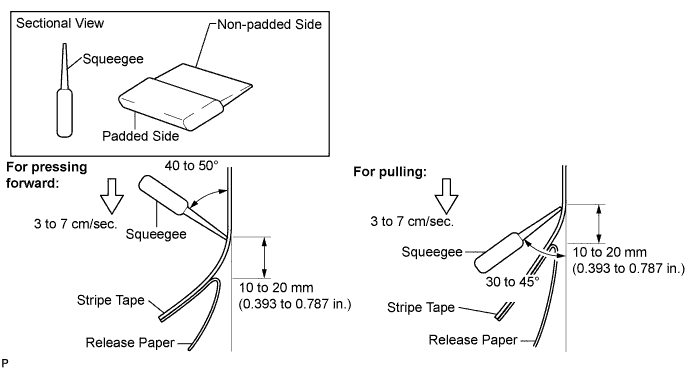
To avoid air bubbles, slightly raise the part of the tape that are going to be applied so that its adhesive surface does not touch the vehicle body while applying the tape. Tilt the squeegee at 40 to 50° (for pressing forward) or 30 to 45° (for pulling) to the vehicle body surface and press the tape onto the vehicle body surface with a force of 20 to 30 N (2 to 3 kgf) at a constant slow speed of 3 to 7 cm (1.2 to 2.8 in.) per second.
NOTICE:
Be sure to observe the specified pressing speed, force, and angle of the squeegee to avoid wrinkles or air bubbles.
HINT:
Either angle of the squeegee (for pressing forward or for pulling) is acceptable.
Be sure to apply tape while removing the release paper 10 to 20 mm (0.393 to 0.787 in.) from the edge of the squeegee.
Key points for installation of the tape (how to use a squeegee and installation procedure for hemming surfaces)
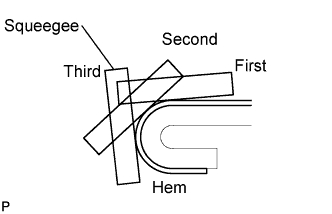
If it is difficult to press the tape, press it in several steps as shown in the illustration. Use your fingers or the padded surface of a squeegee to slowly apply the tape to the hem of the vehicle, especially for a small hem.
HINT:
When applying tape to the backside of a hem, remove the release paper and use your fingers or the padded surface of a squeegee.
Key points for installation of the tape (how to use a squeegee and installation procedure for corners)
Remove the release paper and apply the tape carefully with your fingers.
Before applying the tape to each corner, heat the tape using a heat light and gradually apply it, to avoid wrinkles on the tape and achieve a neat finish.
Check after installation
After completing the application, check if the tape is applied neatly. If the tape is not applied neatly, reapply using new tape.
NOTICE:
Do not reuse the tape.
2.
INSTALL FRONT DOOR LOWER OUTSIDE STRIPE
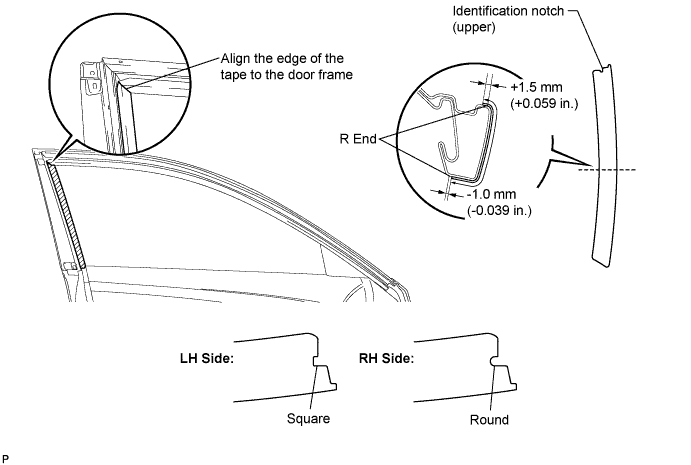
Refer to the illustration to position the front door lower outside stripe.
Remove the release paper and apply the stripe.
3.
INSTALL FRONT DOOR STRIPE
NOTICE:
Be sure to install the front door stripe after applying the front door lower outside stripe.
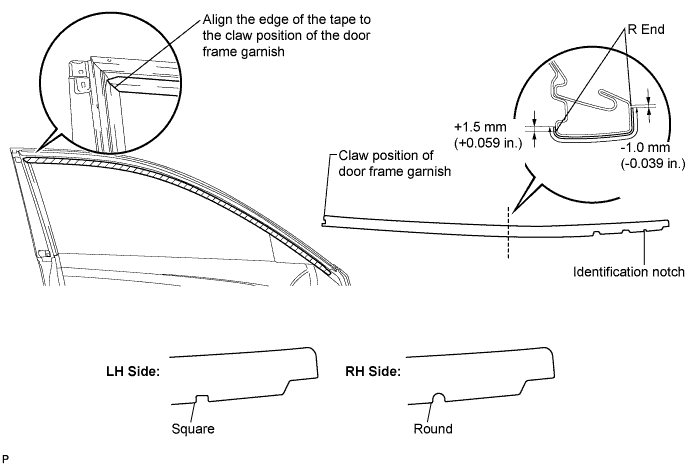
Refer to the illustration to position the front door stripe.
Remove the release paper and apply the stripe.
4.
INSTALL DOOR FRAME GARNISH
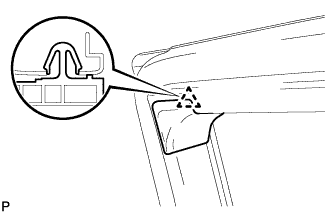
Engage the clip and install a new door frame garnish.
5.
INSTALL FRONT DOOR WEATHERSTRIP
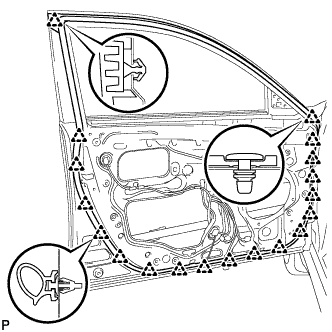
Engage the 19 clips and install the front door weatherstrip.
6.
INSTALL FRONT DOOR GLASS RUN
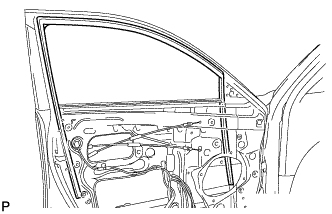
Install the front door glass run.
7.
INSTALL FRONT DOOR GLASS SUB-ASSEMBLY
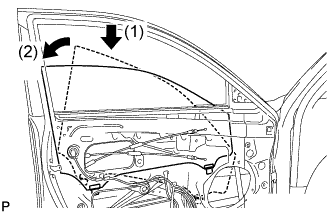
Insert the front door glass sub-assembly into the front door panel along the front door glass run as indicated in the order of the arrows in the illustration.
Install the front door glass sub-assembly with the 2 bolts.
Torque:
5.5 N*m{
56 kgf*cm
, 49 in.*lbf
}
8.
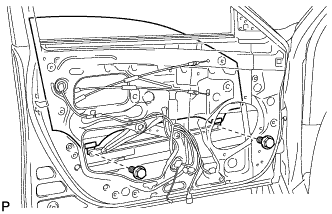
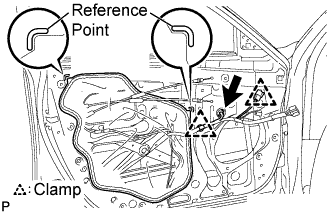
INSTALL FRONT DOOR SERVICE HOLE COVER
Apply butyl tape to the front door panel.
Pass the front door lock remote control cable and rear door inside locking cable through a new front door service hole cover.
Install a new service hole cover.
NOTICE:
Securely install the front door service hole cover avoiding wrinkles and air bubbles.
Connect each connector and each clamp.
9.
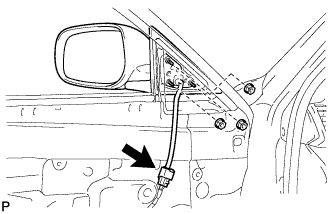
INSTALL OUTER REAR VIEW MIRROR ASSEMBLY
Install the outer rear view mirror assembly with the 3 nuts.
Torque:
4.5 N*m{
46 kgf*cm
, 40 in.*lbf
}
Connect the connector.
10.
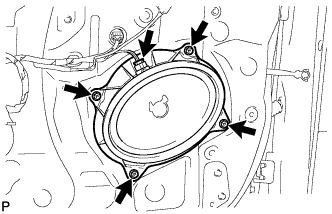
INSTALL FRONT NO. 1 SPEAKER ASSEMBLY
Install the front No. 1 speaker assembly with the 4 bolts.
Connect the connector.
11.
INSTALL FRONT DOOR INNER GLASS WEATHERSTRIP
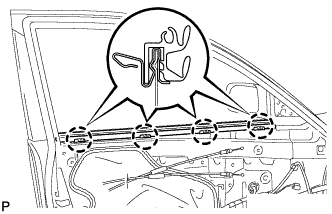
Engage the 4 claws and install the front door inner glass weatherstrip.
12.
INSTALL FRONT DOOR INSIDE HANDLE SUB-ASSEMBLY
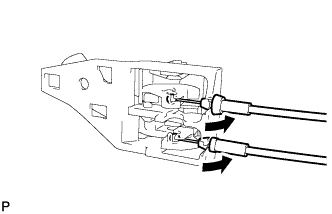
Connect the front door lock remote control cable and front door inside locking cable to the front door inside handle sub-assembly.
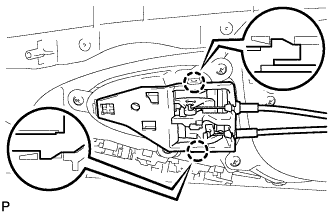
Engage the 2 claws and install the front door inside handle sub-assembly.
13.
INSTALL FRONT DOOR TRIM BOARD SUB-ASSEMBLY
Connect each connector.
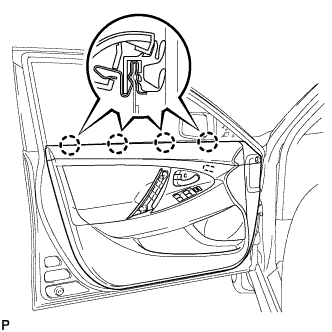
Engage the front door trim board with the 4 clips of the front door inner glass weatherstrip.
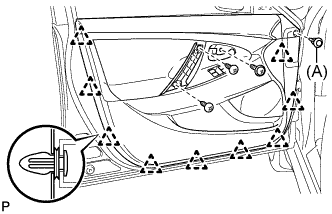
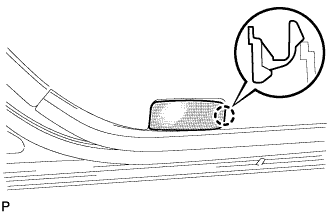
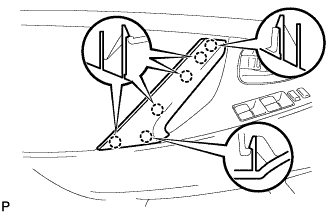
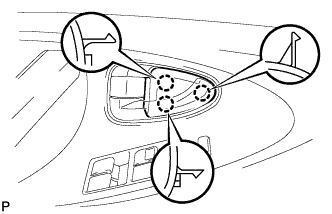
Engage the 9 clips and install the front door trim board to the front door panel.