Home › RESTRAINTS › SUPPLEMENTAL RESTRAINT SYSTEM › SEAT POSITION SENSORREMOVAL
Removal / installation · Vehicles built from Jun 2009
Versions by build date: Jun 2006 – Sep 2006 Oct 2006 – May 2009 from Jun 2009
HINT:
Use the same procedure for the RHD driver side and LHD driver side.
The procedure listed below are for LHD driver side.
1.
PRECAUTION
CAUTION:
Be sure to read "PRECAUTION" thoroughly before servicing (Click here ).
2.
DISCONNECT CABLE FROM NEGATIVE BATTERY TERMINAL (for Manual Seat)
CAUTION:
Wait for 90 seconds after disconnecting the cable to prevent airbag deployment.
3.
REMOVE FRONT SEAT HEADREST ASSEMBLY (for Manual Seat)
4.
REMOVE OUTER SEAT TRACK BRACKET COVER LH (for Manual Seat)
Move the front seat assembly fully forward by operating the slide handle.
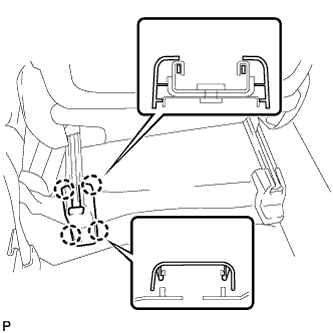
Using a screwdriver, disengage the 4 claws and remove the outer seat track bracket cover.
HINT:
Tape the screwdriver tip before use.
5.
REMOVE INNER SEAT TRACK BRACKET COVER LH (for Manual Seat)
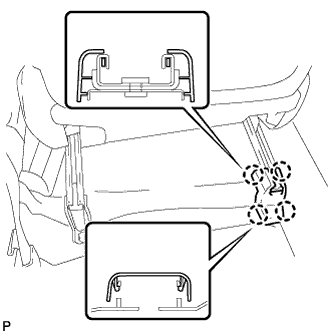
Using a screwdriver, disengage the 4 claws and remove the inner seat track bracket cover.
HINT:
Tape the screwdriver tip before use.
6.
REMOVE FRONT SEAT ASSEMBLY LH (for Manual Seat)
Move the front seat assembly to the rearmost position by operating the slide handle.
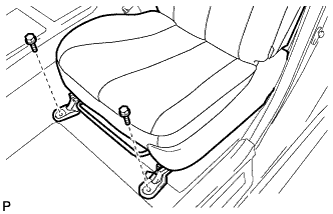
Remove the 2 bolts on the front seat track bracket. Move the front seat assembly fully forward by operating the slide handle.
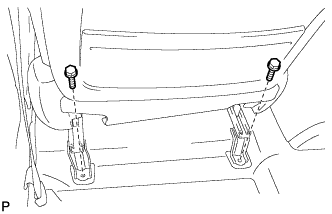
Remove the 2 bolts on the rear seat track bracket. Move the front seat assembly to the center position and adjust the seatback to the vertical position by operating the slide and reclining adjuster release handle.
Disconnect the connectors and clamp.
Remove the front seat assembly.
7.
REMOVE FRONT SEAT HEADREST ASSEMBLY (for Power Seat)
8.
REMOVE OUTER SEAT TRACK BRACKET COVER LH (for Power Seat)
for 2AZ-FE: (Click here ) for 2GR-FE: (Click here )
9.
REMOVE INNER SEAT TRACK BRACKET COVER LH (for Power Seat)
for 2AZ-FE: (Click here ) for 2GR-FE: (Click here )
10.
REMOVE FRONT SEAT ASSEMBLY LH (for Power Seat)
for 2AZ-FE: (Click here ) for 2GR-FE: (Click here )
11.
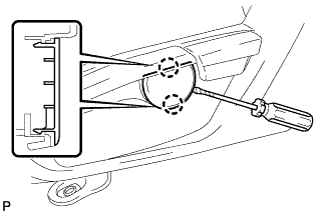
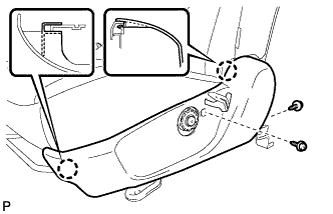
REMOVE VERTICAL ADJUSTER COVER LH (for Manual Seat)
Using a screwdriver, disengage the 2 claws and remove the vertical adjuster cover LH.
HINT:
Tape the screwdriver tip before use.
12.
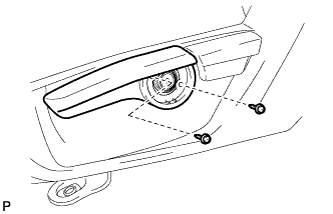
REMOVE VERTICAL ADJUSTING HANDLE (for Manual Seat)
Remove the 2 screws and vertical adjusting handle.
13.
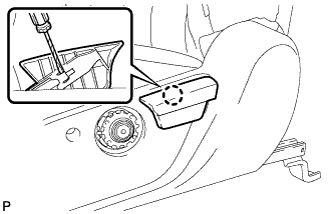
REMOVE RECLINING ADJUSTER RELEASE HANDLE (for Manual Seat)
Lift the reclining adjuster release handle. Using a screwdriver, disengage the claw and remove the reclining adjuster release handle.
HINT:
Tape the screwdriver tip before use.
14.
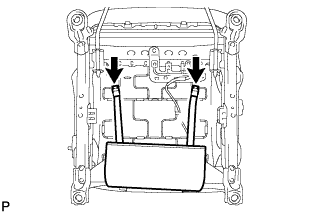
REMOVE FRONT SEAT CUSHION SHIELD (for Manual Seat)
Disengage the 2 hooks.
Remove the 2 screws. Disengage the 2 claws and separate the front seat cushion shield.
Disconnect the connector from the front power seat lumbar switch. (w/ lumber support)
15.
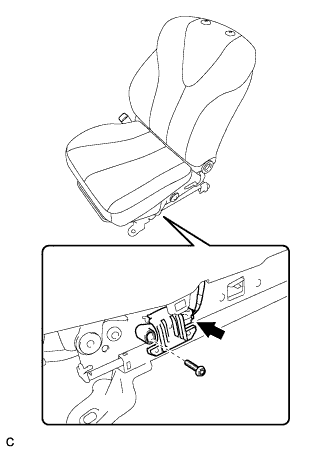
REMOVE SEAT POSITION SENSOR (for Manual Seat)
Disconnect the connector. Using a "TORX" socket (T30), remove the "TORX" screw and seat position sensor with the seat slide position sensor protector.
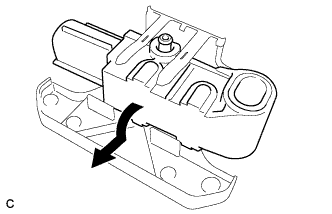
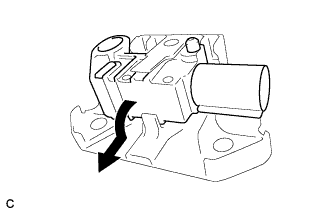
Remove the seat position sensor from the seat slide position sensor protector as shown in the illustration.
16.
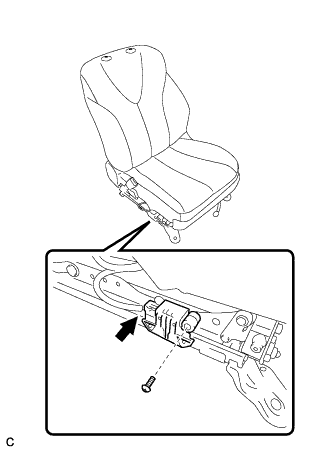
REMOVE SEAT POSITION SENSOR (for Power Seat)
Disconnect the connector. Using a "TORX" socket (T30), remove the "TORX" screw and seat position sensor with the seat slide position sensor protector.
Remove the seat position sensor from the seat slide position sensor protector as shown in the illustration.