REASSEMBLY
Removal / installation · Vehicles built from Jun 2006
| 1. INSTALL INPUT SHAFT FRONT BEARING |

Using SST and a press, install the input shaft front bearing (inner race).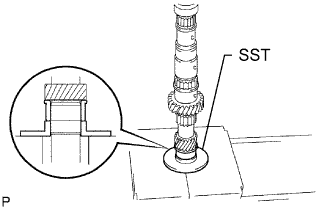

- SST
- 09608-00071
| 2. INSTALL NO. 2 TRANSMISSION HUB SLEEVE |
Coat the transmission No. 2 hub sleeve with gear oil.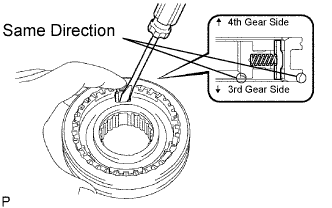
Install the 3 synchromesh key springs with the No. 2 transmission hub sleeve.
- NOTICE:
- Install the No. 2 transmission clutch hub sleeve and the No. 2 transmission clutch hub in the correct direction.
Using a screwdriver, install the synchromesh shifting key to the input shaft.
| 3. INSTALL 3RD GEAR NEEDLE ROLLER BEARING |
Coat the 3rd gear bearing with gear oil and install it to the input shaft.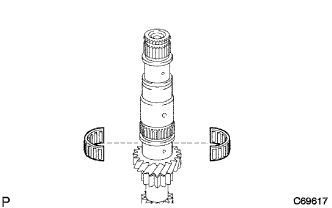
| 4. INSTALL 3RD GEAR |
Coat the 3rd gear with gear oil and install it to the input shaft.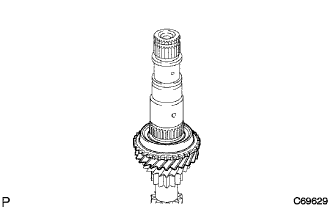
| 5. INSTALL NO. 3 SYNCHRONIZER RING |
Coat the No. 3 synchronizer ring with gear oil and install it to the 3rd gear.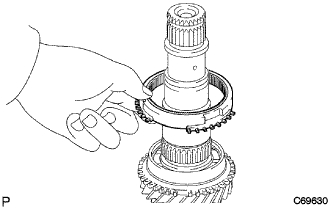
| 6. INSTALL NO. 2 TRANSMISSION CLUTCH HUB |
Using SST and a press, install the No. 2 transmission clutch hub to the input shaft.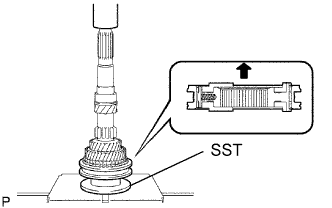
- SST
- 09316-60011
(09316-00041)
- NOTICE:
- Align the claw of the clutch hub No. 2 with the notch of the synchronizer ring No. 3.
- Make sure that the 3rd gear can rotate.
- Align the claw of the clutch hub No. 2 with the notch of the synchronizer ring No. 3.
Select a snap ring so that clearance between the No. 2 transmission clutch hub and the No. 2 clutch hub shaft snap ring will be within the specified range. Using a brass bar and a hammer, install the snap ring.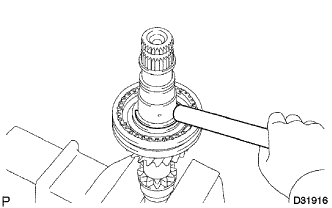
- Standard clearance:
- 0.1 mm or less (0.0039 in.) or less
- Snap ring thickness:
Part No.
Thickness: mm (in.)
Mark
90520-34003
2.30 to 2.35
(0.0906 to 0.0925)
H
90520-34004
2.35 to 2.40
(0.0925 to 0.0945)
J
90520-34005
2.40 to 2.45
(0.0945 to 0.0965)
K
90520-34006
2.45 to 2.50
(0.0965 to 0.0984)
L
90520-34007
2.50 to 2.55
(0.0984 to 0.1004)
M
90520-34008
2.55 to 2.60
(0.1004 to 0.1024)
N
90520-34009
2.60 to 2.65
(0.1024 to 0.1043)
P
| 7. INSTALL 4TH GEAR BEARING SPACER |
Coat the 4th gear bearing spacer with gear oil and install it to the input shaft.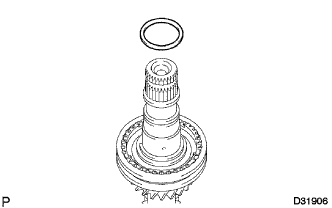
| 8. INSTALL 2ND SYNCHRONIZER OUTER RING |
Coat the 2nd synchronizer outer ring (No. 4 synchronizer ring) with gear oil and install it to the No. 2 transmission clutch hub.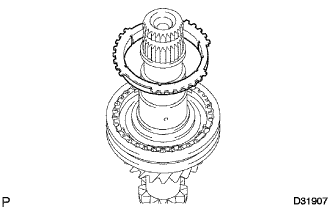
- NOTICE:
- Align the claw of the No. 2 clutch hub with the notch of the 2nd synchronizer outer ring (No. 4 synchronizer ring).
| 9. INSTALL 4TH GEAR NEEDLE ROLLER BEARING |
Coat the 4th gear needle roller bearing with gear oil and install it to the input shaft.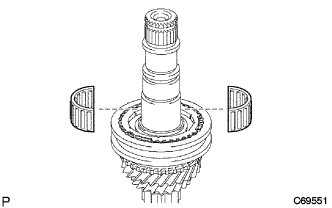
| 10. INSTALL 4TH GEAR |
Coat the 4th gear with gear oil and install it to the input shaft.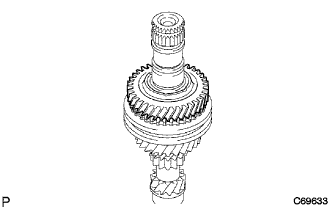
| 11. INSTALL INPUT SHAFT REAR RADIAL BALL BEARING |
Using SST and a press, install the input shaft rear radial ball bearing to the input shaft.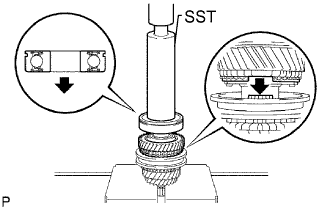
- SST
- 09608-06041
- NOTICE:
- Install the bearing with its groove facing rearward.
- Make sure that the 3rd gear rotates.
- Install the bearing with its groove facing rearward.
Select a snap ring so that the clearance between the input shaft radial ball rear bearing and the input shaft rear bearing snap ring will be within the specified range. Using a brass bar and a hammer, install the snap ring.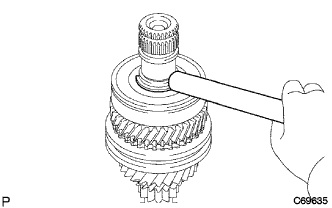
- Standard clearance:
- 0.1 mm (0.004 in.) or less
- Snap ring:
Part No.
Thickness: mm (in.)
Mark
90520-30008
2.35 to 2.40
(0.0925 to 0.0945)
1
90520-30009
2.40 to 2.45
(0.0945 to 0.0965)
2
90520-30010
2.45 to 2.50
(0.0965 to 0.0984)
3
90520-30011
2.50 to 2.55
(0.0984 to 0.1004)
4
90520-30012
2.55 to 2.60
(0.1004 to 0.1024)
5
90520-30013
2.60 to 2.65
(0.1024 to 0.1043)
6
90520-30021
2.65 to 2.70
(0.1043 to 0.1063)
7
90520-30022
2.70 to 2.75
(0.1063 to 0.1083)
8