INSTALLATION
Removal / installation · Vehicles built Oct 2006 – May 2009
Versions by build date: Jun 2006 – Sep 2006 Oct 2006 – May 2009 from Jun 2009
| 1.
INSTALL SKID CONTROL SENSOR |
 |
- Clean the contact surface between the rear axle hub and bearing assembly and a new skid control sensor.
- NOTICE:
- Prevent foreign matter from attaching to the skid control sensor rotor.
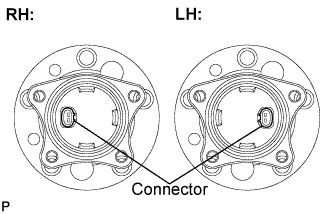
Place the skid control sensor on the rear axle hub and bearing assembly so that the connector is positioned as shown in the illustration.
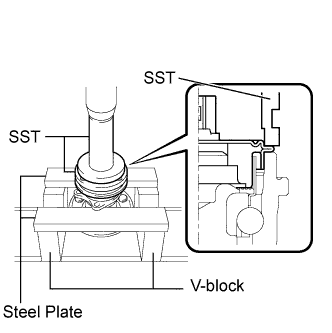
- Using SST, a press, 2 V-blocks, and 2 steel plates, install the skid control sensor to the rear axle hub and bearing assembly.
- SST
- 09309-36010
09213-58013
- NOTICE:
- Keep the skid control sensor away from magnets.
- Do not use a hammer on the skid control sensor.
- Check that there is no foreign matter such as iron chips on the detecting portion of the skid control sensor.
- Slowly press the skid control sensor straight.
| 2.
INSTALL REAR AXLE HUB AND BEARING ASSEMBLY WITH SKID CONTROL SENSOR
|
|
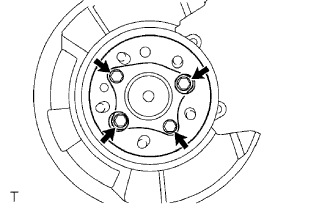
- Install the hub and bearing assembly with the 4 bolts.
-
Torque:
- 80 N*m{
816 kgf*cm
, 59 ft.*lbf
}
Connect the skid control sensor connector.
- NOTICE:
- Do not twist the sensor wire when connecting it.
| 3.
INSPECT REAR AXLE HUB BEARING LOOSENESS
|
|
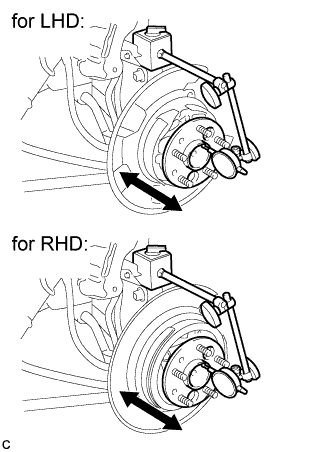
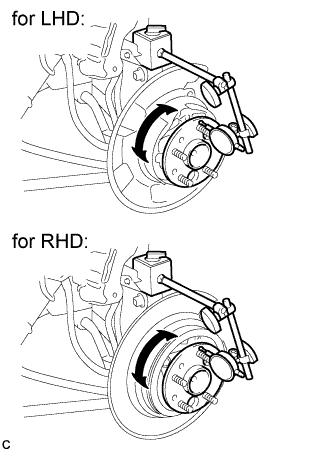
- Using a dial indicator, check for looseness near the center of the axle hub.
- Maximum:
- 0.05 mm (0.0020 in.)
- NOTICE:
- Ensure that the dial indicator is set perpendicular to the measurement surface.
If looseness exceeds the maximum, replace the axle hub assembly.
| 4.
INSPECT REAR AXLE HUB RUNOUT
|
|
- Using a dial indicator, check for runout on the surface of the axle hub outside the hub bolt.
- Maximum:
- 0.07 mm (0.0027 in.)
- NOTICE:
- Ensure that the dial indicator is set perpendicular to the measurement surface.
If runout exceeds the maximum, replace the axle hub assembly.
| 5.
INSTALL REAR DISC (for LHD)
|
|
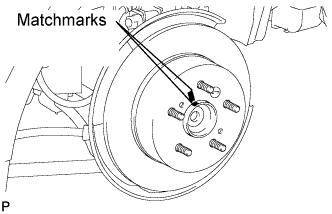
- Aligning the matchmarks, install the rear disc.
- HINT:
- When replacing the rear disc with a new one, select the installation position where the rear disc has the minimum runout.
| 6.
INSTALL REAR DISC (for RHD)
|
|
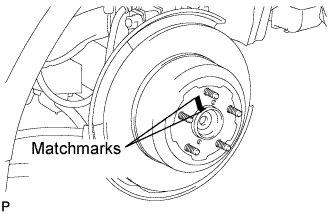
- Aligning the matchmarks, install the rear disc.
- HINT:
- When replacing the rear disc with a new one, select the installation position where the rear disc has the minimum runout.
| 7.
INSTALL REAR DISC BRAKE CALIPER ASSEMBLY
|
|
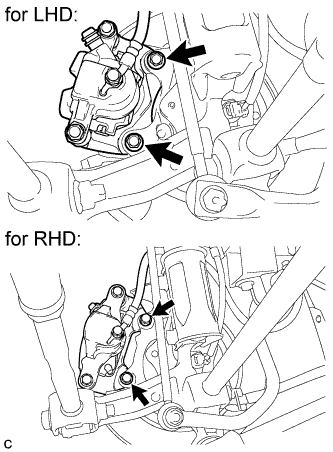
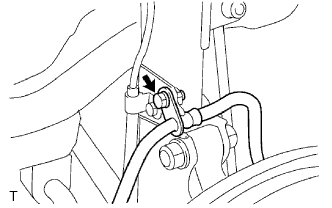
- Install the rear disc brake caliper with the 2 bolts.
-
Torque:
- for LHD:
- 62 N*m{
632 kgf*cm
, 46 ft.*lbf
}
- for RHD:
- 47 N*m{
479 kgf*cm
, 35 ft.*lbf
}
- NOTICE:
- Do not twist the brake hose when installing the rear disc brake caliper assembly LH.
- Install the rear flexible hose with the bolt.
-
Torque:
- 19 N*m{
192 kgf*cm
, 14 ft.*lbf
}
| 8.
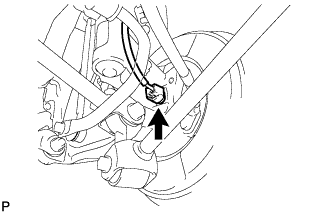
CONNECT SKID CONTROL SENSOR WIRE |
|
- Connect the connector to the skid control sensor.
| 9.
INSTALL REAR WHEEL |
|
-
Torque:
- 103 N*m{
1,050 kgf*cm
, 76 ft.*lbf
}
| 10.
INSPECT AND ADJUST REAR WHEEL ALIGNMENT |
|
- HINT:
- (Click here)
| 11.
CHECK SPEED SENSOR SIGNAL |
|
- HINT:
- without VSC (Click here)
- with VSC (Click here)