Removal / installation · Vehicles built Oct 2006 – May 2009
Versions by build date: Oct 2006 – May 2009from Jun 2009
1.
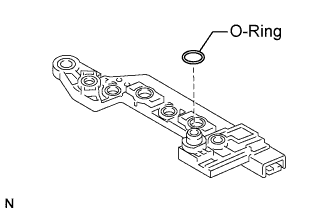
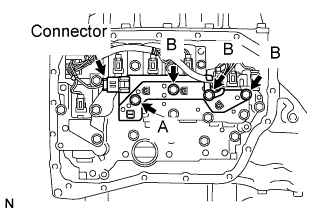
INSTALL ATF TEMPERATURE SENSOR ASSEMBLY
Coat a new O-ring with ATF and install it to the ATF temperature sensor assembly.
Coat the 4 bolts with ATF.
Install the ATF temperature sensor assembly and clamp to the valve body with the 4 bolts.
Torque:
11 N*m{
112 kgf*cm
, 8 ft.*lbf
}
Bolt length:
Bolt A:
25 mm (0.98 in.)
Bolt B:
85 mm (3.35 in.)
Connect the connector.
2.
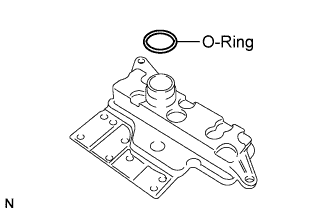
INSTALL VALVE BODY OIL STRAINER ASSEMBLY
Coat a new O-ring with ATF and install it to the oil strainer.
NOTICE:
Ensure that the O-ring is not twisted or pinched.
Install the oil strainer to the valve body with the 2 bolts.
Torque:
11 N*m{
112 kgf*cm
, 8 ft.*lbf
}
3.
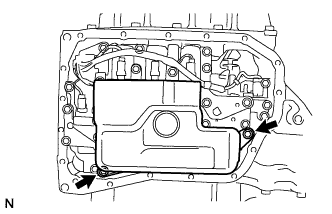
INSTALL AUTOMATIC TRANSAXLE OIL PAN SUB-ASSEMBLY
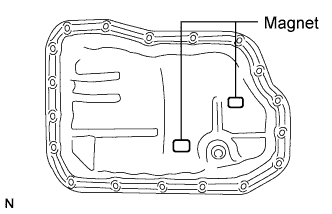
Install the 2 magnets to the oil pan.
Install a new gasket to the oil pan.
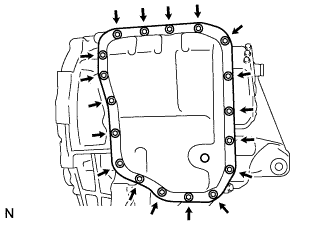
Apply adhesive to the 18 bolts.
Adhesive:
Toyota Genuine Adhesive 1344, Three Bond 1344 or equivalent
Install the oil pan to the automatic transaxle with the 18 bolts.
Torque:
7.5 N*m{
77 kgf*cm
, 66 in.*lbf
}
NOTICE:
In order to ensure proper sealing of the transmission oil pan bolts, apply adhesive to the bolts and install them within 10 minutes of adhesive application.
Completely remove any oil or grease from the contact surface of the transaxle case and oil pan sub-assembly with the gasket before installation.