REMOVAL
Removal / installation · Vehicles built Jun 2006 – Sep 2006
Versions by build date: Jun 2006 – Sep 2006 Oct 2006 – May 2009 from Jun 2009
| 2.
REMOVE ENGINE UNDER COVER RH |
|
| 3.
REMOVE ENGINE UNDER COVER LH |
|
| 4.
REMOVE AIR CLEANER CAP SUB-ASSEMBLY
|
 |
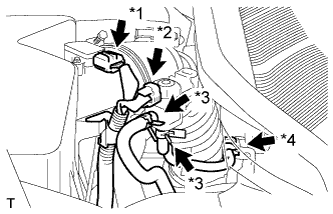
- Disconnect the mass air flow meter connector (*1).
Disconnect the purge VSV connector (*2).
Disconnect the 2 purge VSV vacuum hoses (*3).
Disconnect the purge line hose from the clamp (*4).
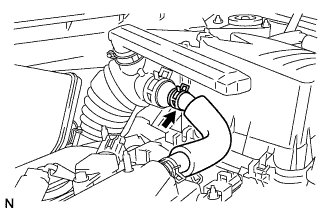
- Disconnect the No. 2 ventilation hose from the air cleaner hose.
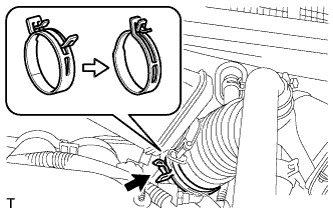
- Lock the No. 1 air cleaner hose clamp, and then disconnect the No. 1 air cleaner hose from the throttle body.
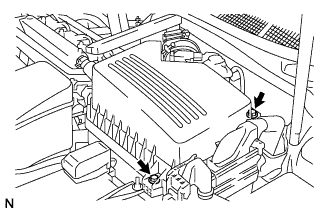
- Remove the 2 bolts and air cleaner cap.
Remove the air cleaner filter element from the air cleaner case.
| 5.
REMOVE AIR CLEANER INLET ASSEMBLY
|
|
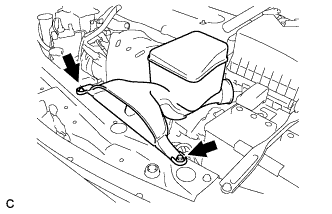
- Remove the 2 bolts, clamp and air cleaner inlet.
| 6.
REMOVE FRONT BUMPER ASSEMBLY (w/ Fog Light)
|
|
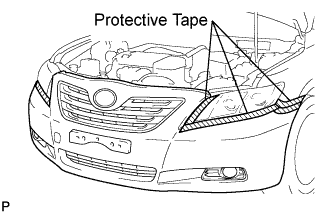
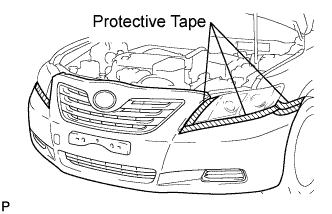
- Put protective tape around the front bumper assembly.
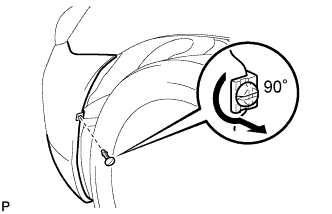
- Using a screwdriver, turn the pin 90 degrees and remove the pin hold clip.
- HINT:
- Use the same procedure for the RH side and LH side.
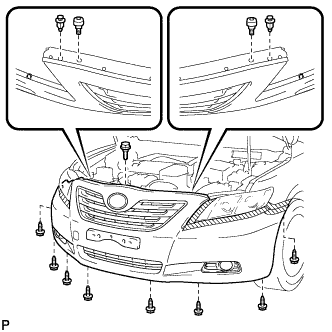
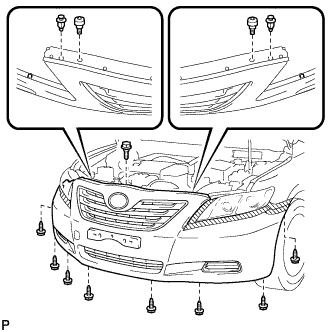
- Remove the 8 screws, 2 clips, 2 radiator grille protectors and bolt.
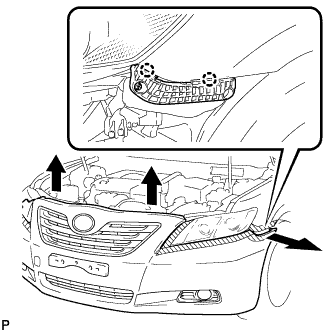
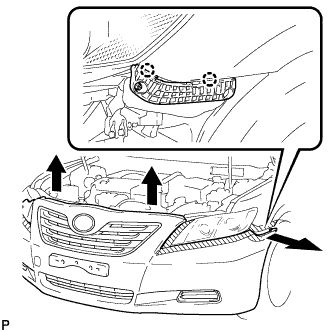
- Disengage the 2 claws and disconnect the front bumper assembly as shown in the illustration.
- HINT:
- Use the same procedure for the RH side and LH side.
Disconnect each connector, and then remove the front bumper assembly.
| 7.
REMOVE FRONT BUMPER ASSEMBLY (w/o Fog Light)
|
|
- Put protective tape around the front bumper assembly.
- Using a screwdriver, turn the pin 90 degrees and remove the pin hold clip.
- HINT:
- Use the same procedure for the RH side and LH side.
- Remove the 8 screws, 2 clips, 2 radiator grille protectors and bolt.
- Disengage the 2 claws and disconnect the front bumper assembly as shown in the illustration.
- HINT:
- Use the same procedure for the RH side and LH side.
Remove the front bumper assembly.
| 8.
REMOVE FRONT BUMPER ENERGY ABSORBER
|
|
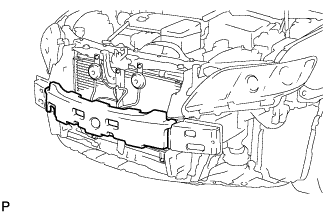
- Remove the front bumper energy absorber from the front bumper reinforcement sub-assembly.
| 9.
SEPARATE RADIATOR RESERVOIR TANK HOSE |
|
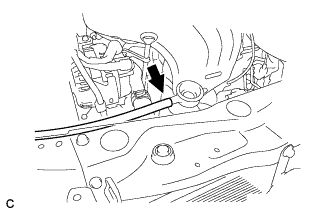
- Separate the radiator reserve tank hose from the radiator assembly.
| 10.
DISCONNECT RADIATOR HOSE INLET |
|
- Disconnect the radiator hose inlet from the radiator assembly.
| 11.
DISCONNECT RADIATOR HOSE OUTLET |
|
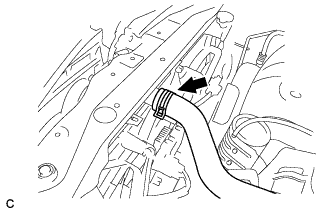
- Disconnect the radiator hose outlet from the radiator assembly.
| 12.
DISCONNECT OIL COOLER INLET HOSE (for Automatic Transaxle) |
|
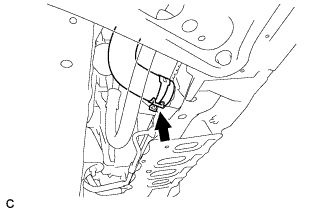
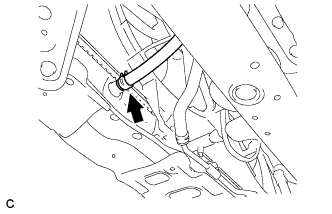
- Disconnect the oil cooler inlet hose from the radiator assembly.
| 13.
DISCONNECT OIL COOLER OUTLET HOSE (for Automatic Transaxle) |
|
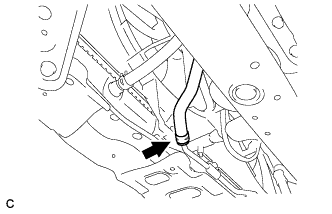
- Disconnect the oil cooler outlet hose from the radiator assembly.
| 14.
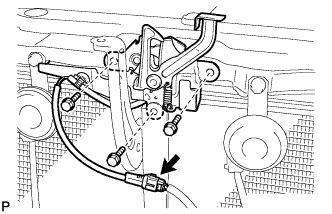
REMOVE HOOD LOCK ASSEMBLY (for LHD) |
|
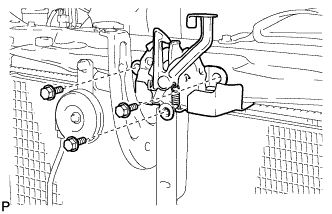
- Remove the 3 bolts.
- Disconnect the hood lock control cable.
Remove the hood lock assembly.
| 15.
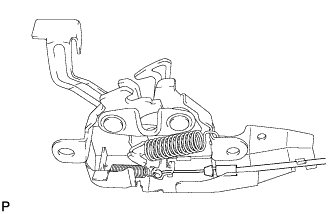
REMOVE HOOD LOCK ASSEMBLY (for RHD) |
|
- Disconnect the connector.
Remove the 3 bolts.
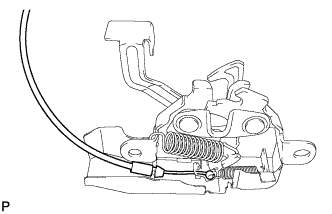
- Disconnect the hood lock control cable.
Remove the hood lock assembly.
| 16.
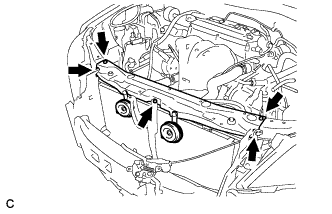
REMOVE RADIATOR SUPPORT UPPER |
|
Remove the clamp and separate the hood lock control cable from the radiator support upper.
- Remove the 5 bolts and radiator support upper.
| 17.
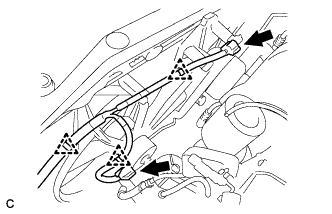
REMOVE RADIATOR ASSEMBLY |
|
- Remove the 3 clamps and disconnect the 2 connectors.
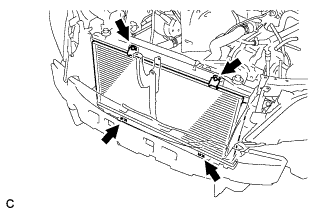
- Remove the 4 bolts and separate the condenser assembly from the radiator assembly.
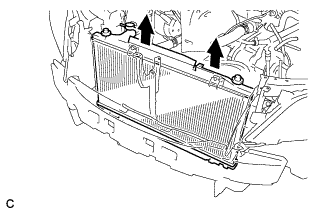
- Remove the radiator assembly from the body.
| 18.
REMOVE FAN ASSEMBLY WITH MOTOR |
|
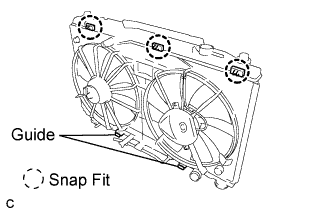
- Release the 3 snap fits and lift the fan assembly with motor from the radiator.
| 19.
REMOVE RADIATOR SUPPORT CUSHION |
|
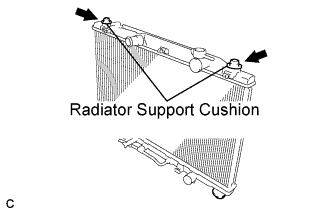
- Remove the 2 radiator support cushions from the radiator assembly.
| 20.
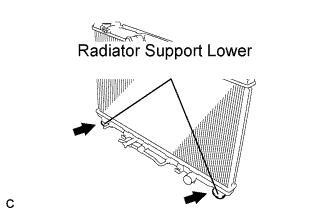
REMOVE RADIATOR SUPPORT LOWER |
|
- Remove the 2 radiator support lowers from the radiator assembly.