Security Horn Circuit
Circuit diagnosis · Vehicles built from Oct 2006
DESCRIPTION
When the theft deterrent system is changed from the armed state to the alarm sounding state, the certification ECU can control the security horn.WIRING DIAGRAM
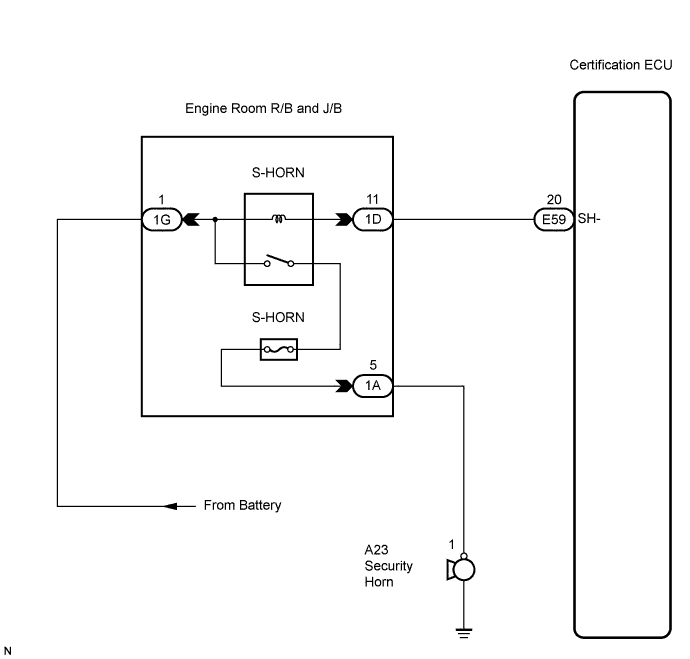

INSPECTION PROCEDURE
| 1. INSPECT SECURITY HORN ASSEMBLY |

Remove the security horn assembly.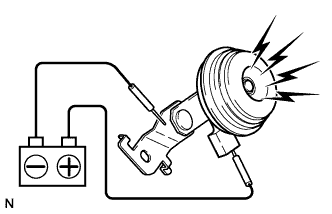
Check operation of the horn.
- Standard:
Measurement Condition
Specified Condition
Battery positive (+) → Terminal 1
Horn sounds
Battery negative (-) → Horn body
|
|
||||

| OK | |
 |
| 2. CHECK HARNESS AND CONNECTOR (ENGINE ROOM J/B - SECURITY HORN ASSEMBLY) |
Disconnect the 1A J/B connector and the A23 horn connector.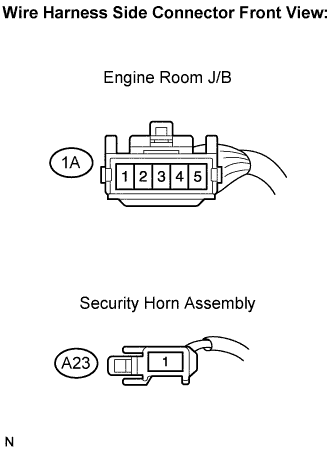
Measure the resistance according to the value(s) in the table below.
- Standard resistance:
Terminal Connection
Specified Condition
1A-5 - A23-1
Below 1 Ω
1A-5 - Body ground
10 kΩ or higher
|
|
||||
| OK | |
|
| 3. CHECK HARNESS AND CONNECTOR (CERTIFICATION ECU - ENGINE ROOM J/B) |
Disconnect the E59 ECU connector and 1D J/B connector.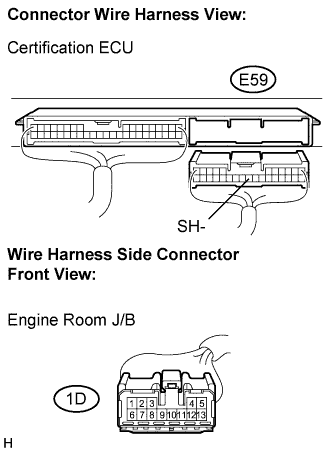
Measure the resistance according to the value(s) in the table below.
- Standard resistance:
Symbol (Terminal Connection)
Specified Condition
SH- (E59-20) - (1D-11)
Below 1 Ω
SH- (E59-20) - Body ground
10 kΩ or higher
|
|
||||
| OK | |
|
| 4. CHECK HARNESS AND CONNECTOR (ENGINE ROOM J/B - BATTERY) |
Disconnect the 1G J/B connector.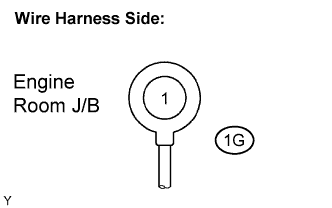
Measure the voltage according to the value(s) in the table below.
- Standard voltage:
Terminal Connection
Specified Condition
1G-1 - Body ground
10 to 14 V
|
|
||||
| OK | ||
 |
||
| ||