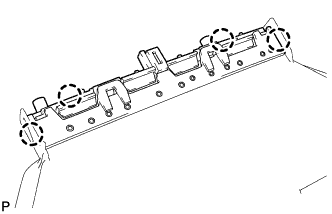
REMOVAL
Removal / installation · Vehicles built Jun 2006 – Sep 2006
| 1. REMOVE REAR SEAT CUSHION ASSEMBLY |

for Fold Down Seat Type: (Click here)
| 2. REMOVE REAR SEAT HEADREST ASSEMBLY |
| 3. REMOVE REAR CENTER SEAT HEADREST ASSEMBLY (w/ Center Armrest) |
| 4. REMOVE REAR SEATBACK ASSEMBLY (for Fixed Seat Type) |
Remove the 3 rear seat belts from the 3 rear seat shoulder belt guides.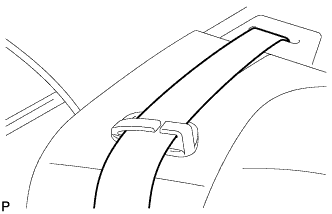

Remove the 4 bolts and rear seatback assembly.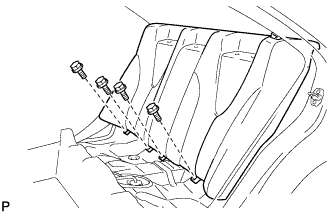
| 5. REMOVE SEPARATE TYPE REAR SEATBACK ASSEMBLY LH (for Fold Down Seat Type) |
Remove the 2 bolts and separate type rear seatback assembly LH.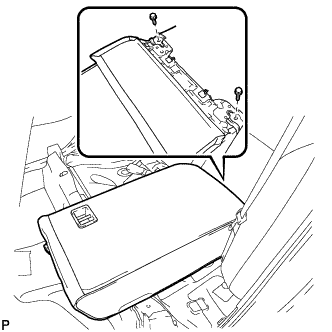
| 6. REMOVE SEPARATE TYPE REAR SEATBACK ASSEMBLY RH (for Fold Down Seat Type) |
Remove the 2 bolts and separate type rear seatback assembly RH.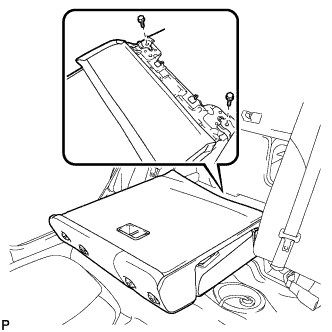
| 7. REMOVE REAR SIDE SEATBACK ASSEMBLY LH (for Fold Down Seat Type) |
Remove the bolt and rear side seatback assembly LH.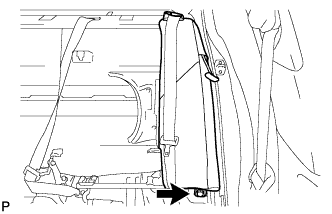
| 8. REMOVE REAR SIDE SEATBACK ASSEMBLY RH (for Fold Down Seat Type) |
- HINT:
- Use the same procedures for the RH side and LH side.
| 9. REMOVE REAR DOOR SCUFF PLATE LH |
Disengage the 5 claws and 2 clips, and remove the rear door scuff plate LH.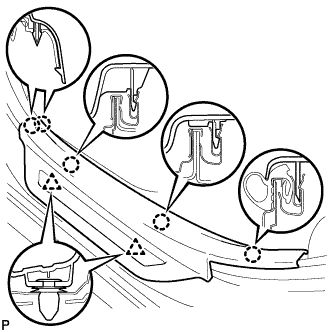
| 10. DISCONNECT REAR DOOR OPENING TRIM WEATHERSTRIP LH |
| 11. REMOVE REAR DOOR SCUFF PLATE RH |
- HINT:
- Use the same procedure for the RH side and the LH side.
| 12. DISCONNECT REAR DOOR OPENING TRIM WEATHERSTRIP RH |
| 13. REMOVE NO. 1 SEAT BRACKET (for Fixed Seat Type) |
Remove the 2 nuts and the No. 1 seat bracket.
| 14. DISCONNECT REAR SEAT INNER WITH CENTER BELT ASSEMBLY LH |
Remove the bolt and disconnect the floor end of the rear seat inner with center belt assembly LH.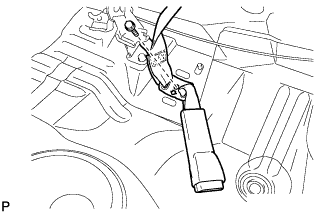
| 15. REMOVE ROOF SIDE INNER GARNISH LH |
Disengage the 5 clips and 2 claws, and remove the roof side inner garnish LH.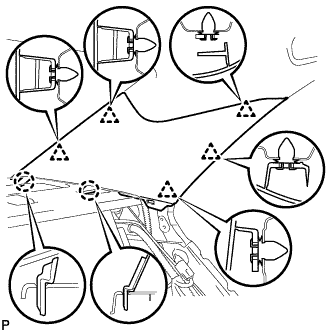
| 16. REMOVE ROOF SIDE INNER GARNISH RH |
- HINT:
- Use the same procedure for the RH side and the LH side.
| 17. DISCONNECT REAR SEAT OUTER BELT ASSEMBLY LH |
Remove the bolt and disconnect the floor end of the rear seat outer belt assembly LH.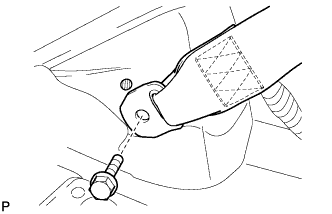
| 18. DISCONNECT REAR SEAT OUTER BELT ASSEMBLY RH |
Remove the bolt and disconnect the floor end of the rear seat outer belt assembly RH.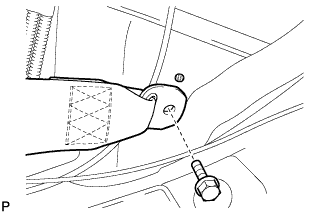
| 19. REMOVE REAR SEAT SHOULDER BELT COVER |
Using a screwdriver, disengage the 4 claws and remove the rear seat shoulder belt cover.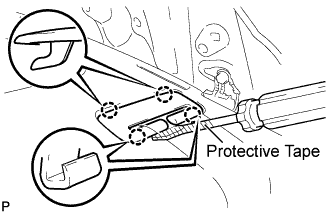
- HINT:
- Tape the screwdriver tip before use.
- Use the same procedure for the RH side and LH side.
- Tape the screwdriver tip before use.
| 20. REMOVE REAR SEAT SHOULDER BELT HOLE COVER |
Using a screwdriver, disengage the 4 claws and remove the rear seat shoulder belt hole cover.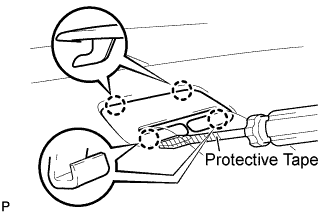
- HINT:
- Tape the screwdriver tip before use.
| 21. REMOVE PACKAGE TRAY TRIM PANEL ASSEMBLY (w/o Rear Sunshade) |
Disconnect the connector.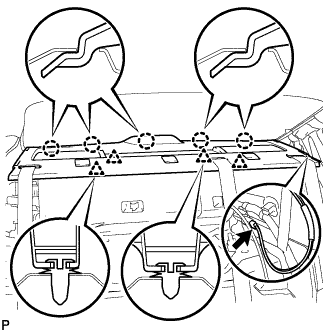
Disengage the 4 clips and the 5 claws.
Pass the 3 rear seat belt floor anchors through the package tray trim panel assembly, then remove the package tray trim panel assembly.
| 22. REMOVE PACKAGE TRAY TRIM PANEL ASSEMBLY (w/ Rear Sunshade) |
Disengage the 2 clips and raise the front portion of the package tray trim panel assembly.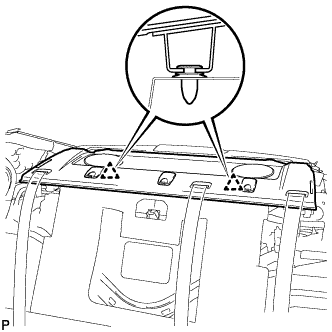
Pass the 3 rear seat belt floor anchors through the holes in the package tray trim panel assembly.
Remove the package tray trim panel assembly.
| 23. REMOVE NO. 2 PACKAGE TRAY TRIM PANEL ASSEMBLY (w/ Rear Sunshade) |
Disengage the 4 clips and 5 claws and remove the No. 2 package tray trim panel assembly.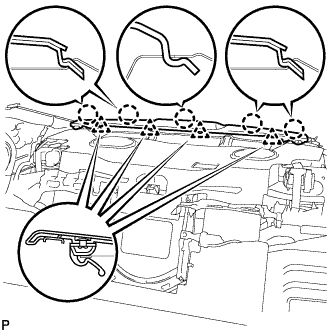
| 24. REMOVE CENTER STOP LIGHT SET (w/o Rear Sunshade) |
Disconnect the connector.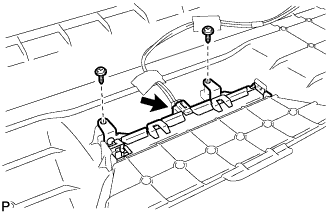
Remove the 2 screws and the center stop light set.
| 25. REMOVE CENTER STOP LIGHT ASSEMBLY (w/ Rear Sunshade) |
Disengage the 4 claws and remove the center stop light assembly.