REMOVAL
Removal / installation · Vehicles built Oct 2006 – May 2009
Versions by build date: Jun 2006 – Sep 2006 Oct 2006 – May 2009 from Jun 2009
| 1.
REMOVE REAR SEAT HEADREST ASSEMBLY |
|
| 2.
REMOVE REAR CENTER SEAT HEADREST ASSEMBLY (w/ Center Headrest) |
|
| 3.
REMOVE REAR SEAT CUSHION ASSEMBLY (for Fixed Seat Type)
|
 |
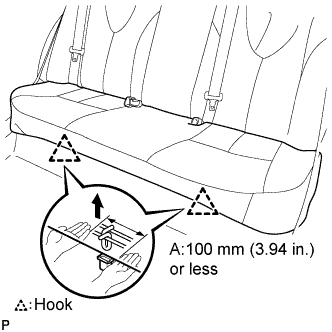
- Detach the 2 front hooks of the seat cushion from the vehicle body.
- NOTICE:
- Follow the instructions below carefully as the cushion frame can be deformed easily.
Choose a hook to detach first. Place your hands near the hook as shown in the illustration. Then lift the seat cushion to detach the hook.
Repeat the step above for the other hook.
Remove the rear seat cushion assembly.
| 4.
REMOVE REAR SEATBACK ASSEMBLY (for Fixed Seat Type)
|
|
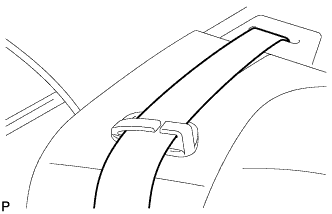
- Remove the 3 rear seat belts from the 3 rear seat shoulder belt guides.
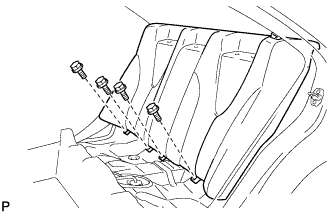
- Remove the 4 bolts and rear seatback assembly.
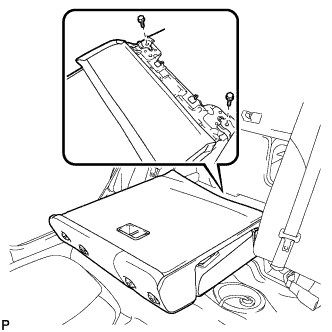
| 5.
REMOVE REAR SEAT CUSHION ASSEMBLY (for Fold Down Seat Type)
|
|
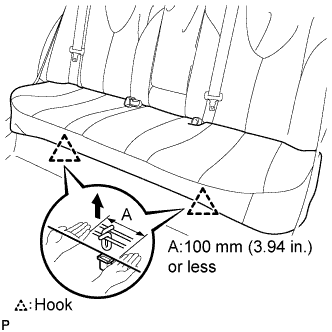
- Detach the 2 front hooks of the seat cushion from the vehicle body.
- NOTICE:
- Follow the instructions below carefully as the cushion frame can be deformed easily.
Choose a hook to detach first. Place your hands near the hook as shown in the illustration. Then lift the seat cushion to detach the hook.
Repeat the step above for the other hook.
Remove the seat cushion.
| 6.
REMOVE SEPARATE TYPE REAR SEATBACK ASSEMBLY RH (for Fold Down Seat Type)
|
|
- Remove the 2 bolts and separate type rear seatback assembly RH.
| 7.
REMOVE REAR SIDE SEATBACK ASSEMBLY RH (for Fold Down Seat Type) |
|
- HINT:
- Use the same procedure for the RH side and the LH side (Click here).
| 8.
REMOVE REAR DOOR SCUFF PLATE RH |
|
- HINT:
- Use the same procedure for the RH side and the LH side (Click here).
| 9.
REMOVE REAR DOOR OPENING TRIM WEATHERSTRIP RH |
|
| 10.
REMOVE ROOF SIDE INNER GARNISH RH |
|
- HINT:
- Use the same procedures for the RH side and the LH side (Click here).
| 11.
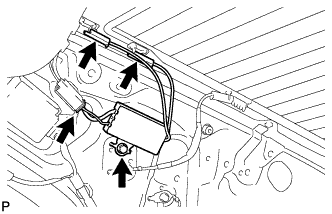
REMOVE AMPLIFIER ANTENNA ASSEMBLY |
|
Disconnect each connector.
- Remove the bolt and amplifier antenna assembly.