INSTALLATION
Removal / installation · Vehicles built from Jun 2009
Versions by build date: Jun 2006 – Sep 2006 Oct 2006 – May 2009 from Jun 2009
| 1.
INSTALL FRONT NO. 2 SPEAKER ASSEMBLY (for 6 Speakers) |
 |
Connect the connector.
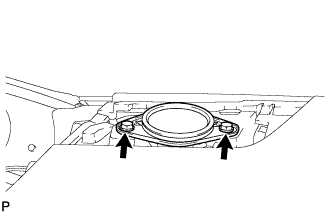
- Install the front No. 2 speaker assembly with the 2 bolts.
| 2.
INSTALL INSTRUMENT PANEL NO. 1 SPEAKER PANEL SUB-ASSEMBLY (for 6 Speakers) |
|
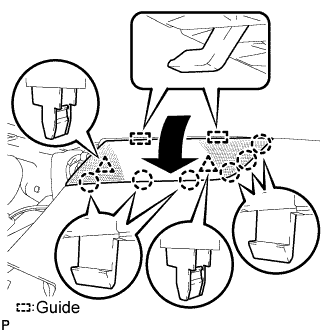
- Engage the 6 claws and 2 clips and install the instrument panel No. 1 speaker panel sub-assembly.
| 3.
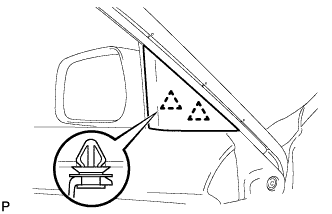
INSTALL FRONT PILLAR GARNISH (for 6 Speakers) |
|
- without Curtain Shield Airbag: (Click here)
- with Curtain Shield Airbag: (Click here)
| 4.
INSTALL FRONT NO. 1 SPEAKER ASSEMBLY |
|
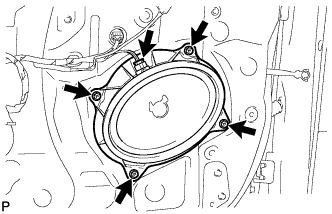
- Install the front No. 1 speaker assembly with the 4 bolts.
Connect the connector.
| 5.
INSTALL FRONT DOOR INNER GLASS WEATHERSTRIP
|
|
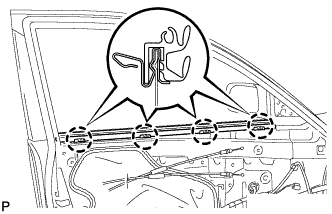
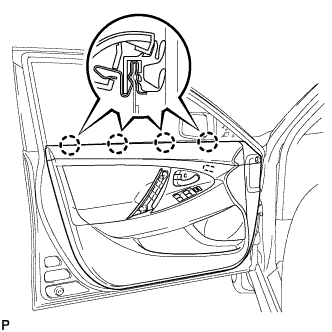
- Engage the 4 claws and install the front door inner glass weatherstrip.
| 6.
INSTALL FRONT DOOR TRIM BOARD SUB-ASSEMBLY
|
|
Connect each connector.
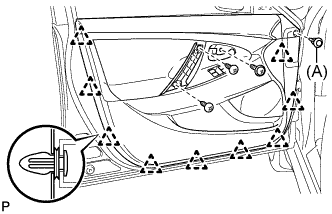
- Engage the front door trim board with the 4 clips of the front door inner glass weatherstrip.
- Engage the 9 clips and install the front door trim board to the front door panel.
Install the 3 screws and clip (A).
| 7.
INSTALL COURTESY LIGHT ASSEMBLY (w/ Courtesy Light)
|
|
Connect the connector.
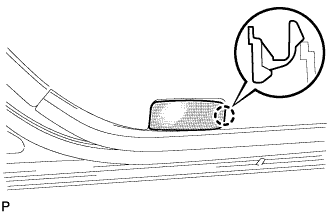
- Engage the claw and install the courtesy light assembly.
| 8.
INSTALL ASSIST GRIP COVER
|
|
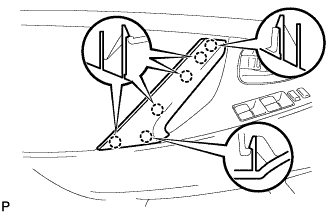
- Engage the 6 claws and install the assist grip cover.
| 9.
INSTALL FRONT DOOR INSIDE HANDLE BEZEL PLUG
|
|
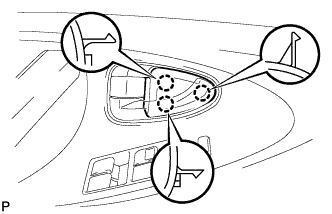
- Engage the 3 claws and install the front door inside handle bezel plug.
| 10.
INSTALL FRONT DOOR LOWER FRAME BRACKET GARNISH
|
|
- Engage the 2 clips and install the front door lower frame bracket garnish.