REMOVAL
Removal / installation · Vehicles built from Jun 2009
Versions by build date: Oct 2006 – May 2009 from Jun 2009
| 1.
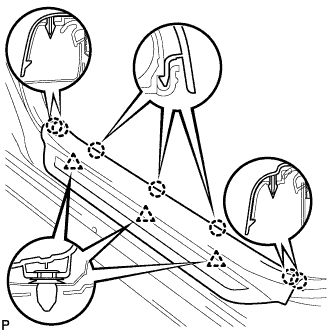
REMOVE FRONT DOOR SCUFF PLATE LH
|
 |
- Disengage the 7 claws and 3 clips, and remove the front door scuff plate LH.
| 2.
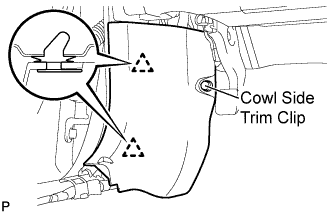
REMOVE COWL SIDE TRIM SUB-ASSEMBLY LH
|
|
- Remove the cowl side trim clip.
Disengage the 2 clips and remove the cowl side trim sub-assembly LH.
| 3.
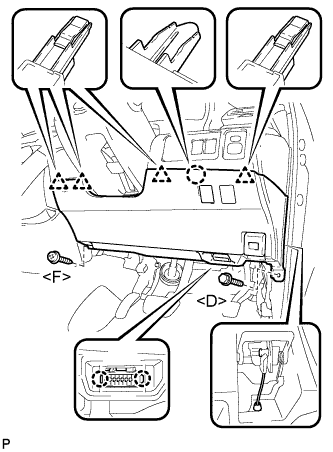
REMOVE LOWER NO. 1 INSTRUMENT PANEL FINISH PANEL
|
|
- Remove the bolt <D> and the screw <F>.
Disengage the 2 claws and the DLC3.
Disconnect the hood lock control cable assembly.
Disengage the claw and the 4 clips.
Remove the air hose, disconnect each connector, and then remove the lower No. 1 instrument panel finish panel.
| 4.
REMOVE FRONT DOOR SCUFF PLATE RH
|
|
- HINT:
- Use the same procedure for the RH side and the LH side.
| 5.
REMOVE COWL SIDE TRIM SUB-ASSEMBLY RH
|
|
- HINT:
- Use the same procedure for the RH side and the LH side.
| 6.
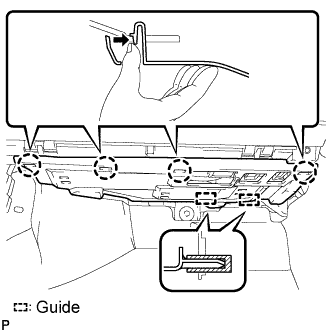
REMOVE INSTRUMENT PANEL NO. 2 UNDER COVER SUB-ASSEMBLY
|
|
- Disengage the 4 claws.
Disengage the 2 guides and remove the No. 2 under cover sub-assembly.
| 7.
REMOVE LOWER INSTRUMENT PANEL SUB-ASSEMBLY
|
|
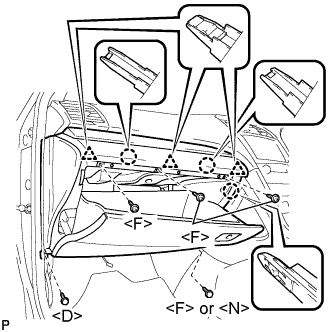
- Remove the bolt <D>.
Remove the screw <F> or <N>.
Remove the 3 screws <F>.
Disengage the 3 claws and the 3 clips, and then remove the lower instrument panel sub-assembly.
| 8.
REMOVE SHIFT LEVER KNOB SUB-ASSEMBLY
|
|
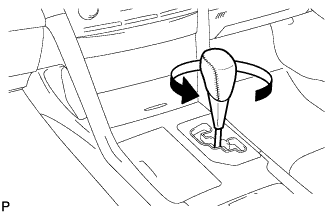
- Turn the shift lever knob counterclockwise and remove the shift lever knob sub-assembly.
| 9.
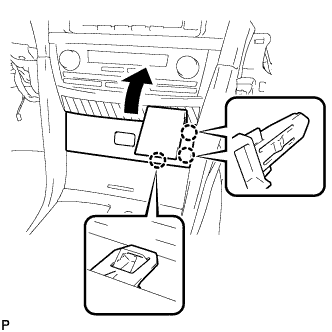
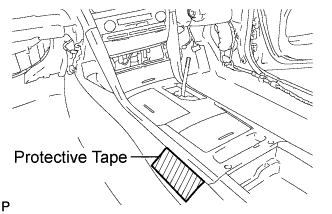
REMOVE UPPER CONSOLE PANEL FRONT GARNISH
|
|
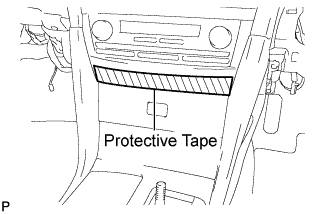
- Apply protective tape to the area shown in the illustration.
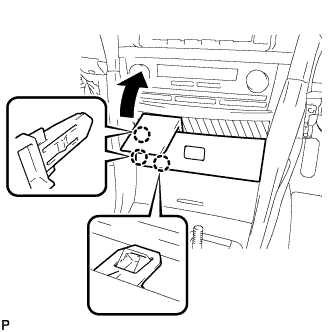
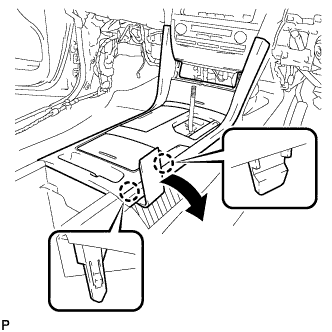
- Using a moulding remover, disengage the 3 claws as shown in the illustration.
- Using a moulding remover, disengage the 3 claws and remove the upper console panel front garnish as shown in the illustration.
Disconnect each connector.
| 10.
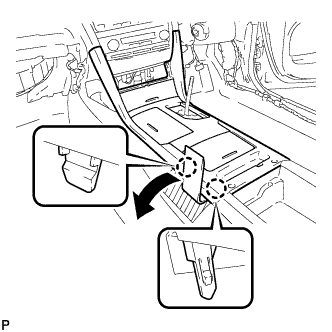
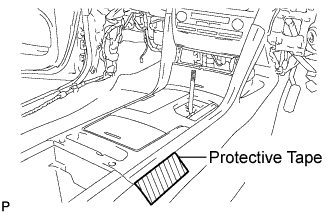
REMOVE UPPER CONSOLE PANEL SUB-ASSEMBLY
|
|
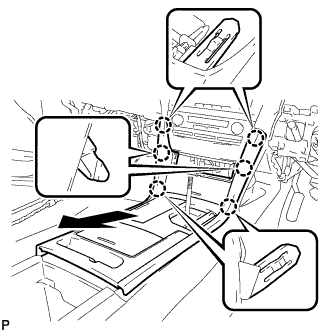
- Apply protective tape to the area shown in the illustration.
- Using a moulding remover, disengage the 2 claws as shown in the illustration.
- Apply protective tape to the area shown in the illustration.
- Using a moulding remover, disengage the 2 claws as shown in the illustration.
- Disengage the 6 claws and remove the upper console panel sub-assembly as shown in the illustration.
Disconnect the connector.
| 11.
REMOVE CONSOLE BOX CARPET |
|
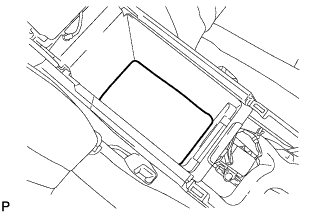
- Remove the console box carpet.
| 12.
REMOVE CONSOLE BOX ASSEMBLY |
|
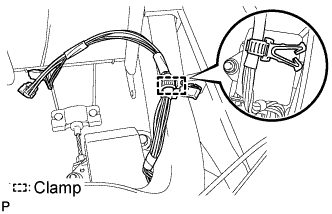
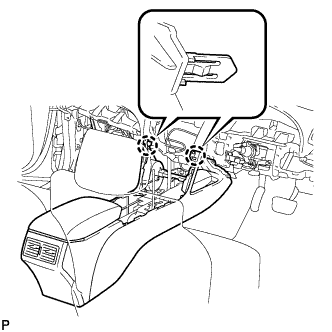
- Disengage the clamp.
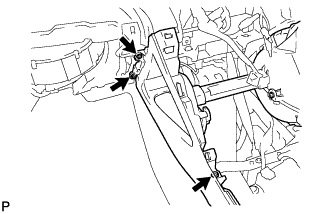
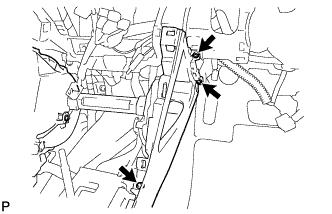
- Remove the 3 screws.
- Remove the 3 screws.
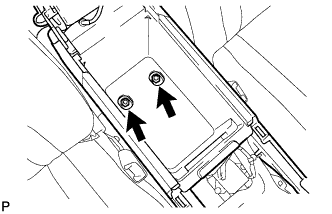
- Remove the 2 bolts.
- Disengage the 2 claws and remove the console box assembly.