Operate the cooler compressor at an engine speed of approximately 1,000 rpm for 5 to 6 minutes to circulate the refrigerant. This causes most of the compressor oil from the various components of the A/C system to collect in the A/C compressor.
Stop the engine.
Recover the refrigerant from the A/C system using a refrigerant recovery unit.
2.
DISCONNECT CABLE FROM NEGATIVE BATTERY TERMINAL
3.
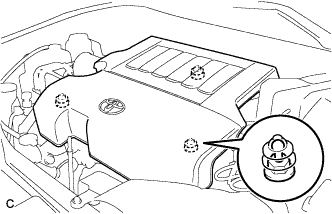
REMOVE V-BANK COVER SUB-ASSEMBLY
Hold the front of the V-bank cover and raise it to disengage the 2 clips on the front of the cover. Continue to raise the cover to disengage the clip on the rear of the cover and remove the cover.
NOTICE:
Attempting to disengage both front and rear clips at the same time may cause the cover to break.
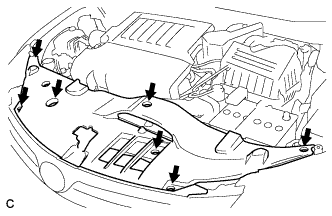
4.
REMOVE COOL AIR INTAKE DUCT SEAL
Remove the 7 clips and intake duct seal.
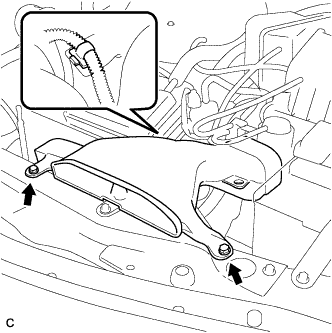
5.
REMOVE AIR CLEANER INLET ASSEMBLY
Remove the 2 bolts, clamp and air cleaner inlet.
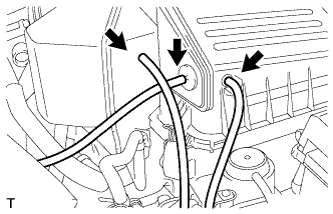
6.
REMOVE AIR CLEANER CAP SUB-ASSEMBLY
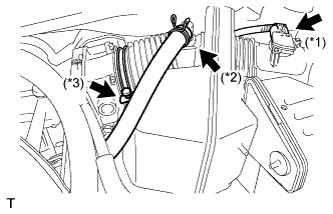
Disconnect the 3 vacuum hoses.
Disconnect the mass air flow meter connector (*1).
Disconnect the No. 2 ventilation hose (*2).
Disconnect the hose band (*3).
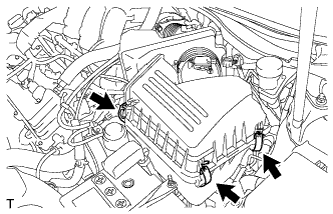
Disconnect the 3 bands, and remove the air cleaner cap sub-assembly.
7.
REMOVE NO. 1 AIR CLEANER INLET
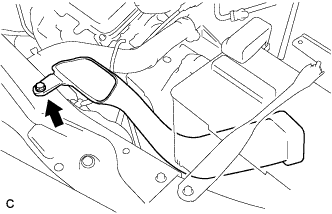
Remove the bolt and No. 1 air cleaner inlet.
8.
REMOVE FRONT BUMPER ASSEMBLY
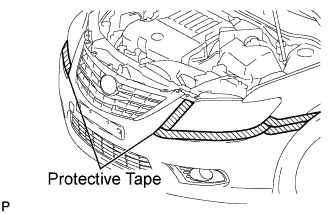
Put protective tape around the front bumper assembly.
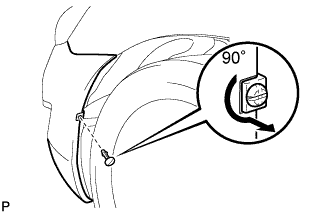
Using a screwdriver, turn the pin 90 degrees and remove the pin hold clip.
HINT:
Use the same procedure for the RH side and LH side.
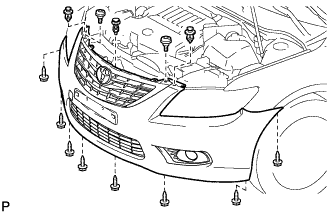
Remove the 8 screws, 3 clips and 2 radiator grille protectors.
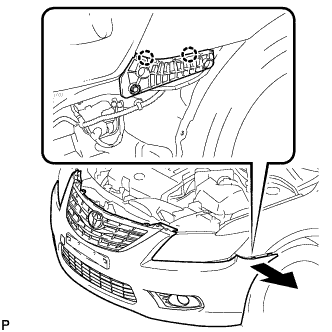
Disengage the 2 claws and disconnect the front bumper assembly as shown in the illustration.
HINT:
Use the same procedure for the RH side and LH side.
w/ Clearance Sonar System:
Disconnect the 2 connectors.
w/ Fog Light:
Disconnect the 2 connectors.
w/ Headlight Cleaner System:
Disconnect the 2 connectors.
Disconnect the headlight cleaner washer hose, and then remove the front bumper assembly.
Remove the front bumper assembly.
9.
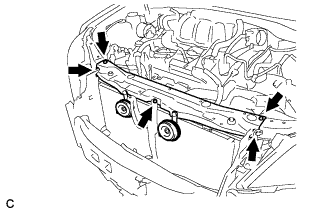
REMOVE RADIATOR SUPPORT UPPER
Disconnect the horn connectors.
Remove the 5 bolts and radiator support upper.
10.
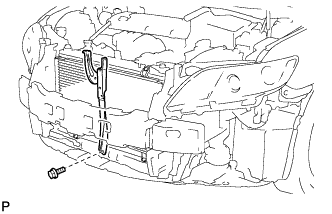
REMOVE HOOD LOCK SUPPORT SUB-ASSEMBLY
Remove the bolt and hood lock support sub-assembly.
11.
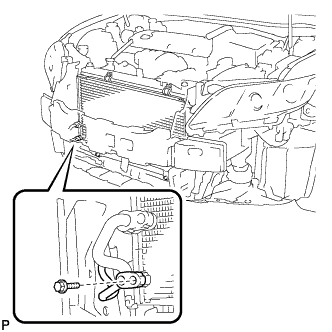
DISCONNECT AIR CONDITIONING TUBE AND ACCESSORY
Remove the bolt and disconnect the air conditioning tube assembly from the condenser.
Remove the O-ring from the air conditioning tube assembly.
NOTICE:
Seal the openings of the disconnected parts using vinyl tape to prevent entry of moisture and foreign matter.
12.
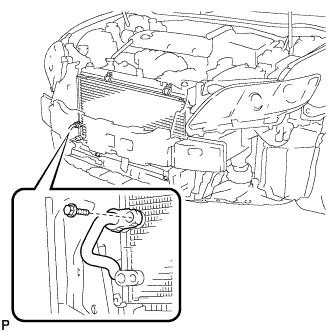
DISCONNECT COOLER REFRIGERANT DISCHARGE PIPE
Remove the bolt and disconnect the cooler refrigerant discharge pipe from the condenser.
Remove the O-ring from the cooler refrigerant discharge pipe.
NOTICE:
Seal the openings of the disconnected parts using vinyl tape to prevent entry of moisture and foreign matter.
13.
REMOVE COOLER CONDENSER ASSEMBLY
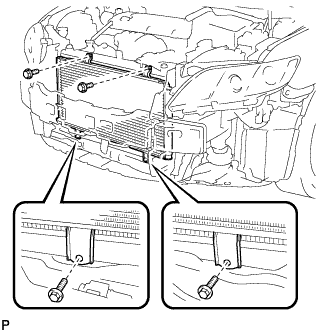
Remove the 4 bolts and condenser.
14.
REMOVE COOLER DRYER
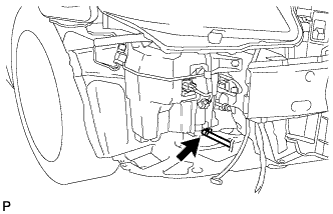
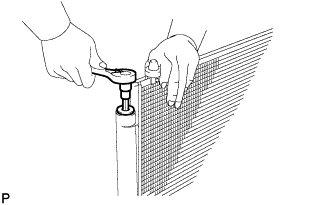
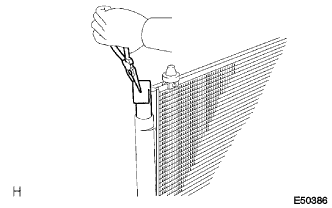
Using a 14 mm straight hexagon wrench, remove the cap from the modulator.