INSTALLATION
Removal / installation · Vehicles built Oct 2006 – May 2009
Versions by build date: Oct 2006 – May 2009 from Jun 2009
| 1.
INSTALL LUGGAGE COMPARTMENT DOOR OUTSIDE GARNISH SUB-ASSEMBLY (w/o Smart Entry and Start System) |
 |
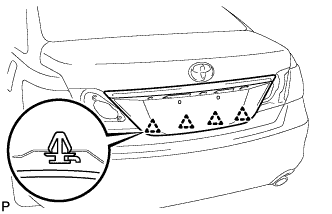
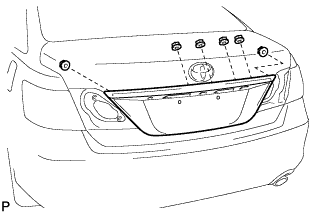
- Engage the 4 clips and install the luggage compartment door outside garnish sub-assembly.
- Install the 6 nuts.
| 2.
INSTALL LUGGAGE COMPARTMENT DOOR OUTSIDE GARNISH SUB-ASSEMBLY (w/ Smart Entry and Start System) |
|
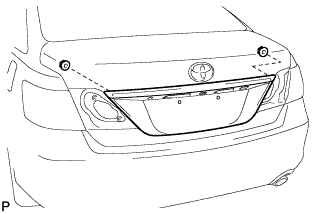
- Engage the 4 clips and install the luggage compartment door outside garnish sub-assembly.
- Install the 2 nuts.
| 3.
INSTALL BACK DOOR GARNISH RETAINER (w/ Smart Entry and Start System) |
|
without Parking Assist Monitor System:
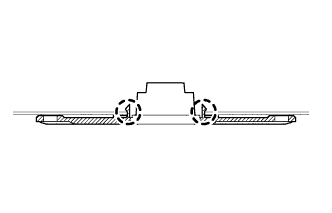
- Engage the 2 claws and install the back door garnish retainer.
- Install the 2 nuts.
| 4.
INSTALL TELEVISION CAMERA ASSEMBLY (w/ Parking Assist Monitor System)
|
|
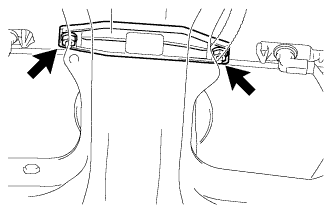
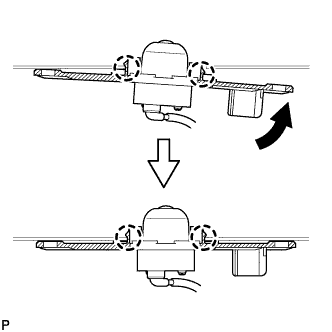
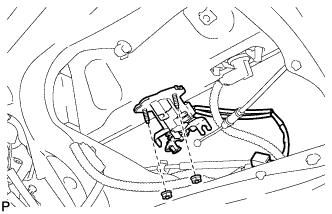
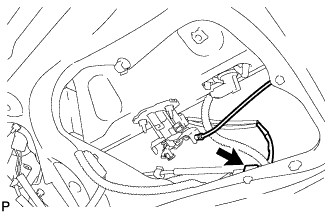
- Engage the 2 claws to temporarily install the television camera assembly to the luggage compartment as shown in the illustration.
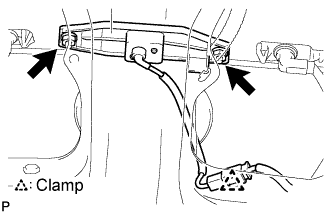
- Install the television camera assembly with the 2 nuts.
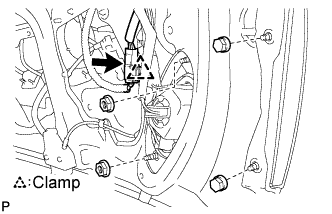
Connect the television camera connector.
Engage the television camera connector clamp.
| 5.
INSTALL LUGGAGE DOOR OPENING SWITCH ASSEMBLY (w/ Smart Entry and Start System)
|
|
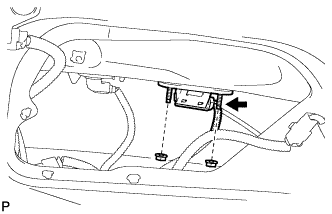
- Install the luggage door opening switch assembly with the 2 nuts.
Connect the connector.
| 6.
INSTALL LUGGAGE COMPARTMENT DOOR LOCK CYLINDER ASSEMBLY
|
|
- Install the luggage compartment door lock cylinder with the 2 nuts.
- Connect the cable and connector.
| 7.
INSTALL REAR LIGHT ASSEMBLY LH
|
|
- Install the rear light assembly with the 4 nuts.
-
Torque:
- 5.4 N*m{
55 kgf*cm
, 48 in.*lbf
}
Connect the connector and clamp.
| 8.
INSTALL REAR LIGHT ASSEMBLY RH |
|
- HINT:
- Use the same procedure for the RH side and LH side.
| 9.
INSTALL LUGGAGE COMPARTMENT DOOR COVER |
|
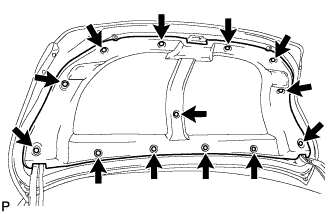
- Install the luggage compartment door cover with the 13 clips.