REMOVAL
Removal / installation · Vehicles built from Jun 2009
Versions by build date: Jun 2006 – Sep 2006 Oct 2006 – May 2009 from Jun 2009
| 1.
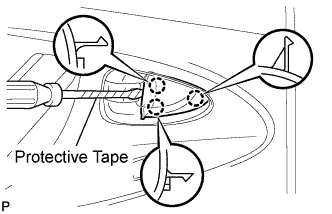
REMOVE REAR DOOR INSIDE HANDLE BEZEL PLUG
|
 |
- Using a screwdriver with the tip wrapped with protective tape, disengage the 3 claws and remove the rear door inside handle bezel plug.
| 2.
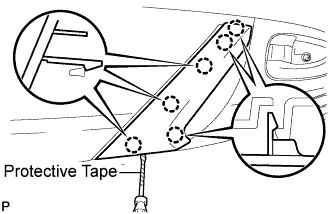
REMOVE DOOR ASSIST GRIP COVER
|
|
- Using a screwdriver with the tip wrapped with protective tape, disengage the 6 claws and remove the door assist grip cover.
| 3.
REMOVE COURTESY LIGHT ASSEMBLY (w/ Courtesy Light)
|
|
- Using a screwdriver with the tip wrapped with protective tape, disengage the claw and remove the courtesy light assembly.
Disconnect the connector.
| 4.
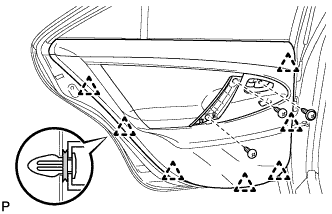
REMOVE REAR DOOR TRIM BOARD SUB-ASSEMBLY
|
|
- Remove the 3 screws.
Using a clip remover, disengage the 7 clips.
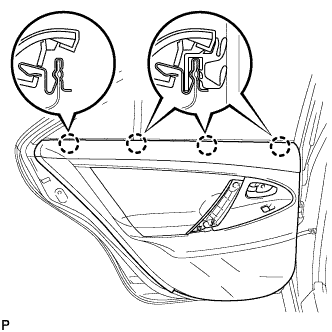
- Raise the rear door trim board to disengage the 4 claws and remove the rear door trim board together with the rear door inner glass weatherstrip.
Disconnect the connector.
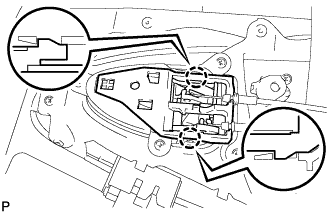
- Disengage the 2 claws and disconnect the rear door inside handle sub-assembly.
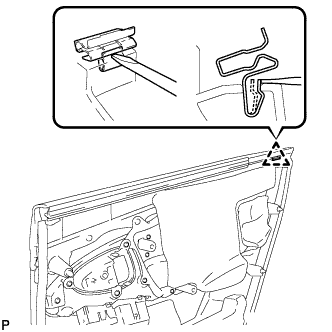
- Disengage the clip as shown in the illustration and remove the No. 1 door scuff plate clamp from the rear door trim board.
| 5.
REMOVE REAR DOOR INNER GLASS WEATHERSTRIP
|
|
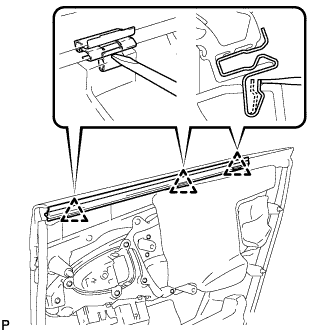
- Disengage the 3 clips as shown in the illustration and remove the rear door inner glass weatherstrip from the rear door trim board.
| 6.
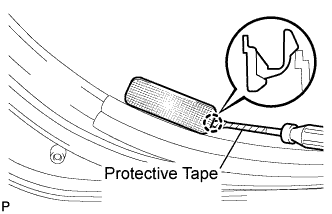
REMOVE REAR DOOR BELT MOULDING ASSEMBLY |
|
- Fully open the rear door glass.
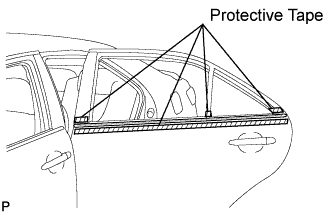
Put protective tape around the rear door belt moulding assembly.
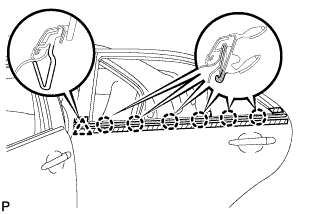
- Using a moulding remover, disengage the clip and 6 claws, and remove the rear door belt moulding assembly.
- HINT:
- Tape the remover tip before use.
- NOTICE:
- Be careful when removing the moulding as there are claws attached to the front end of the moulding.