DISASSEMBLY
Removal / installation · Vehicles built from Jun 2006
| 1. REMOVE CLUTCH RELEASE FORK SUB-ASSEMBLY |

Remove the clutch release fork sub-assembly together with the clutch release bearing assembly from the manual transaxle case.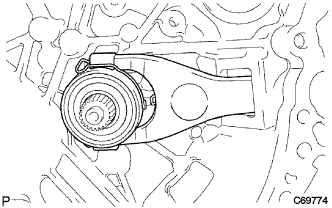

| 2. REMOVE CLUTCH RELEASE BEARING ASSEMBLY |
Remove the clutch release bearing assembly and release bearing hub clip from the clutch release fork sub-assembly.
| 3. REMOVE RELEASE FORK SUPPORT |
Remove the release fork support from the manual transaxle case.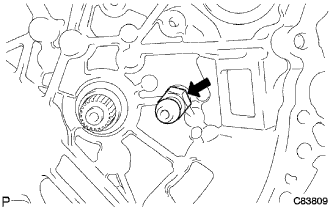
| 4. REMOVE CLUTCH RELEASE FORK BOOT |
Remove the clutch release fork boot from the manual transaxle case.
| 5. REMOVE SPEEDOMETER DRIVEN HOLE COVER SUB-ASSEMBLY |
Remove the bolt and speedometer driven hole cover sub-assembly.
Remove the O-ring.
| 6. REMOVE SELECTING BELLCRANK ASSEMBLY |
Remove the 2 bolts and selecting bellcrank assembly from the manual transmission case.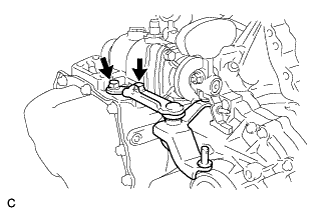
| 7. REMOVE CONTROL SHIFT LEVER |
Remove the nut and spring washer.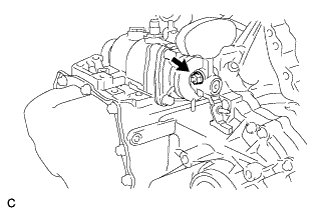
Using a brass bar and hammer, remove the shift outer lever lock pin.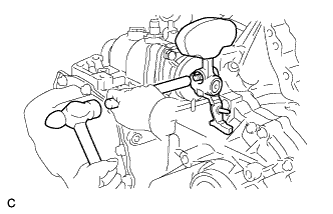
Remove the control shift lever.
| 8. REMOVE CONTROL SHAFT COVER |
Remove the 4 bolts and control shaft cover from the manual transmission case.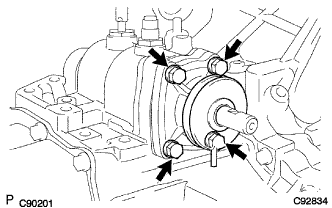
| 9. SECURE MANUAL TRANSAXLE ASSEMBLY |
Place the manual transaxle assembly on wooden blocks.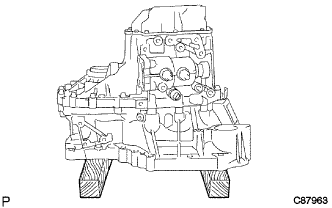
| 10. REMOVE NO. 1 LOCK BALL ASSEMBLY |
Remove the No. 1 lock ball assembly from the manual transmission case.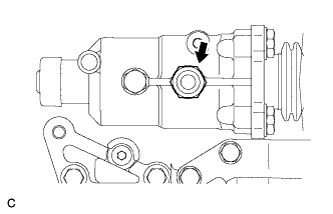
| 11. REMOVE SHIFT GATE PIN |
Remove the shift gate pin from the manual transmission case.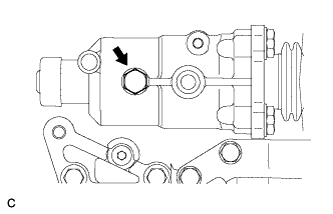
| 12. REMOVE MANUAL TRANSMISSION BREATHER PLUG |
Remove the manual transmission breather plug.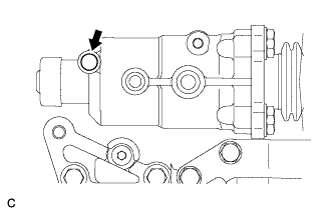
| 13. REMOVE SHIFT AND SELECT LEVER SHAFT ASSEMBLY |
Remove the shift and select lever shaft assembly from the manual transmission case.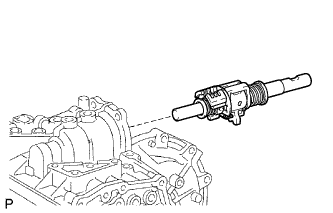
| 14. REMOVE BACK-UP LIGHT SWITCH ASSEMBLY |
Remove the back-up light switch assembly and gasket from the manual transmission case.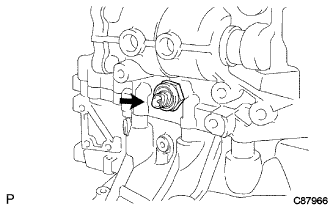
| 15. REMOVE MANUAL TRANSMISSION FILLER PLUG |
Remove the manual transmission filler plug and gasket from the manual transmission case.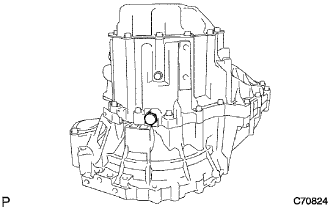
| 16. REMOVE DRAIN PLUG SUB-ASSEMBLY |
Remove the drain plug sub-assembly and gasket from the manual transmission case.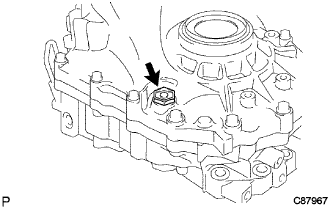
| 17. REMOVE MANUAL TRANSMISSION CASE COVER SUB-ASSEMBLY |
Remove the 10 bolts and manual transmission case cover from the manual transmission case.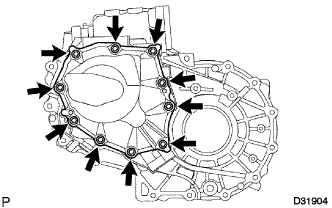
| 18. REMOVE MANUAL TRANSMISSION OUTPUT SHAFT REAR SET NUT |
Engage the 1st and 2nd gears simultaneously.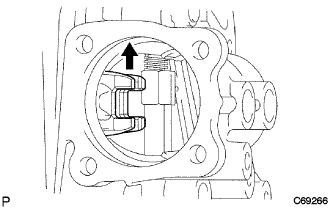
Using SST and a hammer, unstake the manual transmission output shaft rear set nut.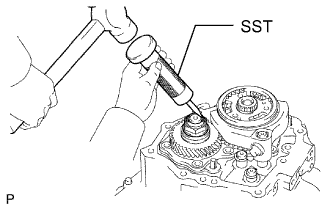
- SST
- 09930-00010
Using SST, remove the manual transmission output shaft rear set nut from the output shaft.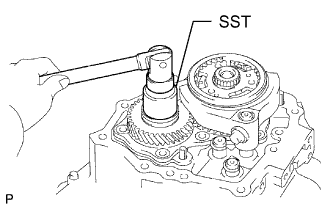
- SST
- 09229-55010
Disengage the gears.
| 19. REMOVE NO. 3 TRANSMISSION CLUTCH HUB |
Using 2 screwdrivers and a hammer, remove the transmission clutch hub No. 3 shaft snap ring from the input shaft.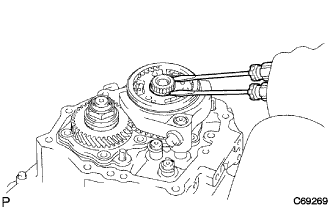
- HINT:
- Use a shop rag or a piece of cloth to keep the snap ring from flying off.
Remove the shift fork set bolt from the No. 3 gear shift fork.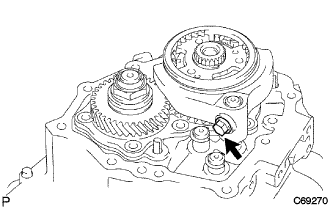
Using SST, remove the No. 3 transmission clutch hub and No. 3 gear shift fork from the input shaft.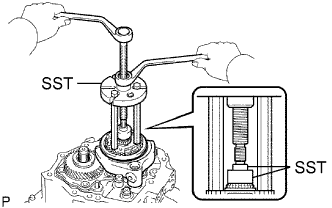
- SST
- 09950-30012
(09951-03010, 09953-03010, 09954-03010)
09950-50013 (09957-04010)
09950-60010 (09951-00280)
| 20. REMOVE 5TH GEAR |
Remove the 5th gear from the input shaft.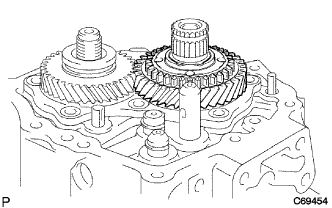
| 21. REMOVE 5TH GEAR NEEDLE ROLLER BEARING |
Remove the 5th gear needle roller bearing from the input shaft.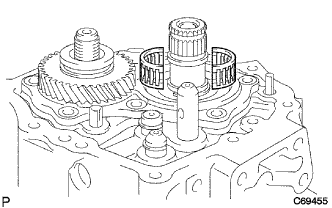
| 22. REMOVE 5TH DRIVEN GEAR |
Using SST, remove the 5th driven gear from the output shaft.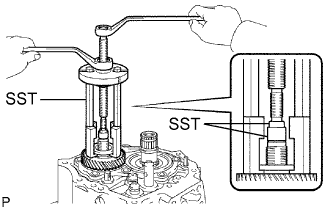
- SST
- 09950-30012
(09951-03010, 09953-03010, 09954-03010, 09957-04010)
09950-60010 (09951-00180, 09955-03011)
09950-50013
| 23. REMOVE REAR BEARING RETAINER |
Using a "TORX" socket wrench (T45), remove the 7 "TORX" screws and rear bearing retainer from the manual transmission case.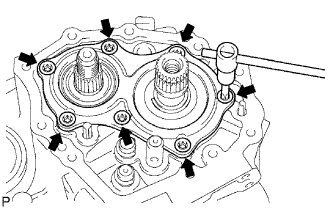
| 24. REMOVE OUTPUT SHAFT REAR BEARING SHIM |
Remove the output shaft rear bearing shim from the output shaft.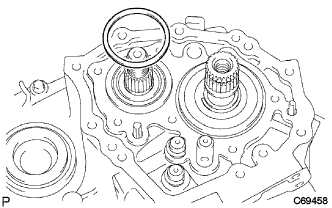
| 25. REMOVE INPUT SHAFT REAR BEARING SHAFT SNAP RING |
Using a snap ring expander, remove the input shaft rear bearing shaft snap ring from the input shaft.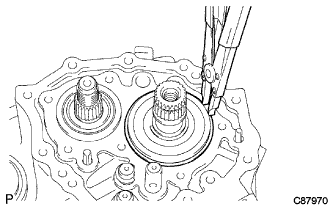
| 26. REMOVE SHIFT FORK SHAFT SNAP RING |
Using 2 screwdrivers and a hammer, remove the shift fork shaft snap ring from the No. 1 gear shift fork shaft.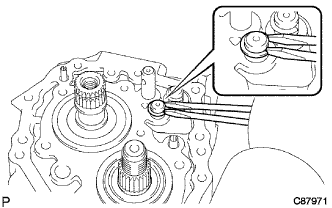
- HINT:
- Use a shop rag or a piece of cloth to keep the snap ring from flying off.
Using 2 screwdrivers and a hammer, remove the shift fork shaft snap ring from the No. 2 gear shift fork shaft.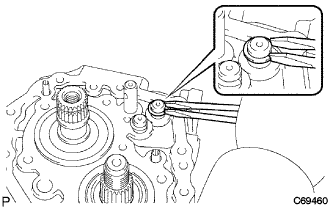
- HINT:
- Use a shop rag or a piece of cloth to keep the snap ring from flying off.
| 27. REMOVE REVERSE IDLER GEAR SHAFT BOLT |
Remove the reverse idler gear shaft bolt and gasket.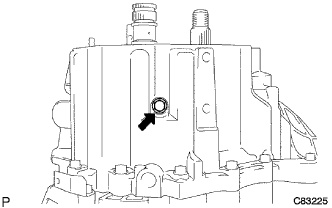
| 28. REMOVE NO. 1 CLUTCH TUBE BRACKET |
Remove the bolt and clutch tube bracket.
| 29. REMOVE MANUAL TRANSMISSION CASE |
Remove the 3 bolts from the manual transaxle case.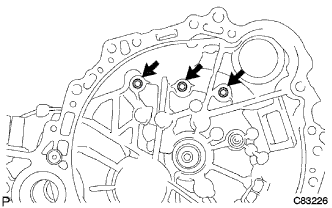
Remove the 14 bolts from the manual transmission case.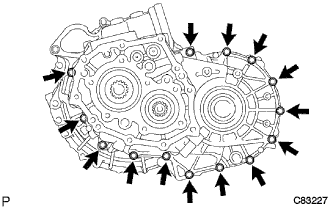
Tapping with a plastic hammer, remove the manual transmission case.
| 30. REMOVE REVERSE RESTRICT PIN ASSEMBLY |
Using a hexagon wrench (6 mm), remove the reverse restrict pin plug from the manual transmission case.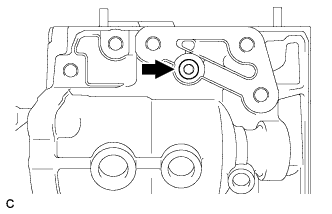
Using a pin punch (φ 5 mm) and hammer, remove the slotted pin.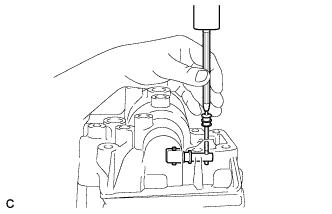
Remove the bolt, transmission oil baffle and reverse restrict pin assembly.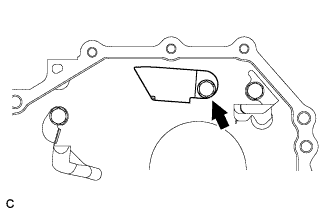
| 31. REMOVE NO. 2 OIL RECEIVER PIPE |
Remove the bolt and No. 2 oil receiver pipe from the manual transmission case.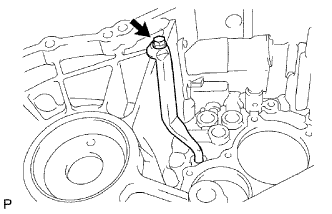
- NOTICE:
- Do not damage the pipe.
| 32. REMOVE NO. 1 OIL RECEIVER PIPE |
Remove the bolt and No. 1 oil receiver pipe from the manual transmission case.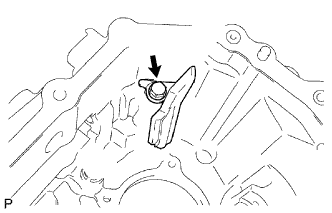
- NOTICE:
- Do not damage the pipe.
| 33. REMOVE TRANSMISSION MAGNET |
Remove the transmission magnet from the manual transaxle case.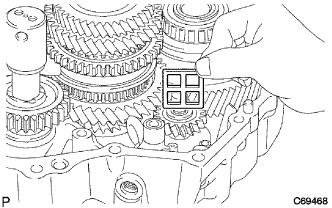
| 34. REMOVE REVERSE IDLER GEAR SUB-ASSEMBLY |
Remove the reverse idler gear sub-assembly from the manual transaxle case.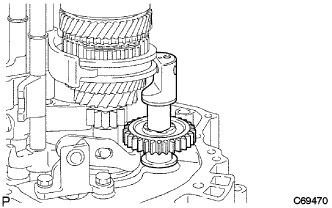
Remove the reverse gear and reverse idler thrust washer from the reverse idler gear shaft.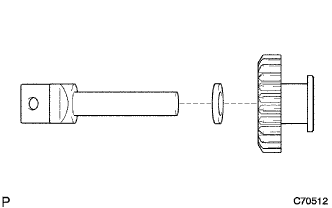
| 35. REMOVE REVERSE SHIFT ARM BRACKET ASSEMBLY |
Remove the 2 bolts and reverse shift arm bracket assembly from the manual transaxle case.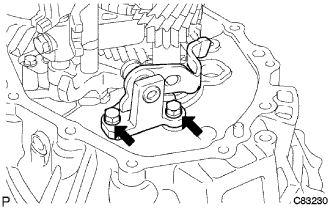
| 36. REMOVE NO. 1 GEAR SHIFT FORK SHAFT |
Remove the shift fork set bolt from the No. 1 gear shift fork.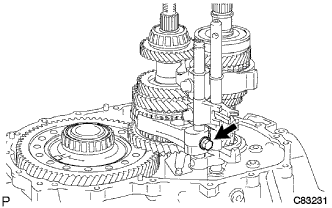
Pull out the No. 1 gear shift fork shaft while the No. 3 gear shift fork shaft is pulled up.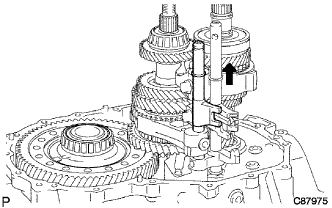
Using 2 screwdrivers and a hammer, remove the shift fork shaft snap ring from the No. 1 gear shift fork shaft.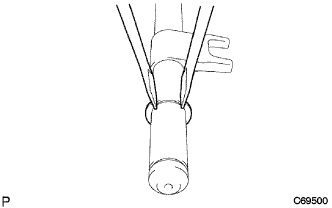
- HINT:
- Use a shop rag or a piece of cloth to keep the snap ring from flying off.
| 37. REMOVE REVERSE SHIFT FORK ROLLER |
Using a magnetic finger, remove the reverse shift fork roller from the reverse shift fork.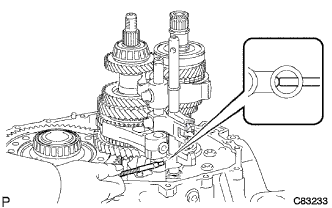
| 38. REMOVE NO. 2 GEAR SHIFT FORK SHAFT |
Remove the shift fork set bolt and shift head set bolt from the No. 2 gear shift fork and No. 1 gear shift head.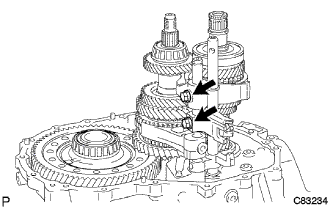
Remove the No. 2 gear shift fork shaft and No. 1 gear shift head from the manual transaxle case.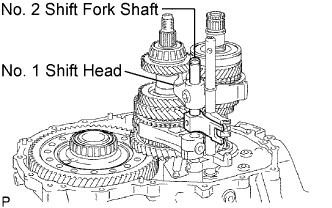
| 39. REMOVE NO. 1 GEAR SHIFT FORK |
Remove the No. 1 gear shift fork.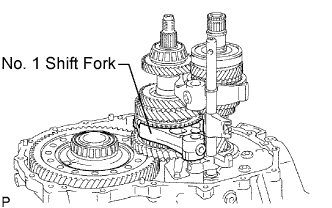
| 40. REMOVE NO. 3 GEAR SHIFT FORK SHAFT |
Remove the No. 3 gear shift fork shaft from the manual transaxle case.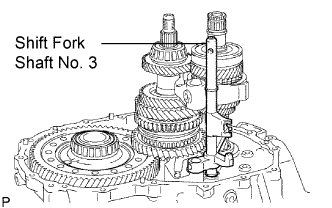
Using 2 screwdrivers and a hammer, remove the 2 shift fork shaft snap rings from the No. 3 gear shift fork shaft.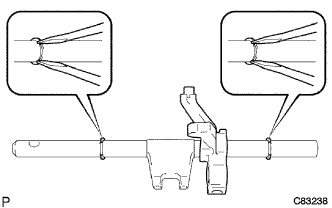
Remove the reverse shift fork from the No. 3 gear shift fork shaft.
| 41. REMOVE NO. 2 GEAR SHIFT FORK |
Remove the No. 2 gear shift fork from the input shaft assembly.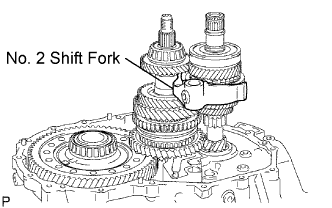
| 42. REMOVE INPUT SHAFT ASSEMBLY |
Tilt the output shaft, then remove the input shaft from the manual transaxle case.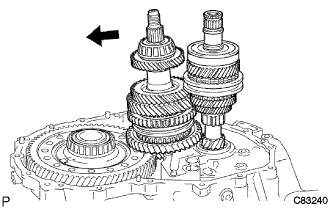
| 43. REMOVE OUTPUT SHAFT ASSEMBLY |
Lift the differential case assembly with the output shaft assembly tilted.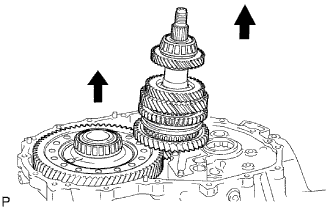
Remove the output shaft assembly from the manual transaxle case.
| 44. REMOVE DIFFERENTIAL CASE ASSEMBLY |
Remove the differential case assembly from the manual transaxle case.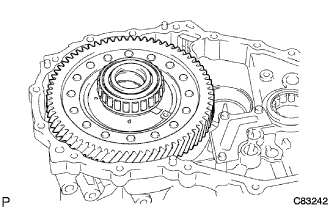
| 45. REMOVE MANUAL TRANSAXLE CASE RECEIVER |
Remove the 3 bolts and manual transaxle case receiver from the manual transaxle case.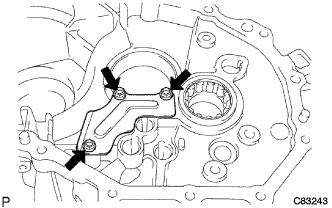
| 46. REMOVE INPUT SHAFT FRONT BEARING |
Using SST, remove the input shaft front bearing (outer race) from the manual transaxle case.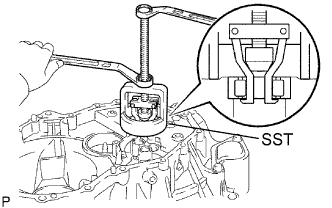
- SST
- 09612-65014
(09612-01040, 09612-01050)
| 47. REMOVE FRONT TRANSAXLE CASE OIL SEAL |
Using SST, remove the front transaxle case oil seal from the manual transaxle case.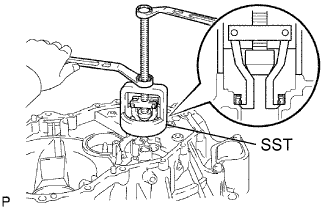
- SST
- 09612-65014
(09612-01040, 09612-01050)
| 48. REMOVE OUTPUT SHAFT FRONT BEARING |
Using SST, remove the output shaft front bearing (outer race) from the manual transaxle case.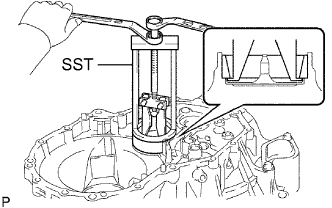
- SST
- 09387-00041
(09387-02020, 09387-02010)
| 49. REMOVE OUTPUT SHAFT COVER |
Remove the output shaft cover from the manual transaxle case.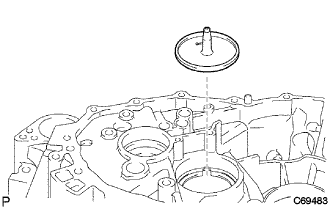
| 50. REMOVE OUTPUT SHAFT REAR BEARING |
Using SST and a hammer, remove the output shaft rear bearing from the manual transmission case (outer race).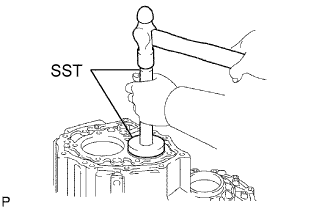
- SST
- 09950-60010
(09951-00680)
09950-70010 (09951-07100)
| 51. REMOVE TRANSMISSION CASE OIL SEAL |
Using SST, remove the transmission case oil seal from the manual transmission case.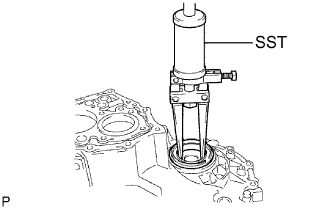
- SST
- 09308-00010
| 52. REMOVE FRONT TRANSAXLE CASE COVER OIL SEAL |
Using a screwdriver, remove the front transaxle case cover oil seal.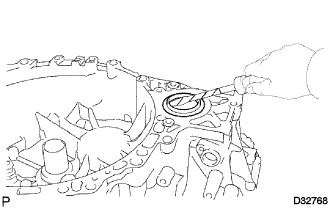
- HINT:
- Tape the screwdriver tip before use to avoid damage.
| 53. REMOVE FRONT DIFFERENTIAL CASE FRONT TAPERED ROLLER BEARING |
Using a brass bar and a hammer, remove the front differential case front tapered roller bearing (outer race) from the manual transaxle case.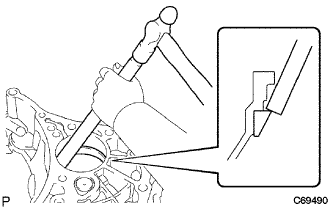
Using SST, remove the front differential case front tapered roller bearing from the front differential case.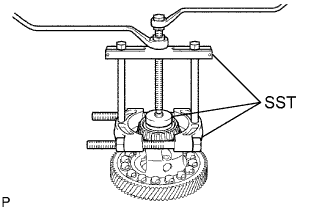
- SST
- 09950-00020
09950-00030
09950-40011 (09957-04010)
09950-60010 (09951-00560)
| 54. REMOVE FRONT DIFFERENTIAL CASE REAR TAPERED ROLLER BEARING |
Using SST and a hammer, remove the front differential case rear tapered roller bearing (outer race) and front differential case rear shim from the manual transmission case.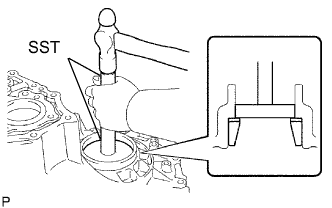
- SST
- 09950-60020
(09951-00790)
09950-70010 (09951-07100)
Using SST, remove the front differential case rear tapered roller bearing (inner race) from the front differential case.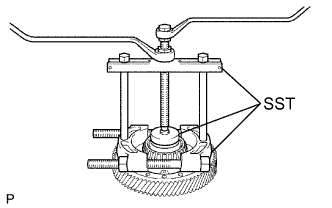
- SST
- 09950-60020
09950-00030
09950-40011 (09957-04010)
09950-60010 (09951-00490)
| 55. REMOVE NO. 3 TRANSMISSION HUB SLEEVE |
Remove the No. 3 transmission hub sleeve from the No. 3 transmission clutch hub.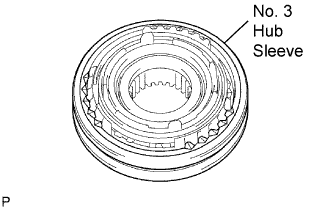
| 56. REMOVE NO. 3 SYNCHROMESH SHIFTING KEY SPRING |
Remove the 2 No. 3 synchromesh shifting key springs from the No. 3 transmission clutch hub while pushing on the No. 3 synchromesh shifting key spring.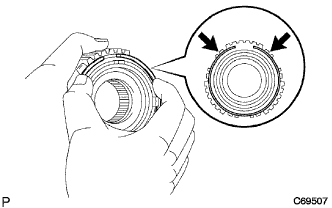
| 57. REMOVE SYNCHRONIZER PULL RING |
Using a screwdriver, remove the synchronizer pull ring snap ring.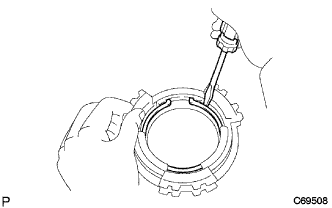
Remove the synchronizer pull ring, No. 5 synchronizer outer ring, No. 5 synchronizer inner ring, and No. 5 synchronizer ring middle from the No. 5 synchronizer ring inner.