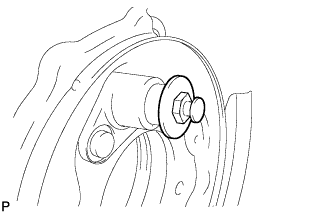
DISASSEMBLY
Removal / installation · Vehicles built Jun 2006 – May 2009
- HINT:
- Use the same procedures for the RH side and the LH side.
- The procedures listed below are for the LH side.
- Use the same procedures for the RH side and the LH side.
| 1. REMOVE REAR WHEEL |
| 2. SEPARATE REAR DISC BRAKE CALIPER ASSEMBLY |

Remove the 2 bolts and separate the rear disc brake caliper assembly.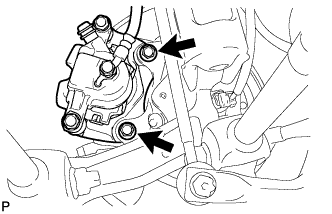

- HINT:
- Do not disconnect the flexible hose from the disc brake caliper assembly.
| 3. REMOVE REAR DISC |
Release the parking brake and put matchmarks on the rear disc and the axle hub.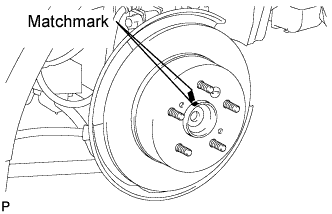
Remove the rear disc.
- HINT:
- If the disc cannot be removed easily, turn the shoe adjuster until the wheel turns freely.
| 4. REMOVE PARKING BRAKE SHOE RETURN TENSION NO. 1 SPRING |
Using needle-nose pliers, remove the 2 parking brake shoe return tension No. 1 springs.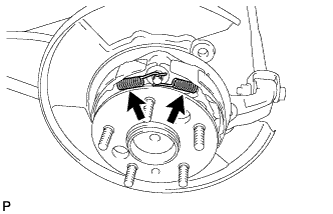
| 5. REMOVE PARKING BRAKE SHOE STRUT |
Remove the parking brake shoe strut and the parking brake shoe strut compression spring.
| 6. REMOVE NO. 1 PARKING BRAKE SHOE ASSEMBLY |
Release the claw of the parking brake shoe hold down spring No. 1 cup.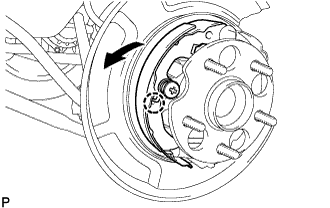
Remove the No. 1 parking brake shoe assembly as shown in the illustration.
Remove the parking brake shoe hold down spring No. 1 cup, the parking brake shoe hold down spring, the parking brake shoe hold down spring No. 2 cup, and the parking brake shoe hold down spring No. 1 pin.
| 7. REMOVE PARKING BRAKE SHOE ADJUSTING SCREW SET |
Remove the parking brake shoe adjusting screw set.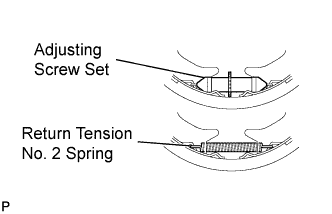
Remove the parking brake shoe return tension No. 2 spring.
| 8. REMOVE NO. 2 PARKING BRAKE SHOE ASSEMBLY |
Release the claw of the parking brake shoe hold down spring No. 1 cup.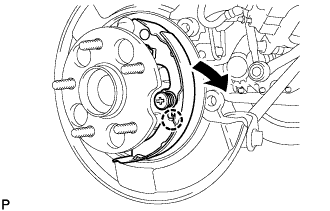
Remove the No. 2 parking brake shoe assembly as shown in the illustration.
Remove the parking brake shoe hold down spring No. 1 cup, the parking brake shoe hold down spring, the parking brake shoe hold down spring No. 2 cup, and the parking brake shoe hold down spring No. 2 pin.
Using needle-nose pliers, disconnect the No. 3 parking brake cable assembly from the parking brake shoe lever.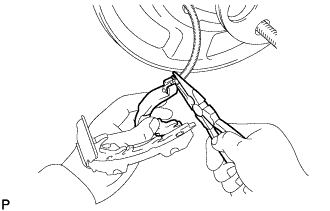
- NOTICE:
- Be careful not to damage the No. 3 parking brake cable assembly.
| 9. REMOVE PARKING BRAKE SHOE LEVER |
Using a screwdriver, remove the C-washer, shim and the parking brake shoe lever.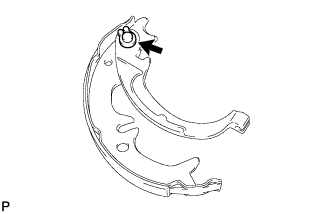
| 10. REMOVE PARKING BRAKE SHOE GUIDE PLATE |
Remove the parking brake shoe guide plate set bolt and the parking brake shoe guide plate.